This was a fun short overnight we did on a whim. Starting from Tuolumne Meadows from the Young Lakes via Dog Lake trail head, the trail meanders 7 miles up to the high country through forest and open meadows. We did this as an overnight but would be great as a two-nighter, allowing for more time to enjoy the lakes and perhaps scramble up Mt Conness. Depending on the time of year, check snow and creek reports. We did this hike mid-July on a mediocre snow year and some creeks were dry already. Permits can be reserved using Yosemite’s online permitting process or at one of the Wilderness Permit Stations. Young Lakes sit at 9800ft elevation.
Thoughts
We picked these permits up on a whim when Yosemite announced they would be releasing the reserve in-person permits through online lottery. Kudos to Yosemite for coming up with a system like this as quick as they did. The process from a user perspective was seemless. I applied to the lottery the same way I always do for permits. Instructions were very clear as to what I needed to do, from the online ranger presentation, submitting the access code to get my permit and parking pass PDF, to arriving at the park and just showing my permit print-out and ID. So just a thank you to the park operators in general, this year has been rough but thank you for doing your best to make a place like Yosemite accessible and safe for everyone involved. From a backpacker’s perspective, it was as easy as can be.
By the way Pohono got punted to the fall. Maybe we’ll be back in September?
We had never started from this trail head before. I was in part, inspired by this article from The Outbound Collective. Seemed like a nice, straightforward trip with a rewarding destination. Over the years I’ve come to realize how much I really love the alpine wilderness. I love those granite lakes and camping at the tree line. This hike checked all the boxes. And like any first trip of the season, short and sweet just to get back into the swing of things.
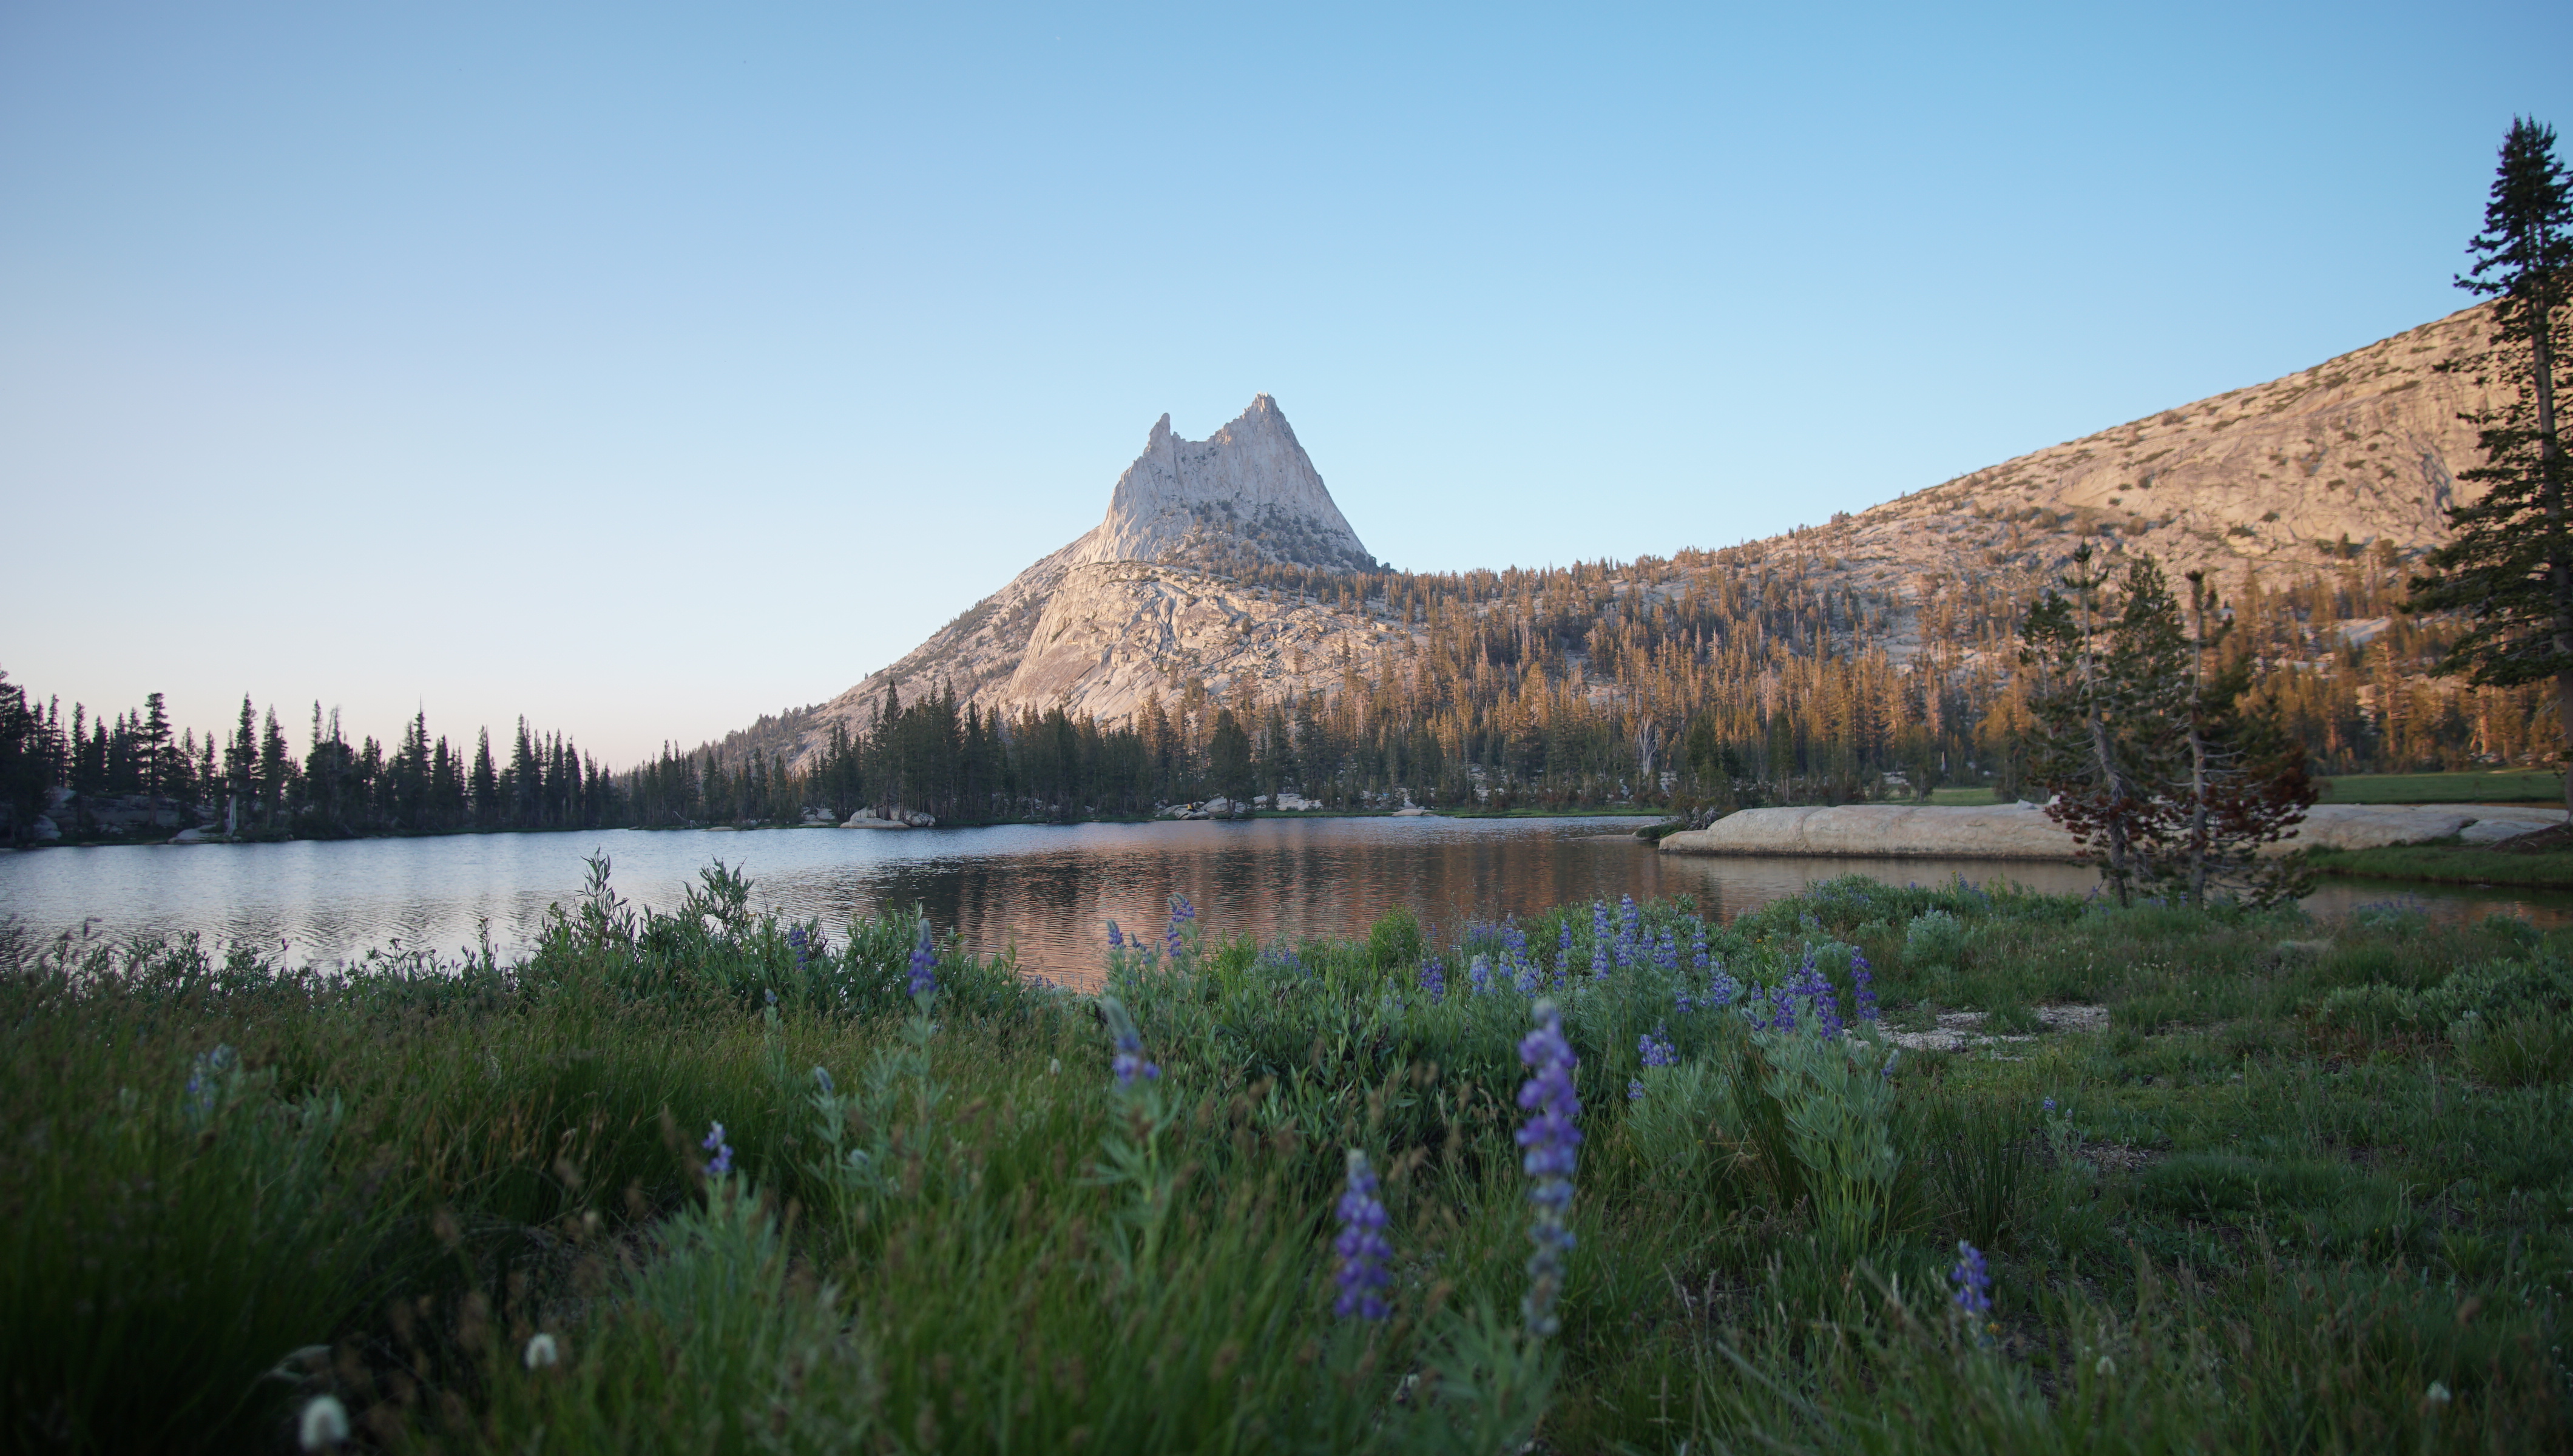
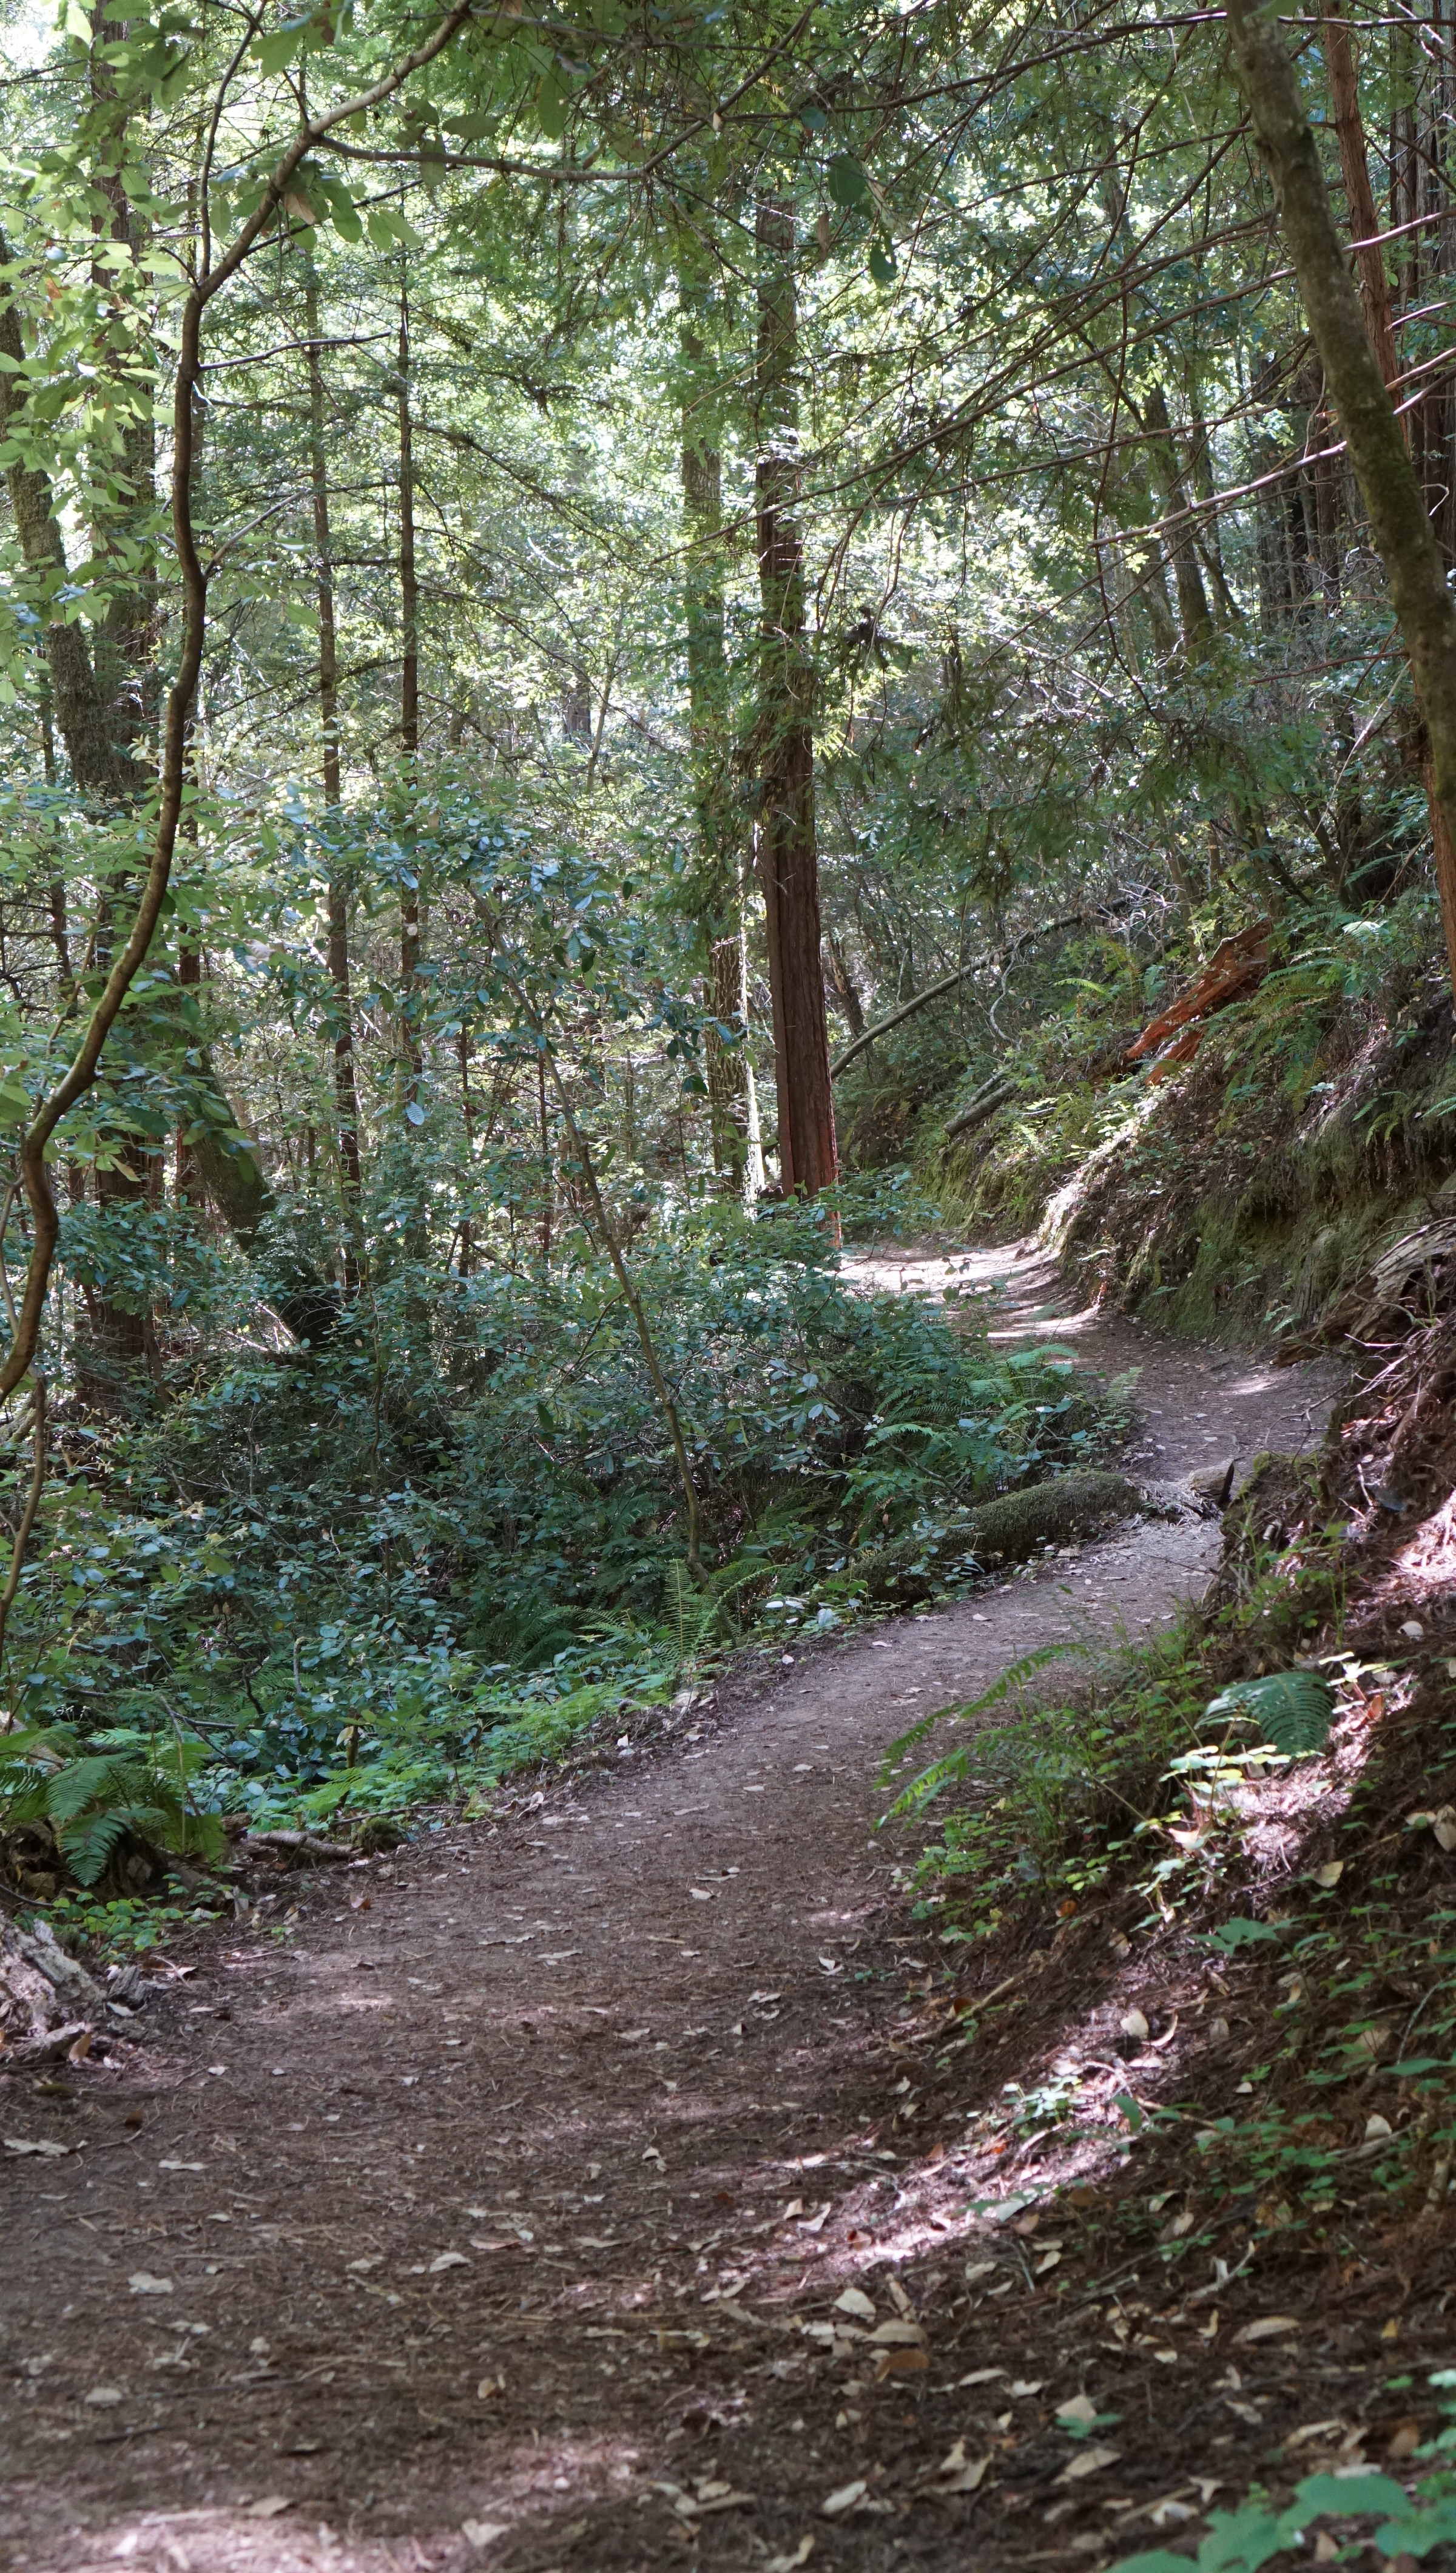
Right from the parking lot, the hike starts with some gain with typical Yosemite switchbacks. Eventually you’ll top out and begin alternating between switchbacks and meadows. The weather was pleasant when we went so we weren’t plowing through our starting water supply. I imagine it could get quite hot though. Delaney Creek was the first water source we crossed, it was still going strong. Dingley Creek was the second and served as a nice lunch spot on the way out. The area around Dingley Creek also had some beautiful views of the Tuolumne area and Cathedral Peak.
It didn’t take too long until we arrived at the lower Young Lake. There were a handful of camping spots on the northern side but I had that alpine lake feel in mind so we pushed on. The second lake was easy to find but was still to foresty. After a little bit of meandering we found a steep trail cutting up next to a waterfall. We followed that and finally found the upper lake in all its alpine glory.
Not a ton to say about this trip. It was short, it was great to be outside after three months of shelter in place, and got to test our setup out in preparation for Lost Coast. Any trip to Yosemite is a good trip.
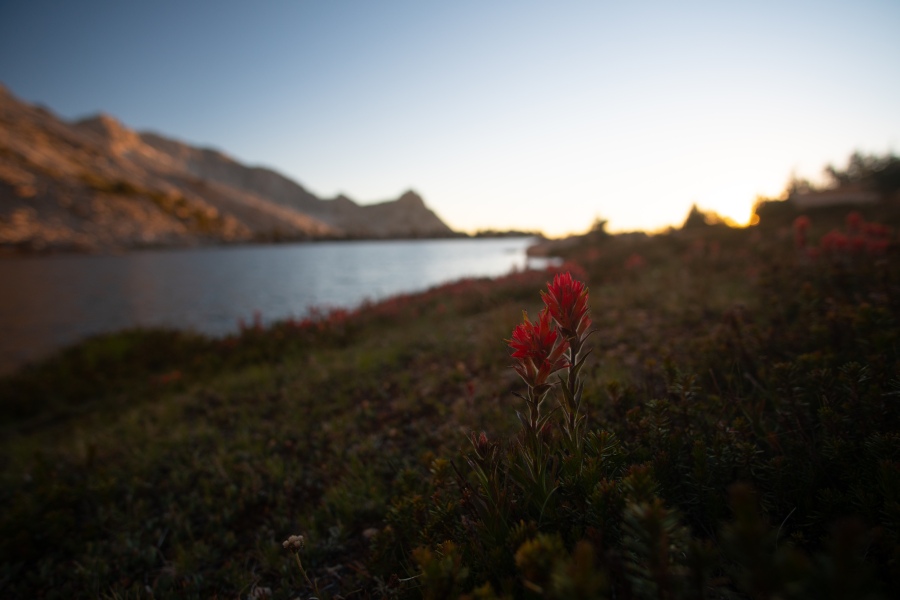
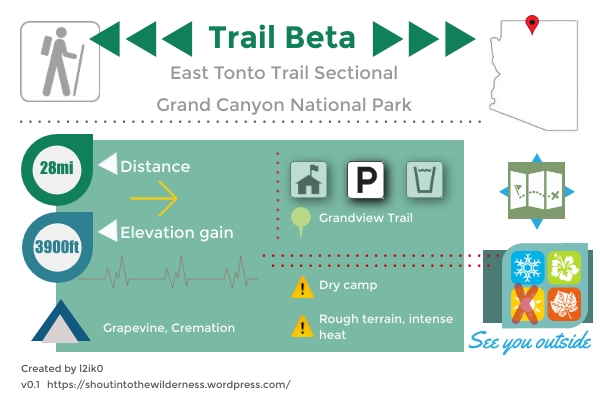
Get a taste for the Grand Canyon without doing the full descent down to the Colorado along the Tonto Trail. We started from Grandview and made our way 28 miles westward toward the Tip Off and finished on South Kaibab, still managing to do 3900ft of elevation change each way. This trail involves a dry camp! We did this hike over 3 days/2 nights, crossing one water source at Cottonwood the first day and a second water source at Grapevine the first night. For the remainder of the trip there was no water. Second night’s camp was at Cremation. The trail is rugged but you’ll be rewarded with blissful solace, a luxury at this popular park. We did this trip in mid-October. Be sure to check with the backcountry office regarding the status of water sources. Grand Canyon backpacking is no joke.
Permits
Grand Canyon National Park probably has the most warnings I’ve ever seen for a backcountry permit and rightfully so. The land is rugged, at times dangerous, and the arid hot climate will take its toll. A no water situation can quickly become a dire. Make sure to do your research and understand what you’re getting yourself into.
The Backcountry Permit website has a table at the bottom of the page showing when to apply based on your trip date. In general, application period is about 4 months prior to the month of your trip. Applications can be faxed or mailed. In person requests can be made but only starting 3 months prior to the month of your trip. Permits are $10 per permit + $8/person/night making this the most expensive permit we’ve ever gotten. Permit costs are non-refundable. This also seems to serve as a way to prevent groups from submitting multiple applications.
Despite being limited to one application, you are allowed to submit seemingly unlimited itineraries. For example, we submitted four itineraries. I just filled out two request forms, wrote page 1 of 2 and page 2 of 2 in huge letters on each page, and faxed them one after the other. Ironically we didn’t get any of the itineraries we wanted. However, the ranger was kind enough to suggest a route that was still available, thus we ended up on the Tonto.
One of the slightly confusing parts of the permit request form was figuring out the “use area” for the different itineraries. You need to know which zone you’ll be in for each night. This map has an overlay of the different use areas along with the various trails.
Camping regulations will vary depending on which trail you’re on. In the corridor, you’re more limited to specific established campgrounds. On the Tonto, where its at-large camping and more typical of wilderness backpacking.
Note:This was the process when we applied in 2019.
Itinerary & Logistics
Our trip was a thru-hike starting from the Grandview Trailhead and finishing at South Kaibab. The trip was 3 days and 2 nights.
Day
Mileage
Camp
1
9.5
Grapevine
2
11.2
Cremation
3
7.5
South Kaibab (end)
It was actually sort of difficult finding information on this route. I couldn’t find many blog posts or trip reports. Probably the most useful information was from the national park website. I always find the park websites to be pretty confusing to navigate and find information. Grand Canyon has a page for Backcountry Trail and Use Areas. From there, they have a nice PDF summary of the main trails in the park, including the section of the Tonto from Grandview to South Kaibab. There’s a good section that gives an overview of the possible water sources and whether they are perennial or seasonal. We also called the Wilderness Information Center the day prior to our hike in to confirm where we could find water.
When we went in October, almost everything was dry. We were able to find water at Cottonwood, downstream near the Tonto junction. When I say “find water”, its little holes in the creek bed that people had dug that will naturally fill with water. We were also able to find the spring in the east arm of arm of Grapevine, about 15 minutes downstream from the trail and campsite area. It involved a little bit of scrambling and navigating the rock. There was a third option at Lone Tree but the Wilderness office had said it was 1 hour downstream which we weren’t interested in trying.
Figuring out the logistics for a thru is always a little difficult. First thing is where to park. We did see overnight parking spots at Grandview but there weren’t many. We ended up parking at lot D next to the Wilderness Information Center. This sounded like it was the only lot in the village you could leave your car over night. Since the shuttle system doesn’t run to Grandview, no matter where we parked we would need to taxi either at the beginning or the end. Beginning is easier to time so we called a taxi (928. 638.2822 under Transportation) that picked us up at the Wilderness Information Center. You can’t arrange the taxi in advance, you only call when you’re ready to go and need to have cash on hand to pay. The response time was pretty quick actually. Within 10 minutes of calling we were on our way. To end our hike, we took the Orange line from South Kaibab to the visitor center and then the Blue line back the Wilderness Information Center.
Thoughts
I was a bit nervous about this trip. After Wonderland, my left knee took a long time to recover and any trip in the Grand Canyon just screams elevation change. On top of that, we were trying to be as prepared as possible for the dry camp on day 2. The climate is dry and not what we’re used to coming from California. How much water do we actually need for two days? How much do we use for dinner? For breakfast? What do we carry it in that won’t make our packs lopsided? There were many questions that we could only guestimate answers for.
On a standard trip in the Sierras, we’re only carrying about a 2L carrying capacity with one or two refills during the day and a pretty much guaranteed water source next to camp. For this trip, we each had a 7L carrying capacity. We used 1.5L Smart water bottles for the majority + our standard Nalgenes + two 1L BeFrees for filtering + a 3L CamelBak (which actually made the water taste heinous). While collapsible water bottles pack better when empty and are lighter, I was a bit weary of having to pack multiple soft side water containers along with every single piece of vegetation trying to stab you. Hard sided bottles seemed more reliable and I was pretty happy with this set-up. We did day 1 with only 4L each. Enough to comfortably do the hike and have water for dinner in case we weren’t able to find the water source at Grapevine.
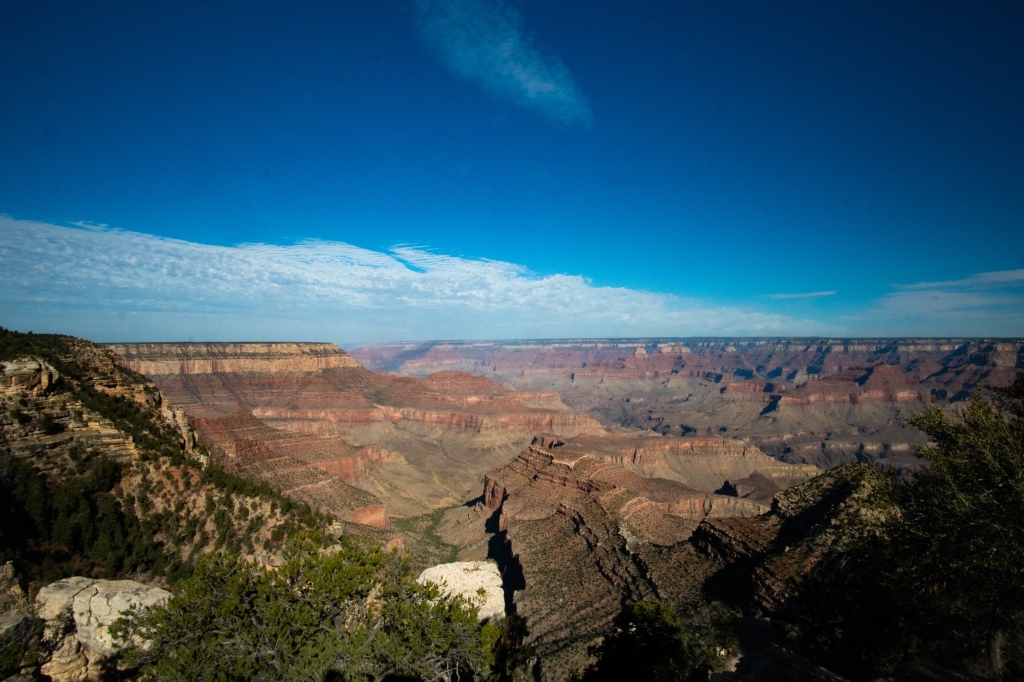
We started off pretty slow. It took us a while to first find the parking lot and then taxi over to the trailhead. Grandview trail wastes no time and you start descending immediately, and it is steep. The views are instant though and you can look out into the canyon and see jaw dropping views in either direction.
You can also see just how far you have to go down. We took it slow and eventually made it to Cottonwood. By that point we were ready to be done with downhill. The trail meanders back and forth across the drainage. We didn’t actually find water until we came across some holes previously hikers had dug in the dry creek bed. We topped off our reservoirs and then pressed on to Grapevine.
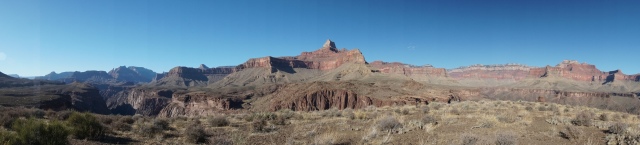
Very quickly after we found water, we hit the Tonto trail junction. A literal sign that our downhill journey was over. From here on the trail would be mostly flat until the the Tip Off.
The trail itself was pretty rocky which I’ve found common across the few desert hikes I’ve done. Grand Canyon takes it to the next level and provides an unending supply of plants that stick out across the trail and stab you. Brush you expect to sort of bend out of the way simply doesn’t and you’re left with nice group of scratches. This is the first time I’ve ever thought that hiking pants would be useful.
By the time we hit the inlet to Grapevine canyon, we were about ready to be done. It was warm and a constant dry wind had picked up in the afternoon. Frequent gusts threatened to blow our hats off into the abyss and a few were strong enough that we had to brace ourselves or risk getting blown off our feet. Around this time we came across a part of the trail that I had not read anything about. On the eastern side of Grapevine, the trail is quite narrow and drops off instantly into nothing. This is probably the most exposed I’ve ever felt backpacking. We’ve done trails on the side of mountains and snowfields where you wouldn’t want to fall but nothing where a mere slip or trip could send you plummeting. Take care in this area, we were all pretty sketched out and hyper-aware.
We reached the back of the drainage as the sun began to set. A debacle with the water source led us to camping on the western arm of Grapevine, not near water, but with a nice wind buffer. At first glance, it didn’t seem like the water was accessible but you just needed to assess and find the best way down to it. Its about 15 minutes downstream from the trail.
We were up early the next day, to top of the rest of our water, and get as far as possible before the sun hit us. You don’t appreciate shade until you’ve spent the entire day hiking in the sun. Its relentless. Day 2 consisted of meandering in and out of side canyons. Despite being flat, our water-laden packs were heavy and as we approached the Cremation drainage we decided the plateau we were on was as good as any to camp. The wind wasn’t too bad, there were areas that looked used, rocks to stake our tent, and nice views in all directions. We came up about 1 mile short of the drainage but turned out to be for the best. As you get closer, you end up losing all views of the canyon. We successfully carried enough water for our dry camp and had more than enough for the hike out the next day.
With zero clouds in site, we set up our tent sans rainfly. We were treated to the Milky Way and numerous shooting stars before the moon rose and illuminated everything. The wind died down completely, making our camping spot even more satisfying. We awoke the next day, ready to be done being stabbed by all the plants and motivated to wrap up our trip. South Kaibab was not nearly as steep as Grandview but probably 10x as crowded. But the views never stop.
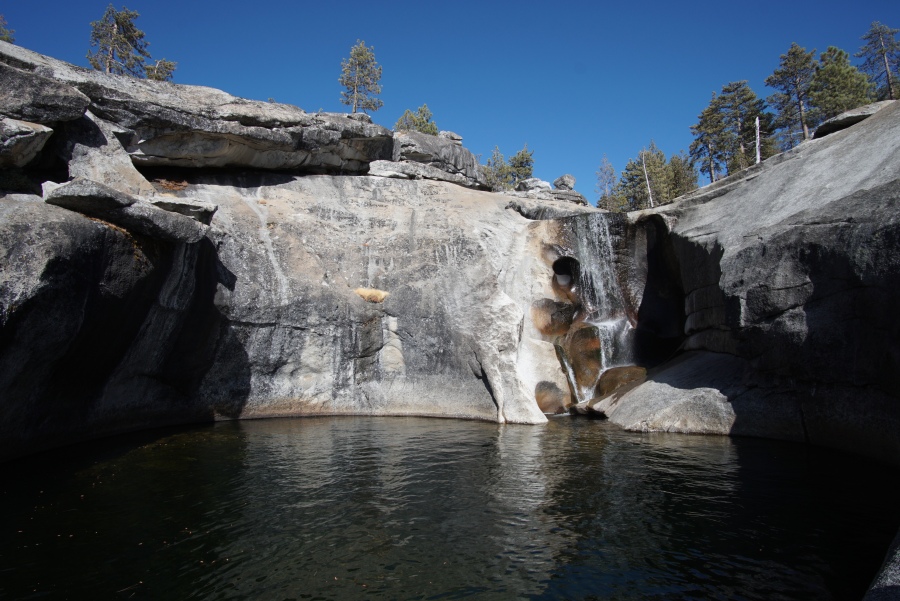
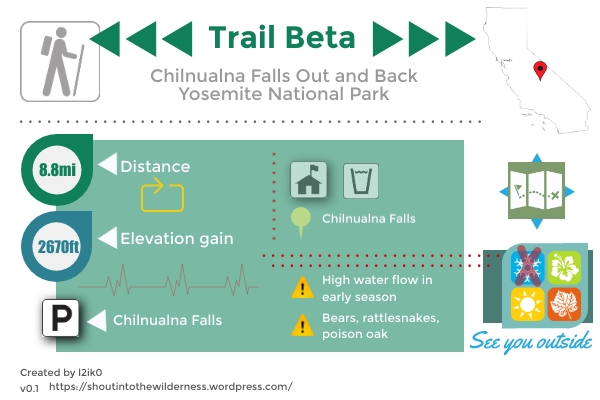
Check out one of the least visited areas of the Yosemite. Starting from Wawona, its a steep (but not as steep as the valley) up to the top of Chilnualna Falls. This is great as a 8 mile day hike or as a short leisurely out and back backpacking trip. There’s very little water access until you reach the top of the falls. Pay attention to water levels, especially during the spring and summer. Permits can be reserved using Yosemite’s online permitting process or at one of the Wilderness Permit Stations. We did this trip in September as a 1-nighter.
Thoughts
Ah, but this was supposed to be a Pohono trip wasn’t it??? Apparently mother nature had other plans. Storm closure of Glacier Point Road forced us to swap our itinerary. While it is possible to hike up 4 mile trail to Glacier Point, the group we were with wasn’t up to the task.
Luckily, Chilnualna Falls trailhead is rarely full. We were able to get enough permits for our group and successfully rearranged our trip. Pohono, hopefully, we’ll see you in 2020.
The minimum distance from a trailhead you have to hike before camping in Yosemite, is 4 miles, so that became our goal. Coincidentally, its 4 miles to the top of Chilnualna Falls so we were aiming for a just a bit past the top. This trip was intended to be an intro to backpacking for multiple friends so we were trying to do something a little easier than the brutal 15 mile days we’ve been doing as of late. It was a nice break for us as well. However, anything in Yosemite is going to have a decent amount of elevation gain, this one being no exception. Its about 2000ft of gain over those 4 miles
The hike up to to the top of the falls cuts away from the creek so there isn’t all too much to see other than some nice glimpses of the surrounding granite domes, ya know, if you’re into that sort of thing like I am. We took frequently breaks and enjoyed the surprisingly warm weather. Night temperatures were supposed to dip below freezing so we were enjoying it while it lasted.
We stopped at the top of the falls to enjoy the view. Already, a cold breeze was beginning to pick up. We meandered a bit further, past the fork in the trail. The ranger had said there should be some established sites past the top of the falls with some fire rings. How rare it is we get to enjoy a fire in the backcountry.
It didn’t take too long to find a good site that would fit all of us plus had a good fire ring. The wind felt like ice at this point and I was ready to put some layers on. Once camp was set up we decided to explore a bit downstream. Since it was fall, the creek flow was slow but steady. We scampered across the exposed rock, following it down to subsequent pools that would have been amazing swimming holes if the temperature wasn’t plummeting.
After our explorations we built our fire and settled in for snacks, dinner, and a round table reading from this young adult Goosebumps-esque National Parks themed book called “Ghost Horse” my friend gave me as a gag gift. The night was everything great about backpacking with friends. The minute we finished, snowflakes started falling down from the black sky, followed quickly by hail. There was a flurry of goodnight’s as we doused the fire and headed for our tents. Right as we were settling inside, a flash of lightning lit up the tent followed by a crash of thunder. What timing indeed.
The next day was a slow moving morning. D and I still operate in long distance mode so we were up at sunrise, ate breakfast rather slowly, and then waited around for the rest of the group. Despite the slow pack up, it was a mad dash back down the trail to the car. Group trip accomplished. We got to see whats up above Chilnualna. I had been wondering for a while what’s back there. Based on maps, there’s a pretty expansive wilderness area and it sounds like hardly anyone goes. Sometimes its also nice to have this leisurely trips. To enjoy some of the little luxuries we don’t always get on our, shall we say “more exhausting” trips.
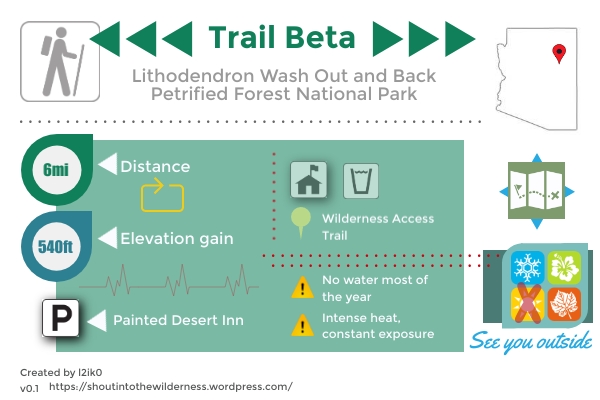
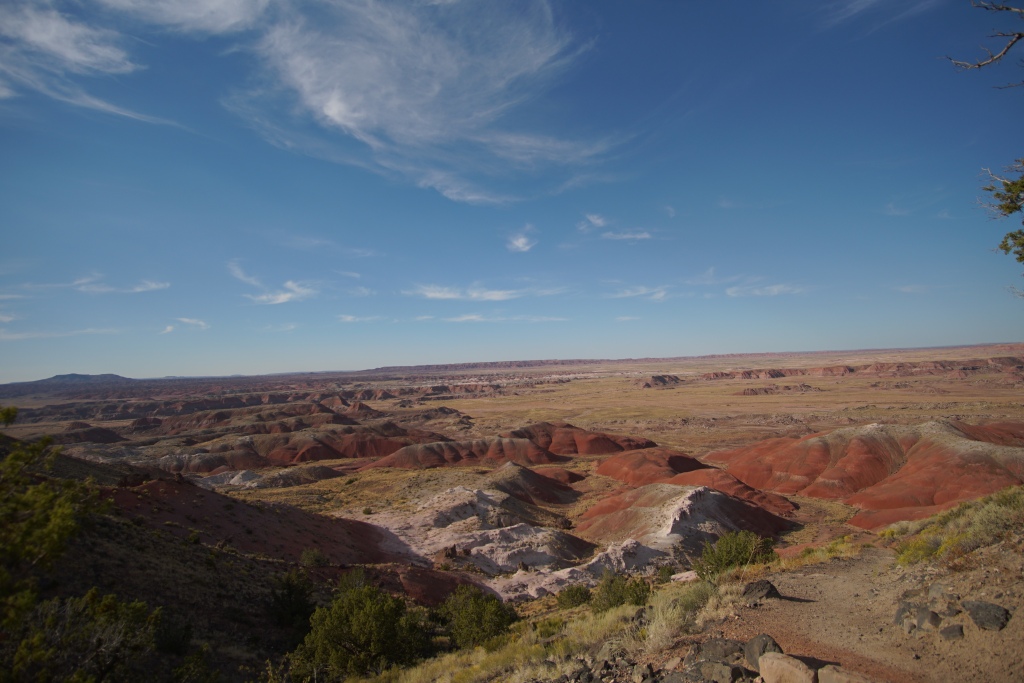
Do some off-trail exploration through the northern Zone 2 Black Forest backcountry of Petrified Forest National Park. Seriously, there aren’t any trails. Be sure to bring plenty of water and take into account the weather forecast. Walk through desert washes and explore the various Petrified Forest Members, layered mounds of reddish mudstone and brown sandstone layers. Its sort of a choose-your-own adventure, the requirement being you need to be at least 1 mile from the trailhead. Parking and trailhead are at the Painted Desert Inn. Permits can be picked up from the Painted Desert Visitor’s Center for free. We did this in September as a weekend trip.
This was another one of those trips where a Backpacker Magazine article was incepted into my mind. And once that happens you know I have to do it. We ended up not really following the route from the magazine but went to the same general area. Petrified Forest NP isn’t exactly known for its backcountry. In our brief time there, most of the visitors we saw were in cars or motorhomes on a roadtrip, only stopping at the vistas and short walks outlined on the visitor map. Perhaps that’s why I enjoyed the backcountry so much. There was no one there. We had an entire vastness of desert to explore unencumbered. No restrictions on where we could hike or where we could camp. It was a nice reprieve from the constant reminders I have for various permit lotteries.
Our day started early with a flight into Phoenix and then a long drive straight up and over the mountains to Petrified Forest. By the time we rolled into Petrified Forest it was already 3:30. This worked a bit to our advantage considering it was still around 90F outside. We took our time getting the permit and checking out the visitor’s center before doing the short drive over to the Painted Desert Inn. Once there, we packed up our stuff, topped off our water at the fountain and set off on the Wilderness Access Trail to the left of the inn.
The inn and parking lot sit on a plateau that offers some wonderful views of the aptly named painted desert. This also functioned as a safety net for our first off-trail adventure since you can see the inn from miles away. The Wilderness Access Trail drops down quickly and continue for roughly a mile. Once the trail faded to nothing we looked around and asked ourselves, “Well….what do we want to see?”. Its freeing to not have a designated trail to follow yet I get that FOMO anxiety that I could choose incorrectly. We decided that we wanted our camp to be somewhere with a nice sunset so that meant traversing up on to of the colorful mounds that pepper the landscape.
We got a permit for Zone 2 which is a section of the Black Forest (named due to the color of the petrified wood). The zones are kind of vague and there’s no way to tell if you’re in or another unless you somehow plotted a boundary out in a GPS tracker. It didn’t sound like they cared which zone we ended up in, just that we were more than a mile from the trailhead. Zone 2 was roughly directly north from the inn so that’s which way we went. We crossed some grassland, saw a few giant anthills, crossed a large wash before getting close enough to the colorful mounds or members as they’re called.
To my surprise, the members weren’t very solid at all. It took kind of a running start to get up them, each step crumbling away beneath you. Once on top, they were much more stable. We traversed across the little plateau we had found. It was littered with fragments of petrified wood and smooth rocks balancing on what only looked like dried mud. The petrified wood is intriguing. Its surface looks exactly like wood but the gloss and shininess is all wrong. They glitter in the sunlight.
With another ridge in front of us, we set about trying to find a way over. It took a few attempts before we were able to find a route that wouldn’t involve us sliding 20 feet down. The sun was beginning to set and we wanted to have camp setup so we could take some photos. We found a nice little spot on some loose dirt in front of some picturesque pieces of petrified wood. With our tent all set, we enjoyed dinner and the desert sunset.
The night was mild so we didn’t have the rainfly on, hoping to see some stars. I had forgotten there was a full moon that night. If you’ve never camped during a full moon, there’s pros and cons. Its nice being able to see pretty well. But its also like sleeping with headlights pointed right at your face.
The next morning we packed up, ate some sad cold oatmeal (didn’t feel like dealing with a stove), and started our way back down. I wanted to check out the Onyx Bridge since it was a notable feature on the map. I had downloaded the google map for the area on my phone so I just lead us around while keeping the arrow pointed to that spot. The Onyx Bridge might have been a bit anticlimactic. It was cool I guess, but the Members were much more beautiful to see.
We hiked out and then took the rest of the afternoon to see the other spots in the park and check out some petroglyphs. All in all a great weekend trip in Petrified Forest National Park.
Circumnavigate Mount Rainier over 93 miles and 26,000 ft of elevation gain and loss on the Wonderland Trail. Aptly named, the trails winds through flowery meadows and misty forests as it ungulates around the mountain. Either enter the permit lottery or roll the dice for a walk-up permit. This backcountry loop only allows camping is designated sites. We had to do an extra excursion off trail due to the campgrounds we were assigned. All campgrounds have a pit toilet as well as bear poles for hanging food. Check with the park rangers regarding water crossings and trail conditions before starting. Water sources are plentiful and the mosquitos mild. We started this hike from Longmire and left a car there for the duration of the hike. We lucked out with mild weather and no rain which is definitely not always the case. Be prepared for heavy rain and possibly snow even during the summer months. We did this hike at the end of July after a mild snow year for Washington. There was still snow on some parts when we did this hike.
Permits
The Wonderland Trail permits are awarded based on a lottery system run by Mount Rainier National Park. You can apply for sections of the trail as well as for the full loop. There are walk-up permits available as well.
From March 15 until March 31, you can apply for Wonderland permits here. Applications will be processed in a random order and you’ll be notified sometime toward the end of April to beginning of May. There is a nonrefundable 20$ to submit the application (even if you aren’t awarded a permit).
The trail does not allow dispersed camping. All camping is regulated to distinct sites along the trail. The permit will ask for your desired itinerary, including starting and ending dates, entry trailhead, exit trailhead, and nightly campsites.
The permit application also allows for some flexibility, if you want it. It will ask if you’ll accept alternate campsites, dates, starting trailhead, and hiking direction. In the notes box, we had also added that we could hike 16 mile days which is probably how we ended up with a campground not on the actual trail. These options are double edged swords. It does increase chances you’ll be awarded a permit but it opens the possibility to a sub-par itinerary. Not all campgrounds are equal IMO.
Note:These were the options when we applied in 2019.
Itinerary
We did a 7 day clockwise itinerary starting from Longmire and actually received most of the campgrounds we had requested. We were actually permitted an 8 day itinerary but the day 7 camp was Paradise River which ended up closed due to hazard trees. We were reassigned to Cougar Rock when we picked up the permit. Cougar Rock isn’t on the Wonderland trail and is roughly 1 mile from Longmire so we decided to just finish it in 7 days.
Day
Mileage
Camp
Food Cache
1
16.7
Klapatche Park
2
7.6
Golden Lakes
3
10.3
Mowich Lake
X
4
13.5
Mystic Lake
5
12.9
White River
X
6
17.1
Olallie Creek
7
16.9
End at Longmire
Thoughts
I had actually been pretty excited about this trip. There’s a lot of glamour to a trail with a name like Wonderland so the bar was set pretty high. The photos from guidebooks and trip reports are simply amazing. The hype from winning the permits really amps you up. And if you haven’t caught on yet, I’m not sure how much I really enjoyed the trip. Don’t get me wrong, there were absolutely stunning moments along the trail. But there were also a large amount of mundane moments that made up a large percentage of those 7 days. Let’s start from the beginning.
We knew going into this that day 1 was going to be rough. We were looking at a 17 mile day with roughly 6500ft of gain and 3700ft of loss according to CalTopo. Not exactly how you want to start a multi-day hike. We grabbed a high cost but conveniently located motel room at Gateway Inn and Cabins for the night before our start. It made picking up our permit the day before and getting an early start feasible as it was only 15-20 minutes from the Longmire trailhead and wilderness center.
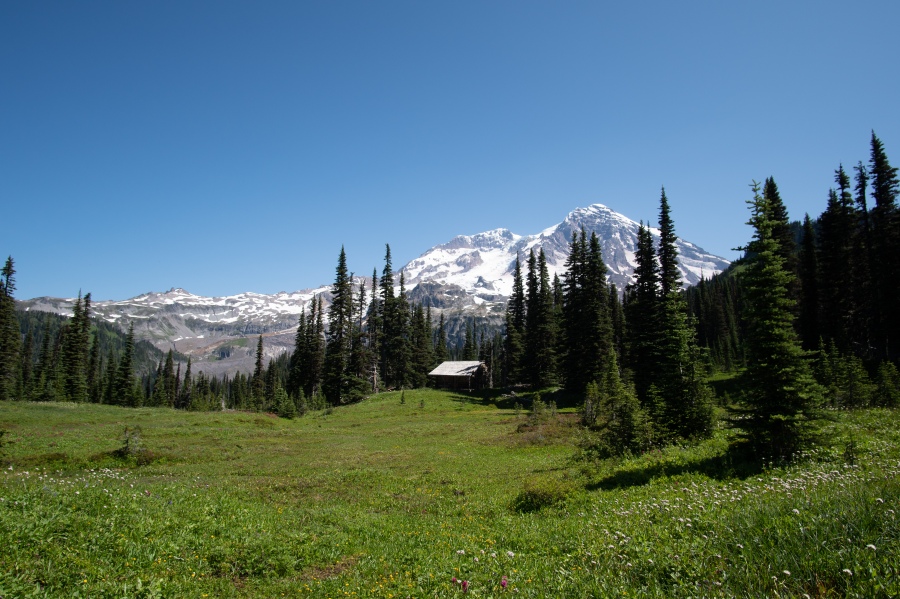
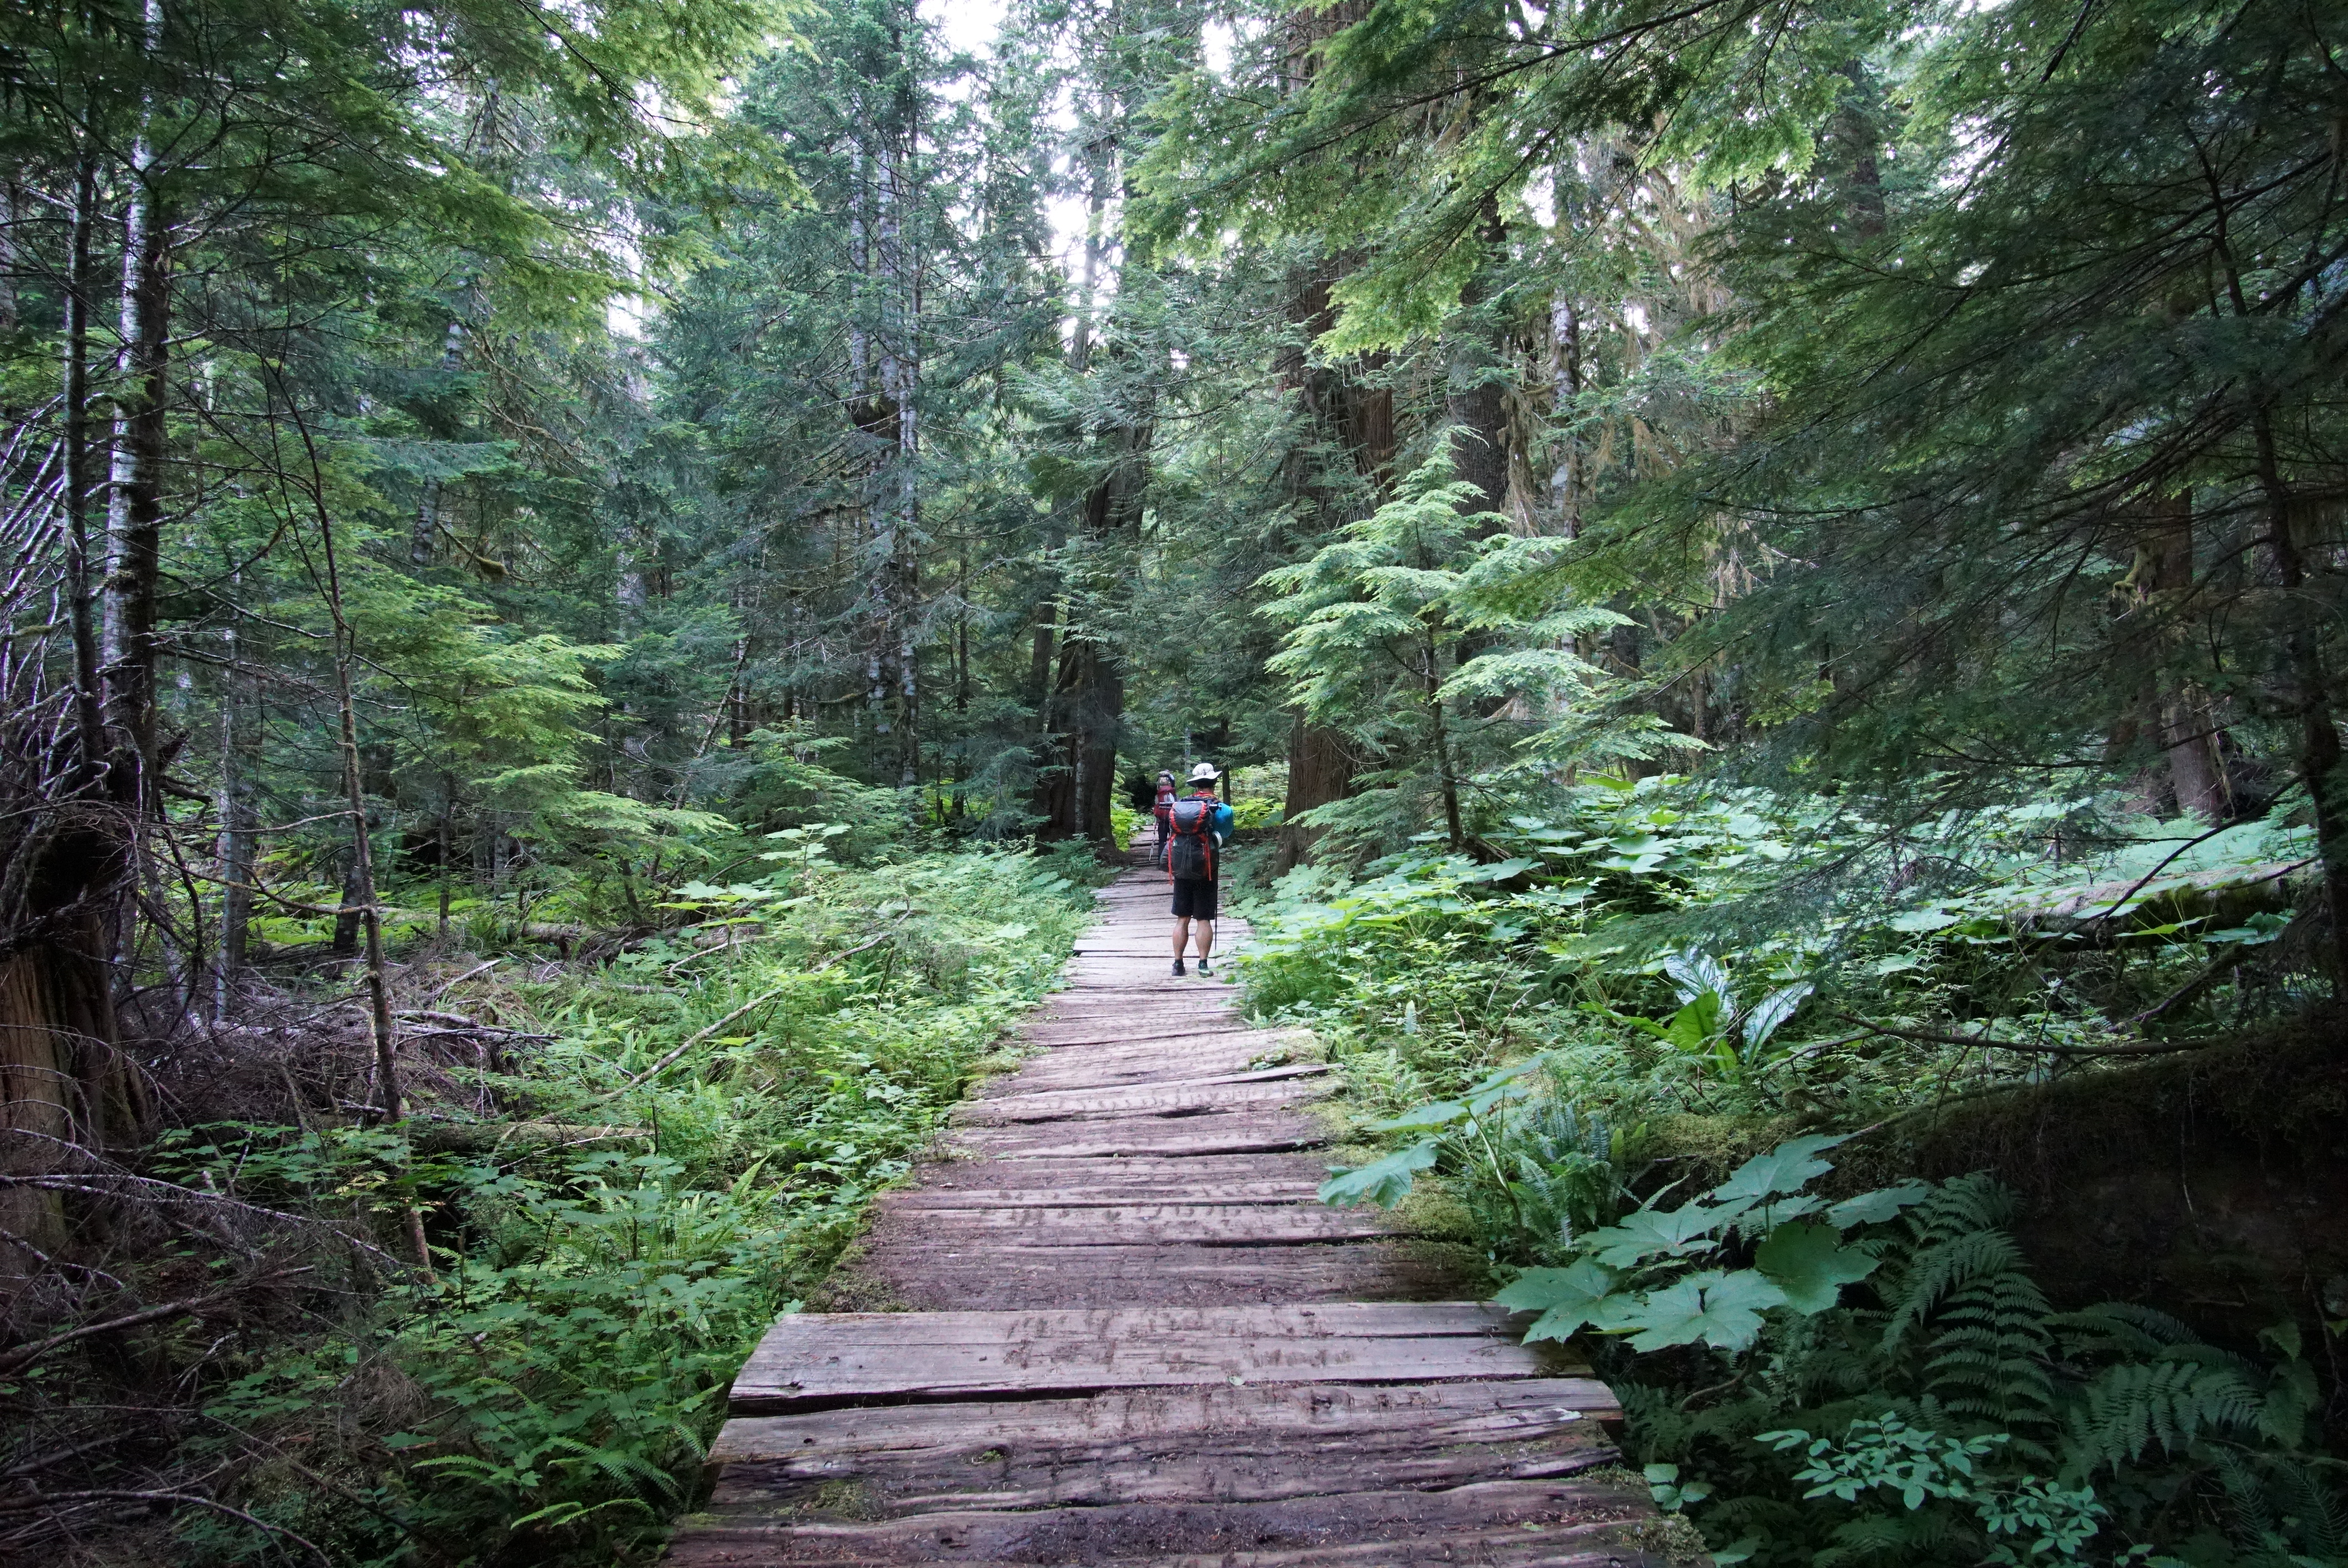
Right from the start you notice just how vibrantly green everything is. Coming from California, lush vegetation is just not something you see unless you’re on the coast. The multitude of greens right next to the trail was astounding. We settled into our step as we took in the ups and downs of the trail. Hiking through dense forest can be beautiful and it was different from our typical high Sierra granite sprawls. Lots of shade, limited exposure except on the high points. It didn’t take long until we were treated with our first view of Mount Rainier. One minute we were in dense foliage, the next, the world opened up to this view.
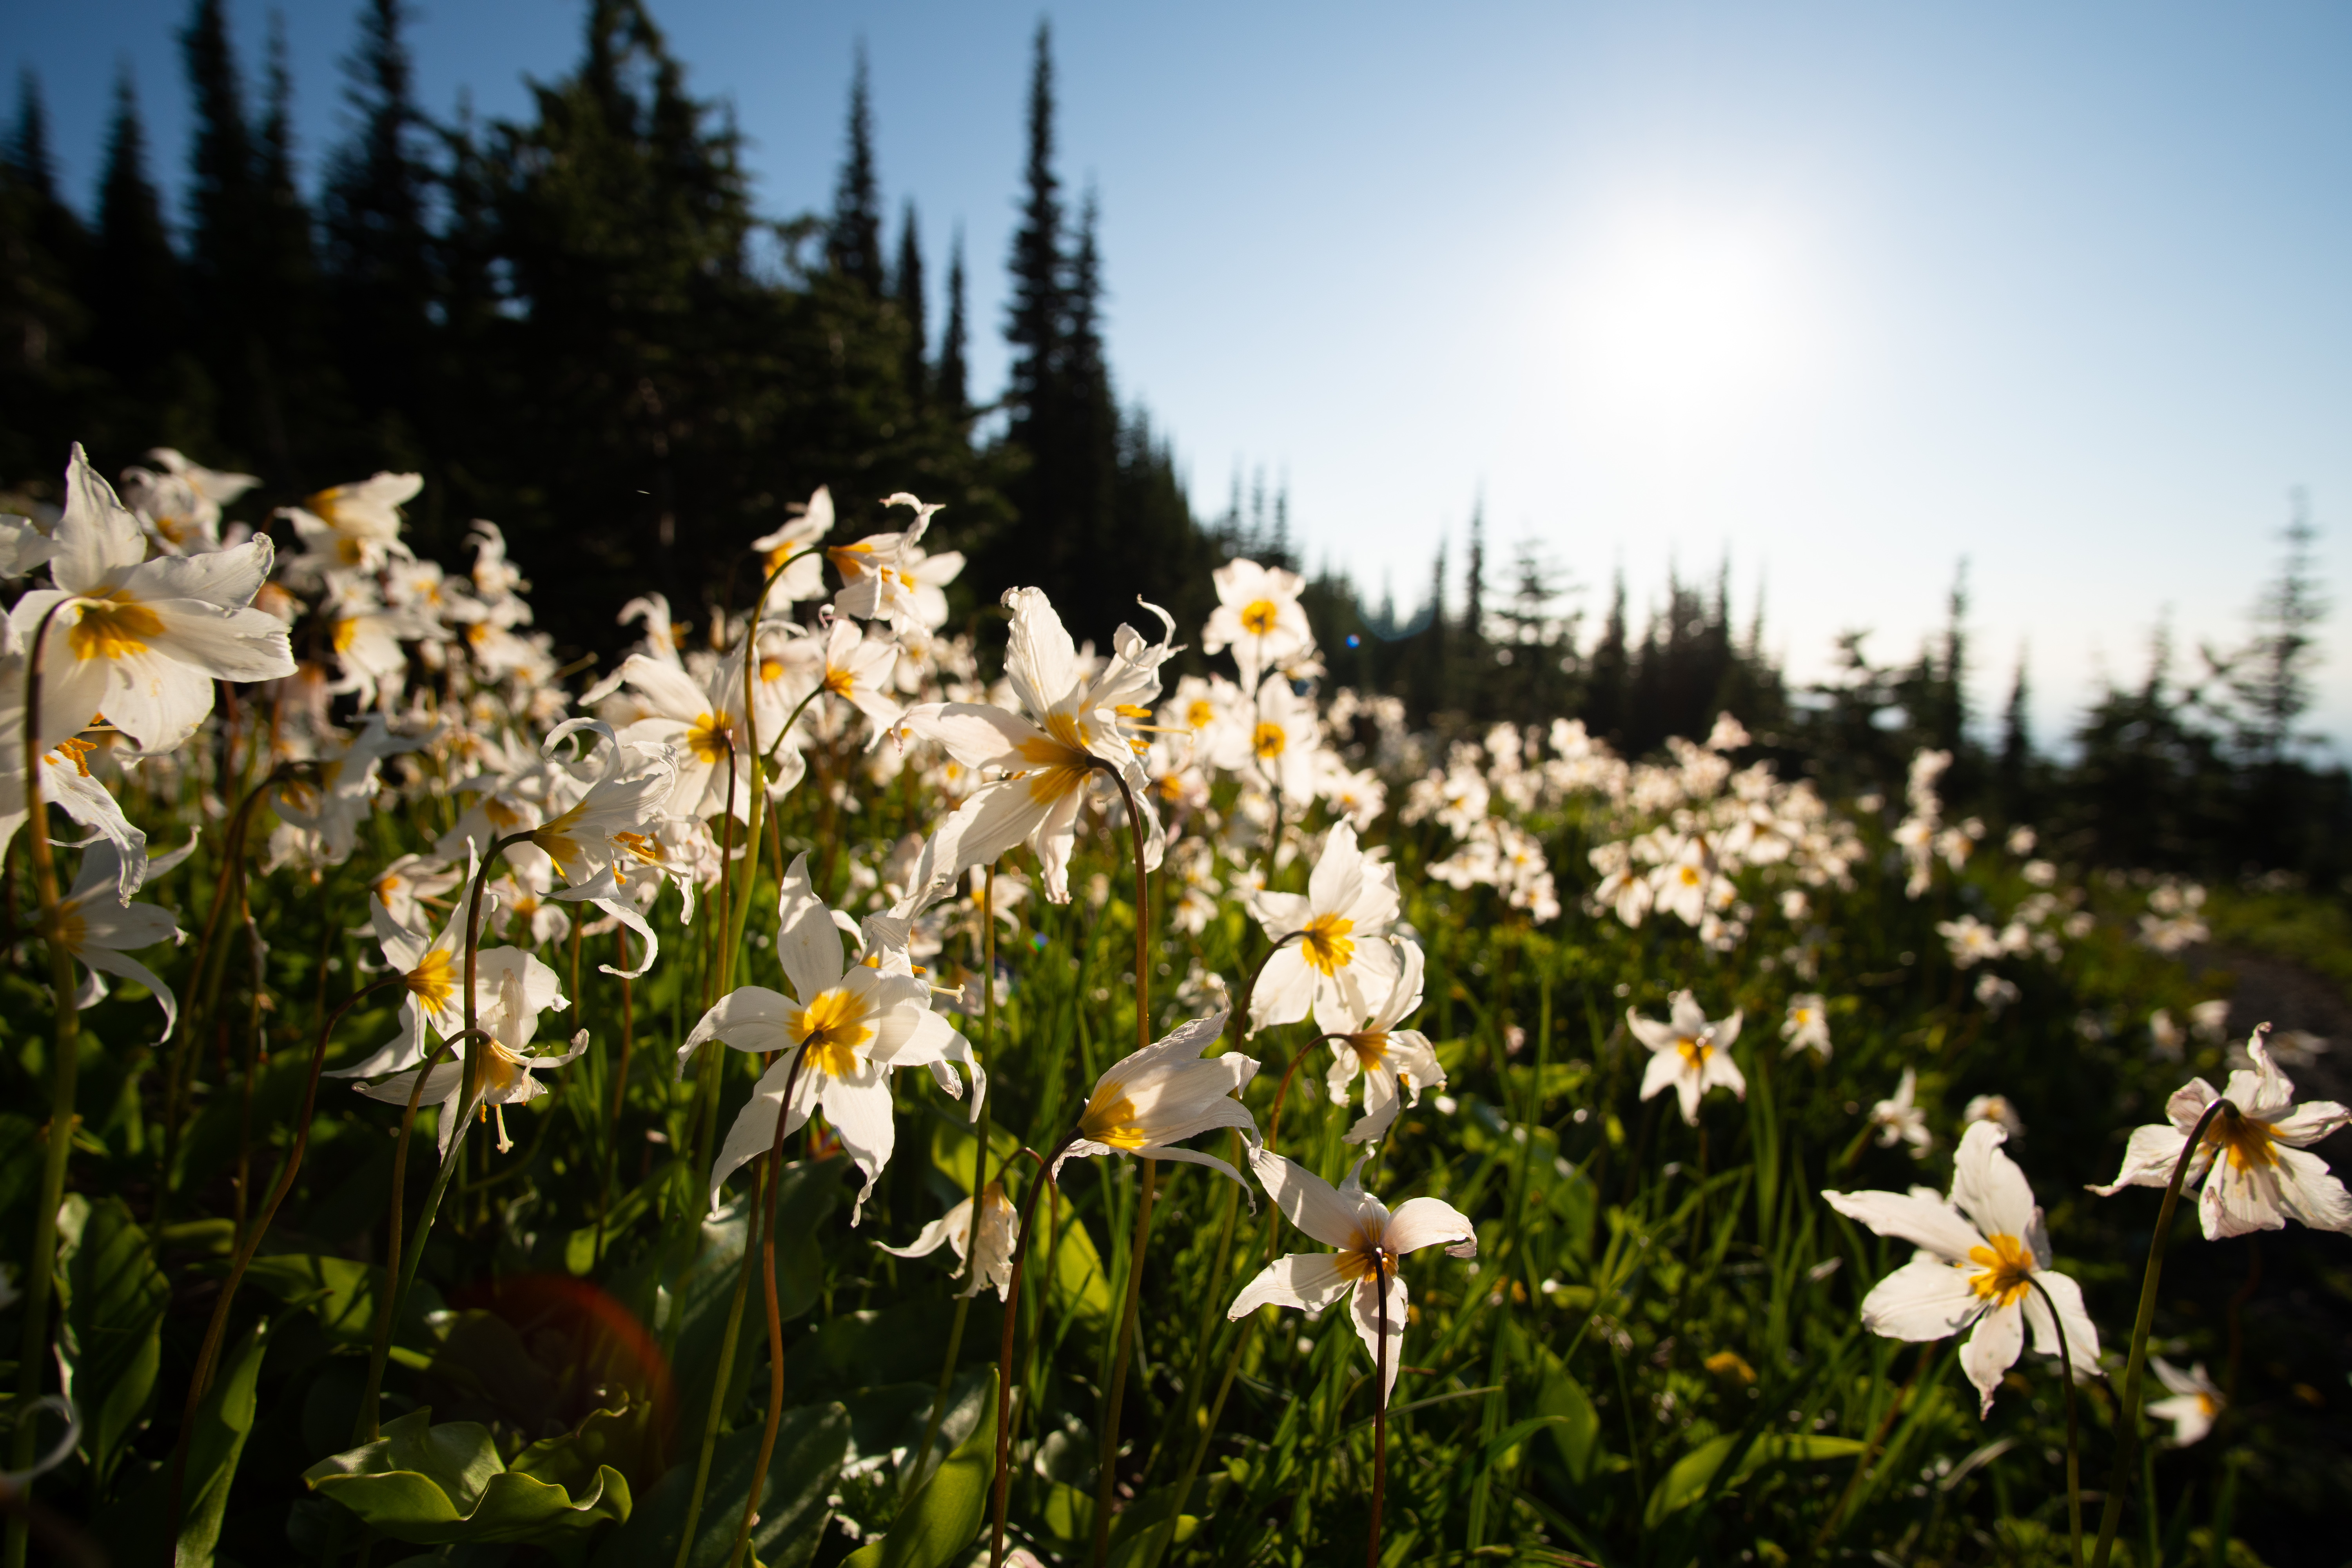
In and out of the trees we weaved. Every once in a while we’d come across a meadow overrun with a variety of wildflowers and a spectacular view of the mountain. These were probably my favorite moments and the whole reason I had wanted to do this trail in the first place.
Each day we were presented with a similar schedule; a couple thousand feet of gain or descent, lunch, then a couple thousand feet of the opposite. A lot of switchbacks were done, most of them in dense forest. On this trip I discovered that I much prefer open expanses to hiking with limit sight of where the trail is going. The images often advertised of vast alpine meadows are from specific areas and not totally representative of the whole trail.
After doing the JMT last year I realized that I don’t really care to write play by plays. For the most part, you had to be there. There are high points or little points of interest that I enjoy writing about, but for the most part, I don’t think I could do these places justice and I much rather inspire people to go do it for themselves.
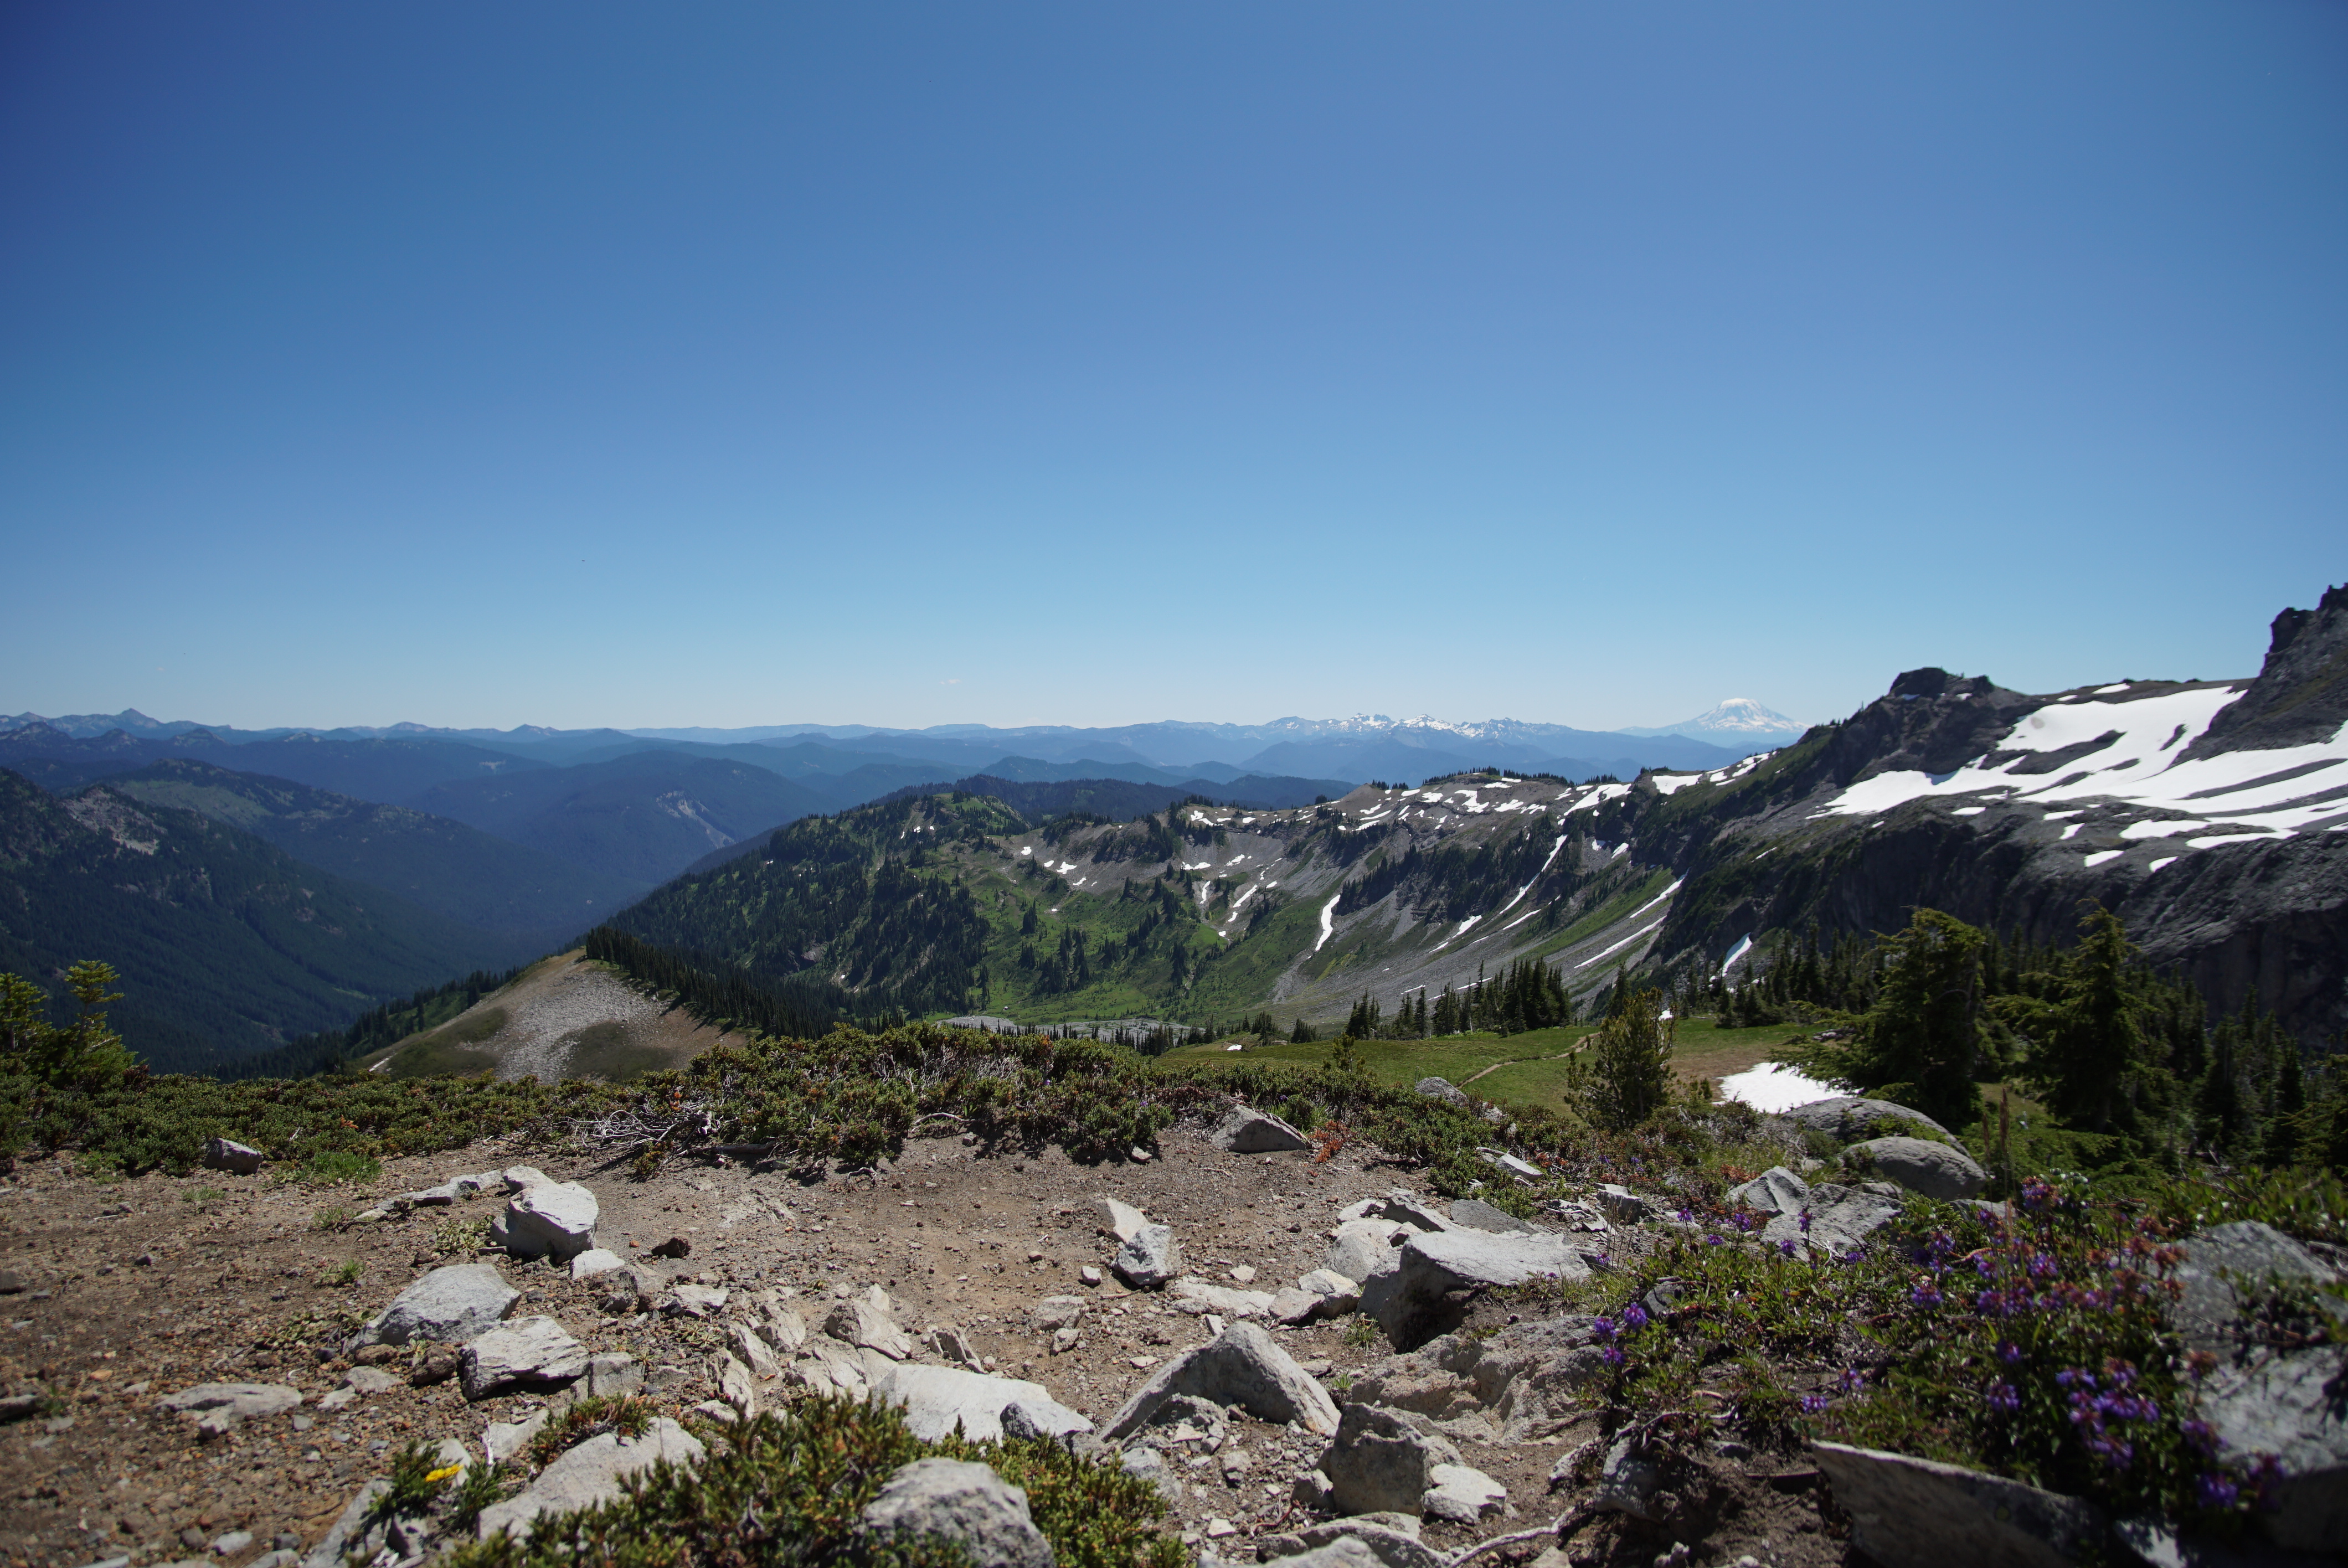
My favorite part of the trail was definitely day 6, White River to Olallie Creek. Olallie Creek in itself was moral destroying, I don’t recommend using that camp. However, the trail through Summerland and Indian Bar was everything I had wanted the Wonderland Trail to be. I love being above the tree line. I love alpine meadows and snow melt lakes. We could see the climbers descending after summiting the mountain. We could see Mt Adams and Mt Hood after we topped out from Indian Bar. That day was stunning.
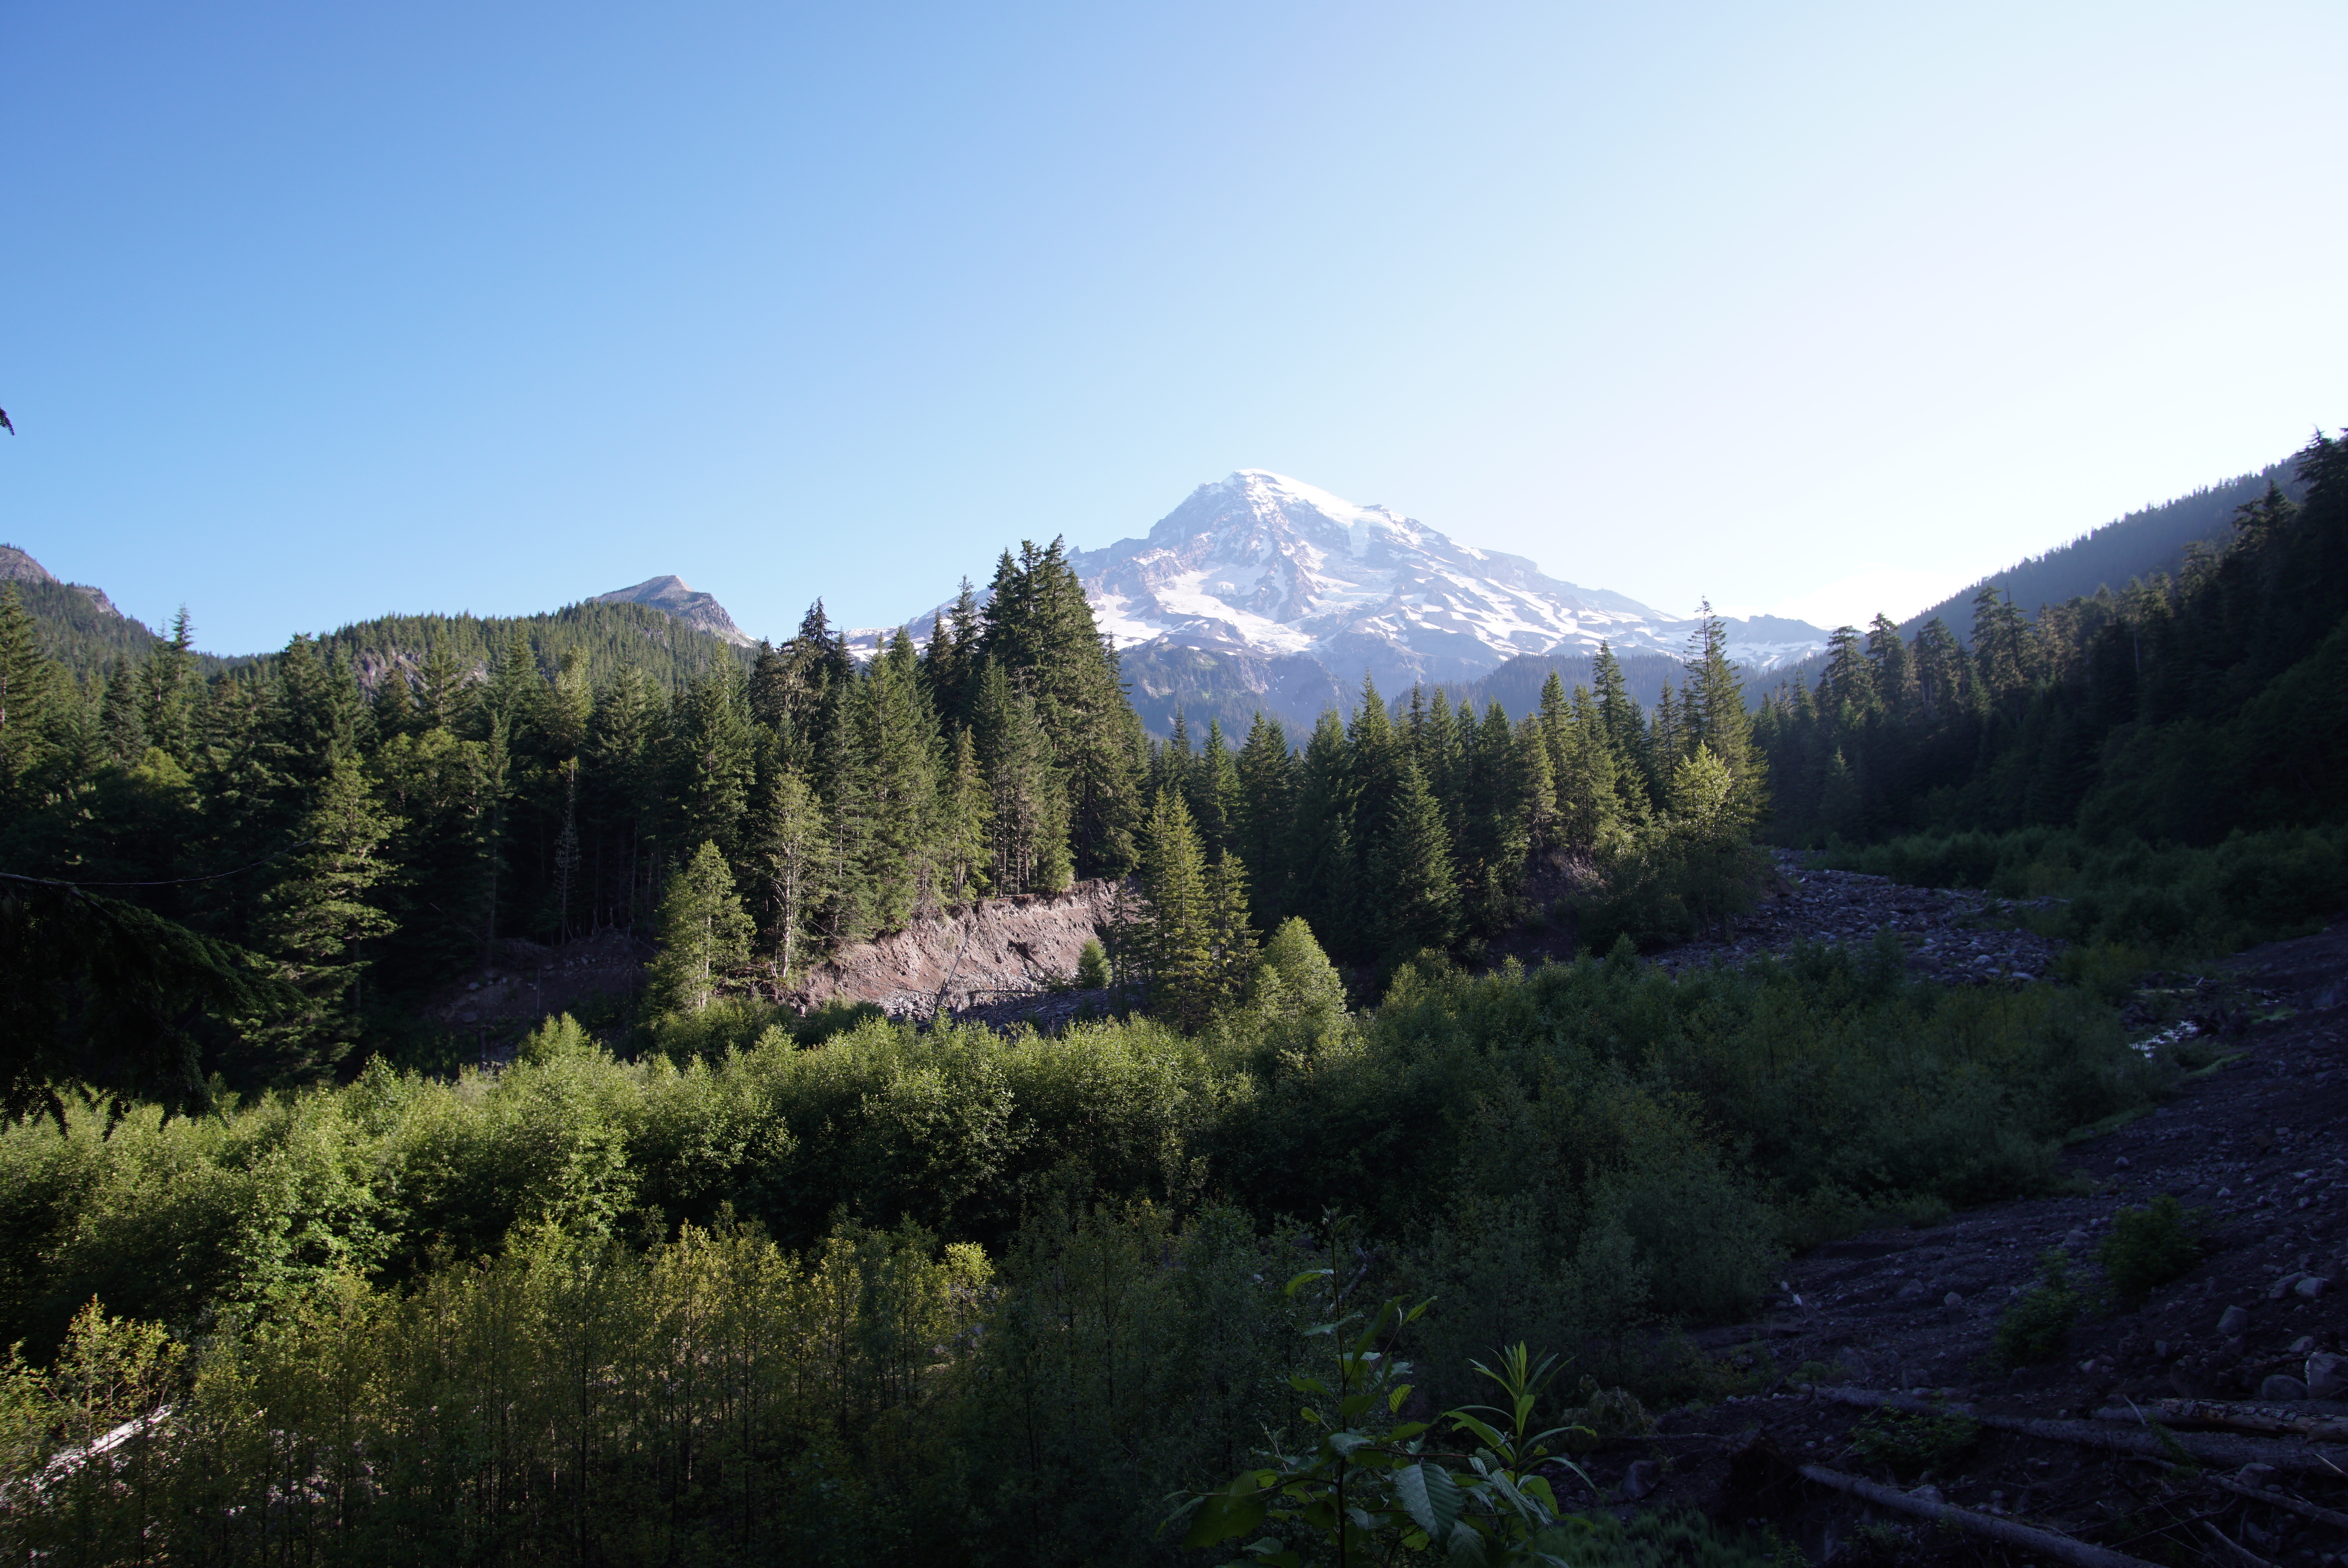
Mount Rainier itself, almost as tall as Whitney, dominates the landscape in the area like surrounding peaks like Mt Adams. Its so tall compared to everything else that it really is quite a beautiful mountain. The Wonderland Trail was an adventure for sure and every excursion is a learning experience. I think I might take a break from the long hikes. I find I don’t have the time or energy to really appreciate just being there. I’m looking forward to a few relaxing overnighters now that I can better appreciate them. I’m glad to have had the opportunity to do the Wonderland Trail. Can’t beat those wildflowers, that’s for sure.
Day 3 took us from Upper Cathedral Lake to Lyell Fork in 15.3 moderately flat miles. We took an extended lunch in Tuolumne Meadows where you can also pick up a resupply if needed. We followed Lyell Canyon until we just couldn’t walk anymore. Several established campsites are spread out on the mountain side of the trail. Elevations still below the cutoff for campfires.
Now facing an even longer day than the one before, we woke up early once again to beat the heat and try and put a dent in the 15 miles we had. What little uphill we had that day was right at the beginning. We passed the turn off for Lower Cathedral Lake, bringing back memories of our past trip, and then descended toward Tuolumne Meadows. The portion through Tuolumne Meadows wasn’t all that eventful. We chose not to cross over to the north side of Hwy 120 . Half my maps say the trail stays south while the other half says the trail crosses over so we decided to just stay south since we planned on getting food anyway. We made good time getting to the shuttle stop and burger place but ended up lingering too long, enjoying the fresh food and somewhat dreaded the next leg.
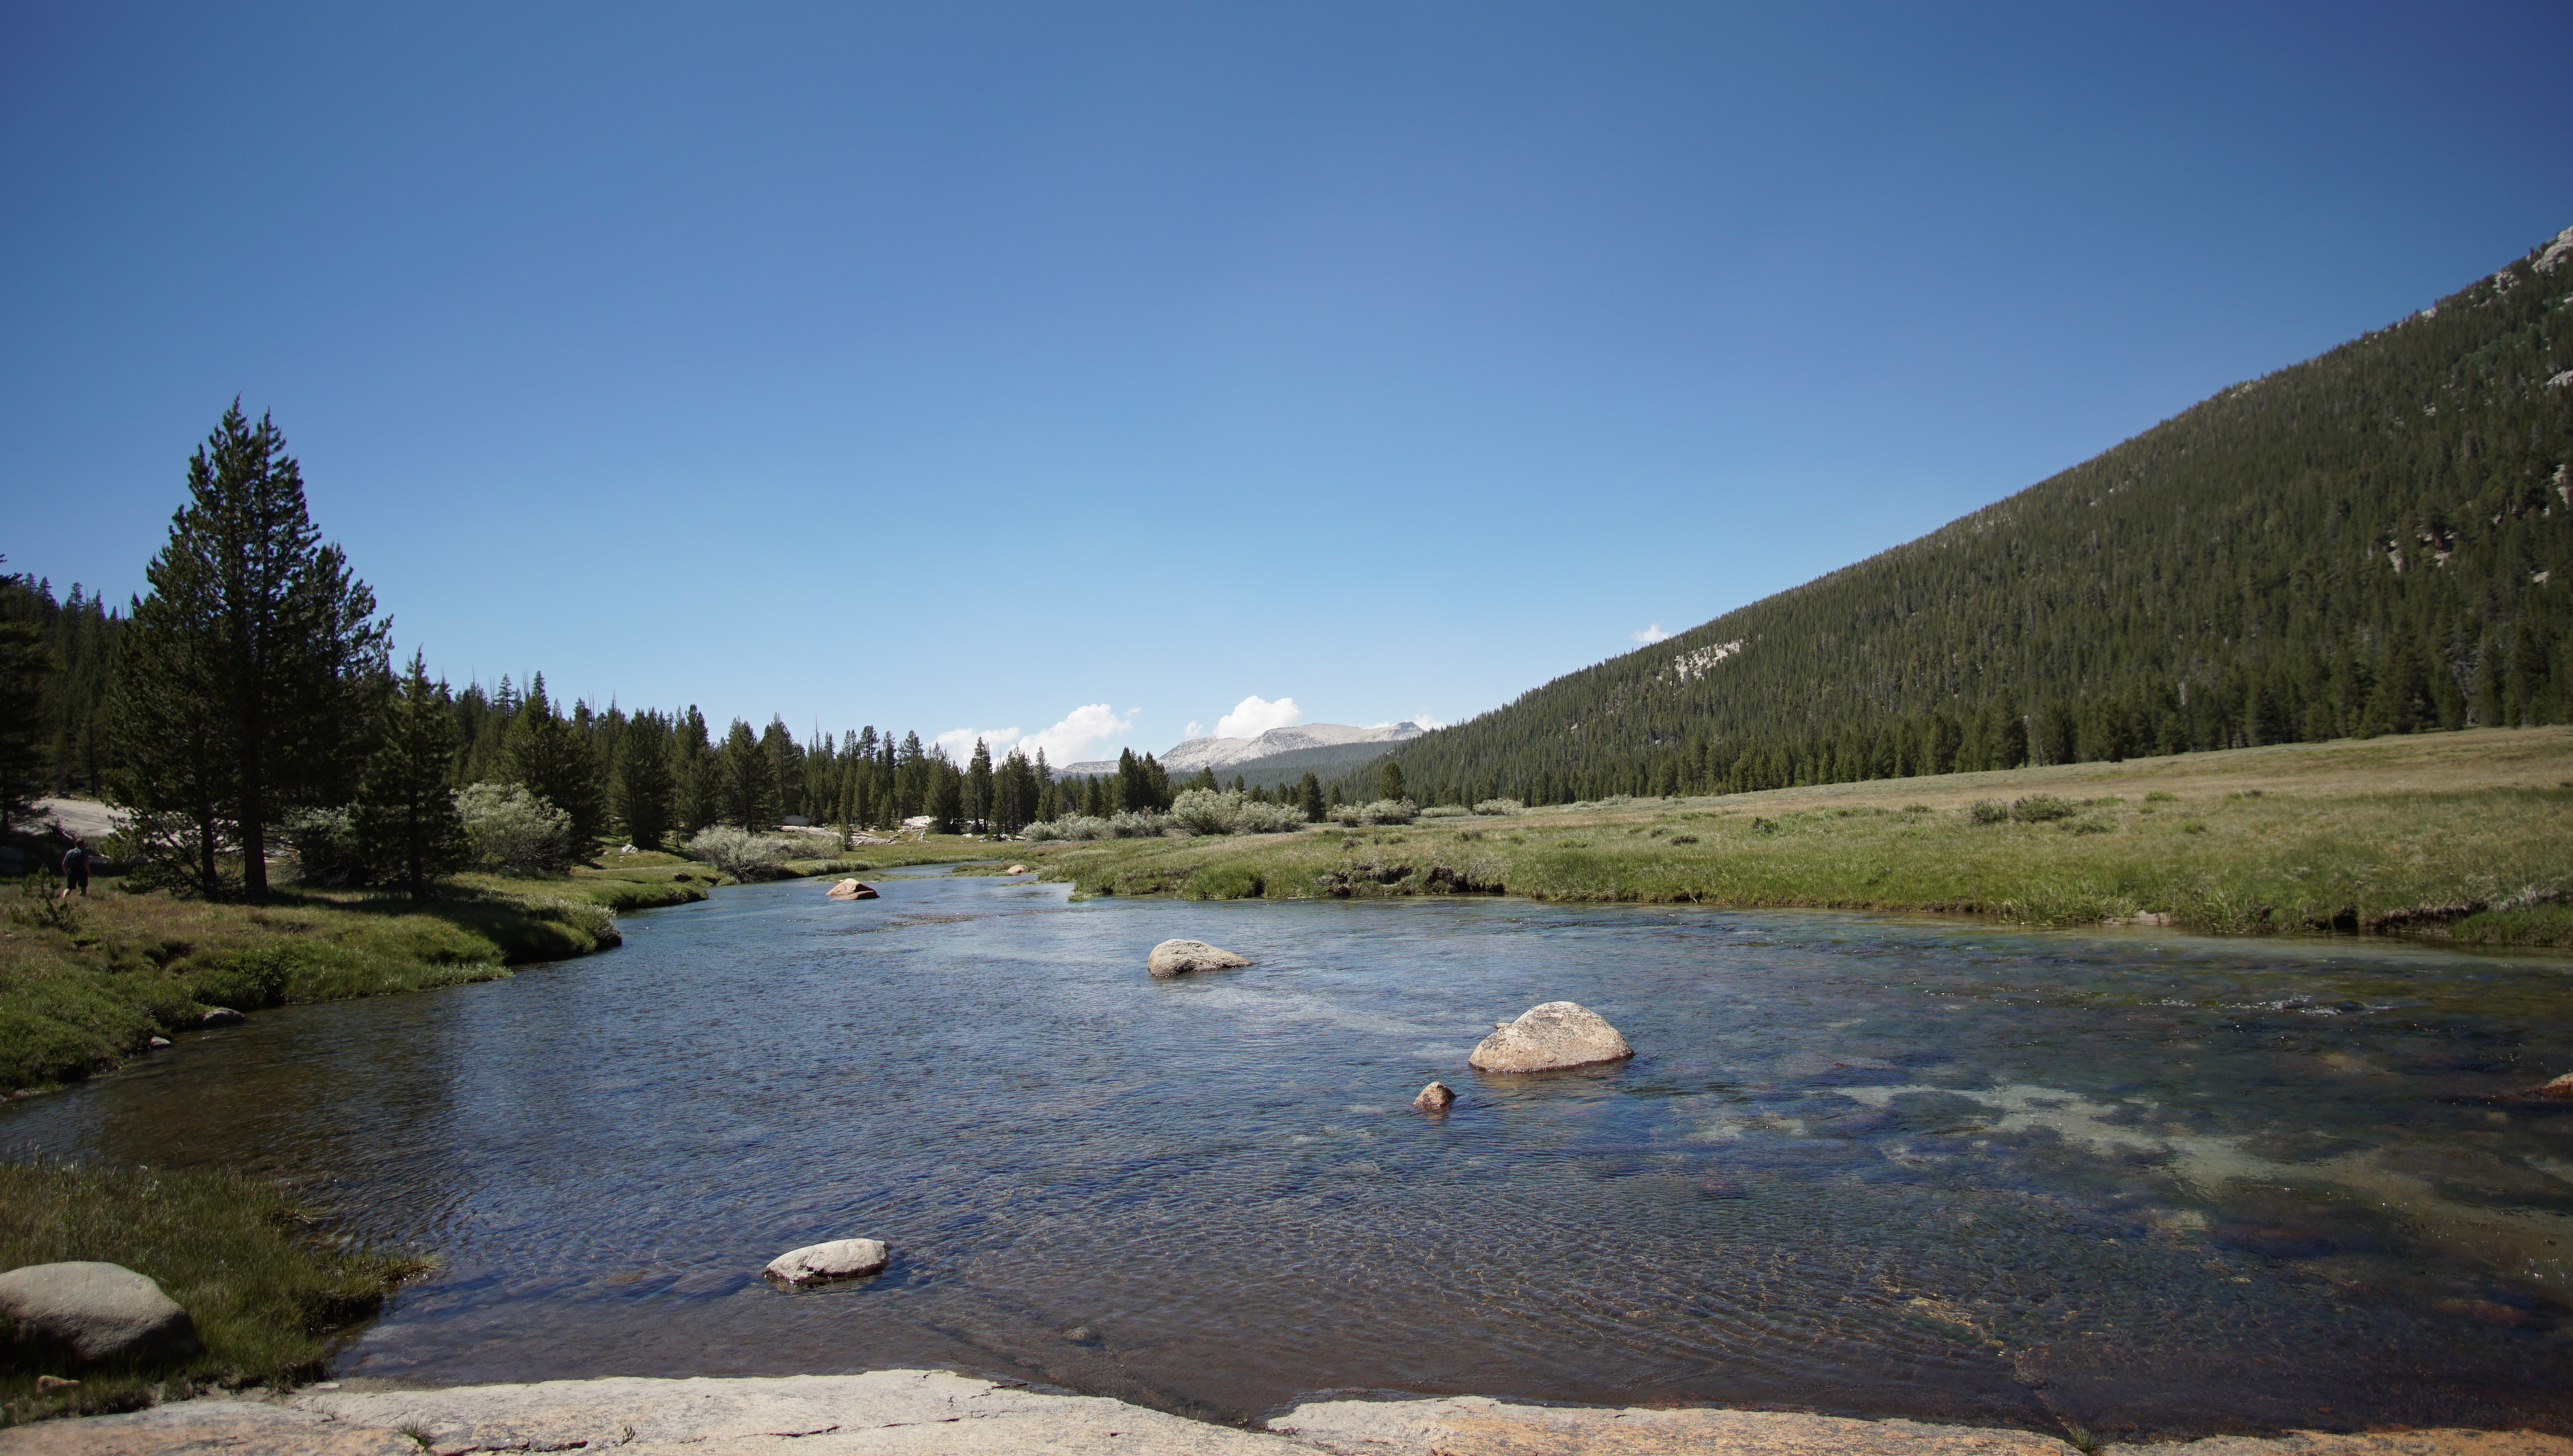
The meanders parallel to Tioga Rd until passing the Tuolumne Meadows Ranger Station when it starts cutting south to Lyell Canyon. This was the beginning of uncharted territory for us. I hadn’t even heard much of Lyell Canyon until planning this trip but it might be one of my favorite spots in Yosemite now. Its a beautiful wide canyon with a river that snakes back and forth within a grassy meadow. We took a second lunch break next to the water to soak our feet and just enjoy how amazing it all was.
Soaking our feet might have contributed to our demise. We were stiff after that break and really just wanted to be at camp already. As you travel further into the canyon, it begins to narrow and the walls become taller. We were soon in shadow and the temperature began to drop. The last 2 miles of everyday will always feel like the longest, no matter how many miles you’re doing. Feeling exhausted, we decided to just camp at the first sites we could find, falling short of goal that day. The last mile would have required a decent amount of elevation gain that we knew we didn’t have the energy for.
Scattered among the granite we found two campsites that had fire rings. Being one of the few places we could actually have a fire and with the chill setting in, we happily made one, enjoyed our dinner, and quickly passed out. This was only day 3.
For our second day on the trail, we hiked from Little Yosemite Valley to Upper Cathedral Lake. This was our first full day of hiking and was a rough 12.5mi. You gain elevation quickly as you bypass offshoots to Half Dome and Clouds Rest. Once in the high country, you’ll hike by Sunrise High Sierra Camp, through Cathedral Pass and then descend to Upper Cathedral Lake. Established campsites surround the south and east sides of the lake.
We woke up early to get a head-start on the elevation gain we had that day. About 3700ft of gain awaited us and started right outside of Little Yosemite Valley. Immediately, you start doing switch backs up to the fork to Half Dome and then to the fork to Clouds Rest. While I’ve done many hikes through Yosemite, I’ve actually never hiked from the Valley up to Tioga Pass. Once I passed the turn off to Half Dome I was in new territory, and to be honest, it wasn’t that exciting. The air was warm and dry as we passed through dead forests and dry brush. The scenery was pretty unchanging and there were long dry gaps between water sources. At mile 6, we hit the most heinous set of switchbacks I’ve ever done. Even after the end of the trip, nothing compared to these switchbacks. They were abnormally steep and, despite being a short section, dragged on forever.
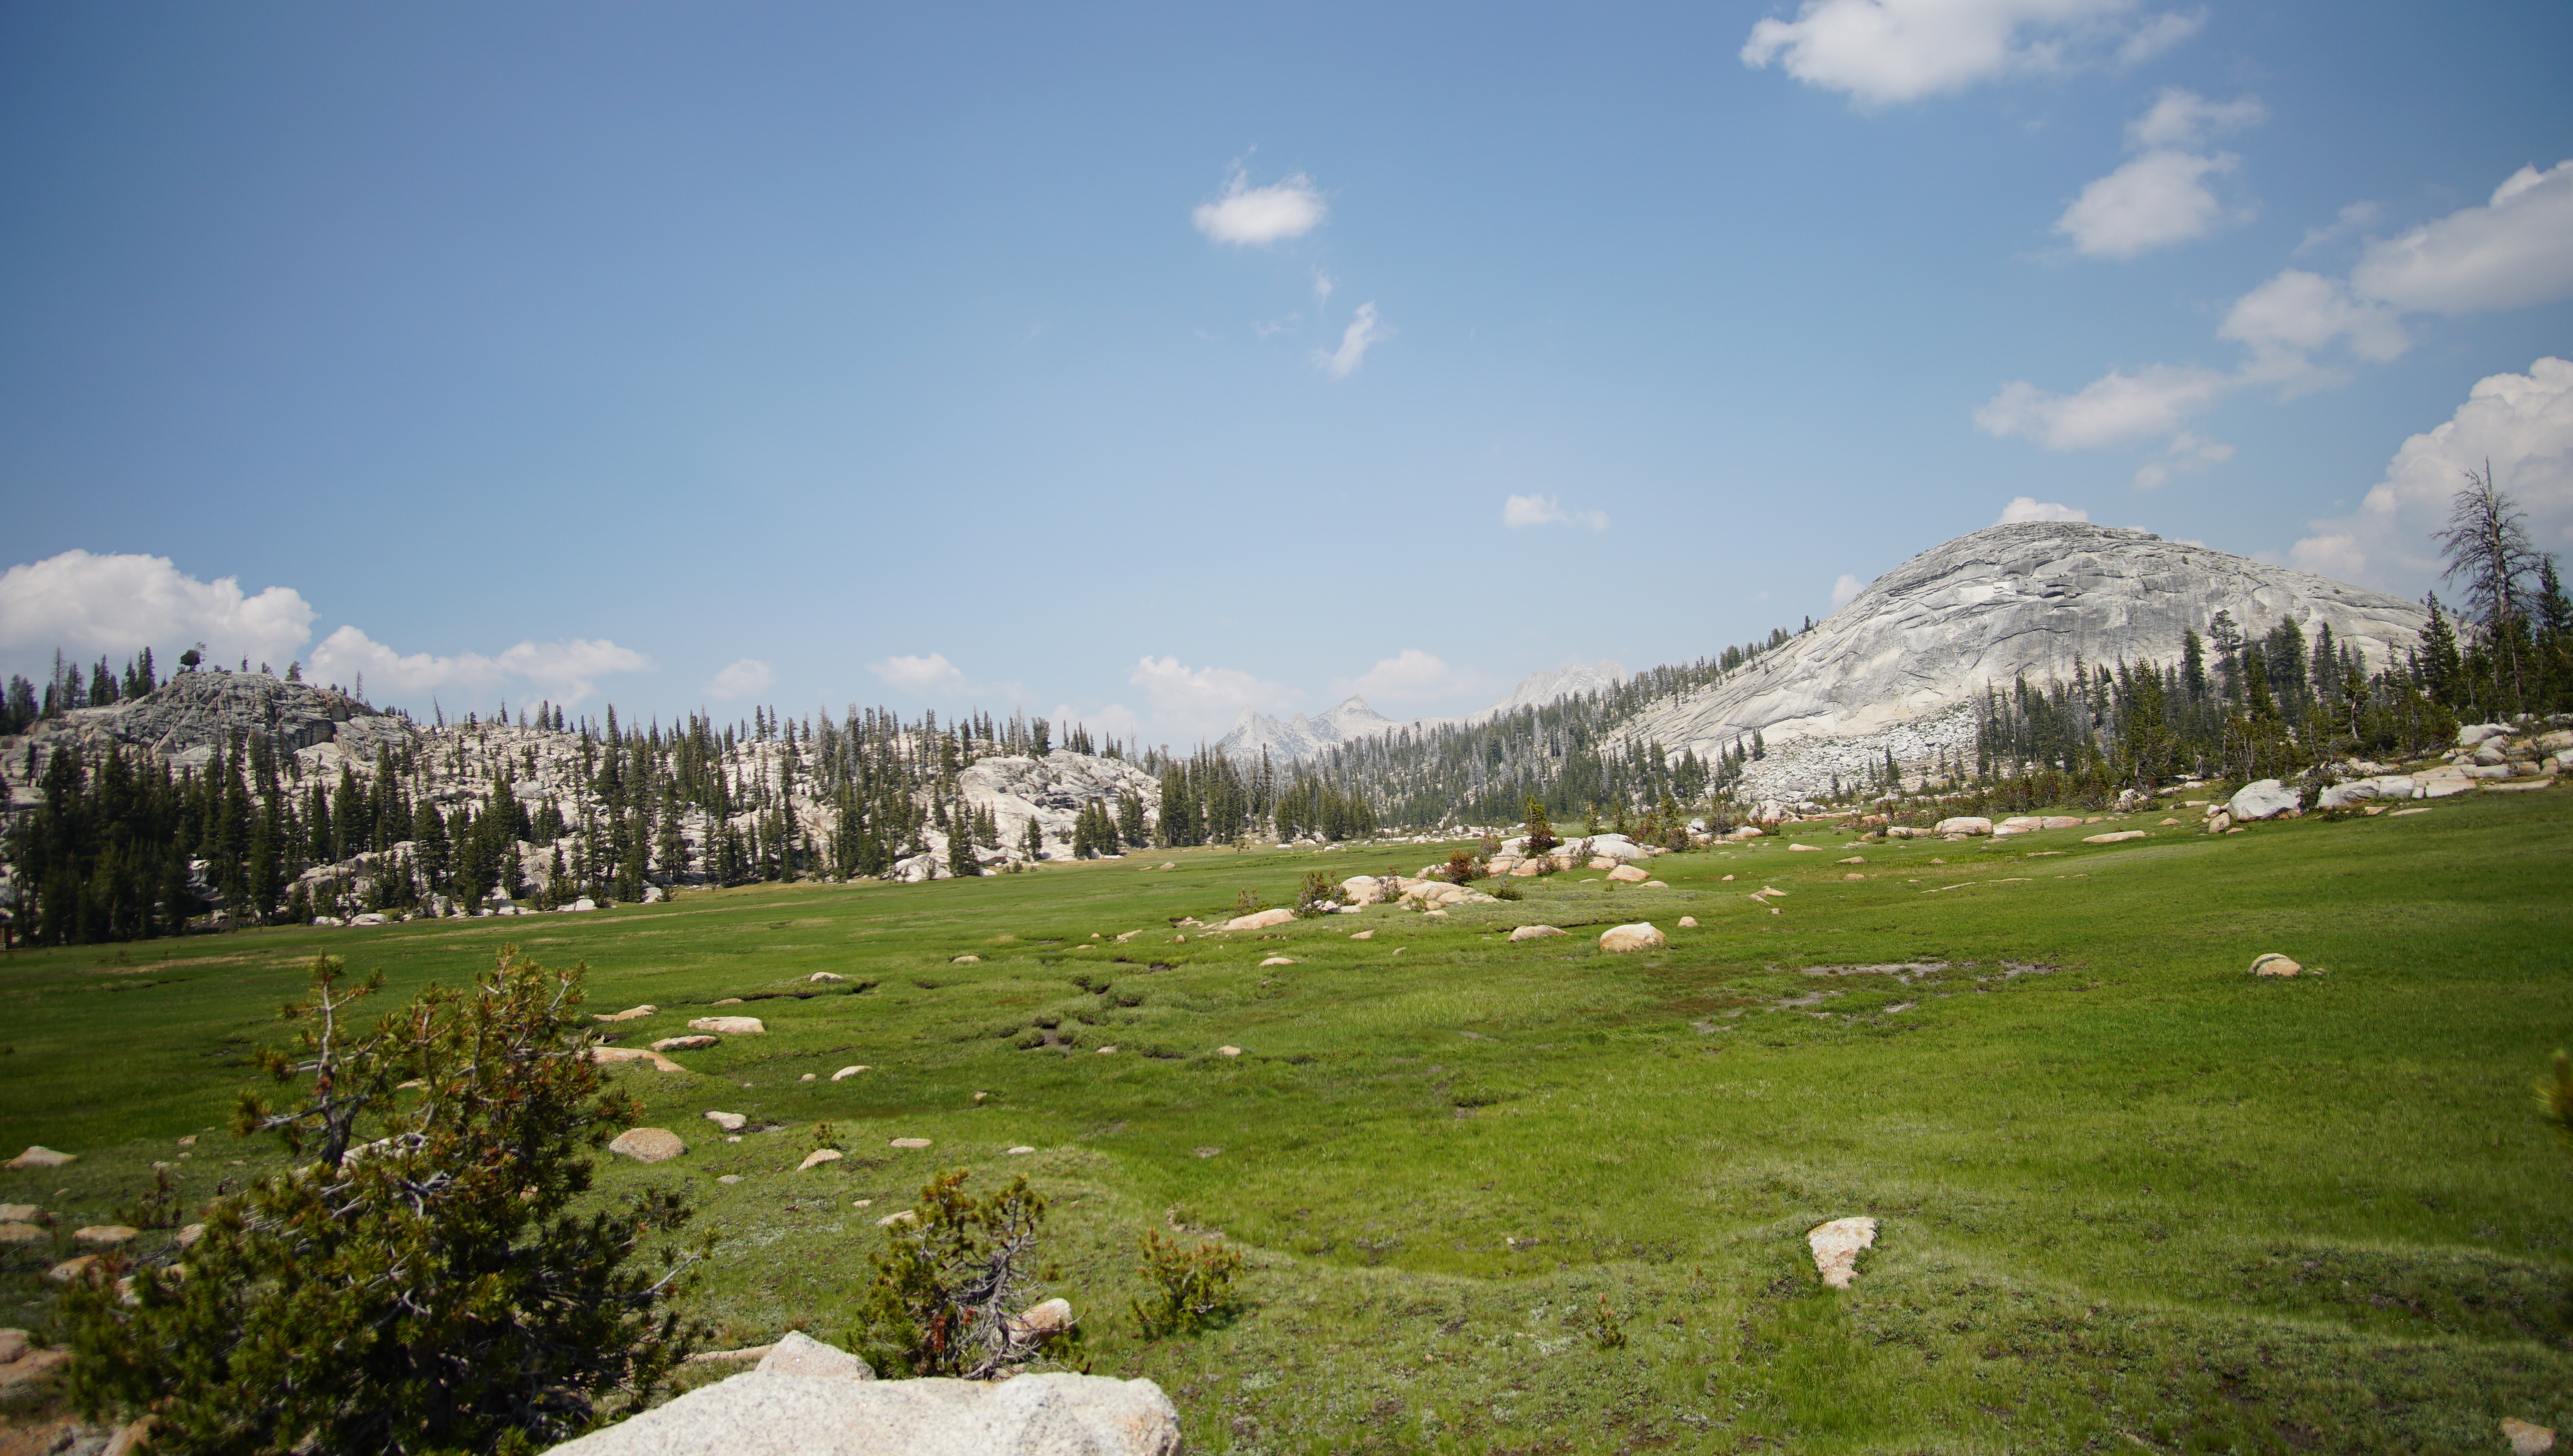
We topped out on Sunrise mountain and collapsed for lunch. This was our high point of the day, close to 9800ft. It wasn’t a great spot for lunch. We were exposed with little shade and all the rocks were covered in sap. We rested up then began our decent that would bring us past Sunrise High Sierra camp. We had been through this section before when we did our hike to Lower Cathedral Lake. Its a beautiful meadow that brings you past Tressider Peak to Cathedral Pass.
My memory of Cathedral Pass was doing me a disservice as I didn’t remember it being that long. We were dragging by the time we made the last descent to Upper Cathedral Lake. Our first full day of hiking was taking its toll. We mosied down to the southern part of the lake looking for an open camping spot. The sun was going down and any hopes of getting a quick dip in the lake were diminishing as we saw most of the established campsites were taken. We started making our way back into the granite slopes looking for a spot flat enough for a tent. We found a few plateaus that would be good enough and set up there. Mosquitoes were out in force due to the warm weather. After getting water, rinsing off our feet, and eating dinner, D and made another trip down to lake to take some photos and enjoy the alpenglow. Cathedral lakes and peak have always been one of our favorite spots in Yosemite and it was a nice treat to come back.
Our first day on the trail took us from Happy Isles to Little Yosemite Valley in 5 short miles. Because we didn’t get a Little Yosemite Valley pass-thru on our JMT permit, we were required to stay the night in Little Yosemite Valley. Little Yosemite Valley backpacker’s camp sits back behind Nevada Falls. Campsites have bear boxes and there is also a 4 stall solar toilet for the camp.
Shuttling the cars ended up being a 2 day affair. We drove two cars out to Lone Pine and dropped one off at Whitney Portal. The next day we started the drive north, stopped by Mammoth to drop of our Red’s resupply (which ended up being an endeavor in itself), and then continued on Yosemite Valley. Since we arrived after the day hikers were already leaving (~6:30PM) we were able to get a parking spot. We made our way over to valley backpacker’s camp and squeezed our way into half of a campsite. That was my first time using that backpacker’s camp and it was a bit chaotic. Its kind of every person for themselves yet you still have to pay even if you don’t necessarily have a real spot. Randomly, the rangers will come around checking for payment tags and if you don’t have one you’ll get an earful and then kicked out. The night was hot and I got my first mosquito bites before the trip even began.
We weren’t in any rush to start the next day. We packed up and went to “HalfDome Village” (I miss Camp Curry) to get breakfast and then headed to the general store to grab some lunch to take with us. We then returned to the car to make last minute gear choices and prepare to leave for real. With a poorly planned early afternoon start, we said bye to my car and set off toward Vernal Falls.
The initial segment of this trail is packed with day hikers making their way to the base of the falls. If you’ve never done the Vernal Falls hike, it has a decent amount of elevation gain within a short distance. We bobbed and weaved past the day hikers just so we didn’t have to do the steep portions at a slow pace. Just over the bridge at the bottom of Vernal is the fork to the Mist Trail on the left and the John Muir Trail on the right with the first trail sign for the JMT.
The trail wondered up switch backs until it reached the top of Nevada Falls. The short day was a nice way to ease back into backpacking even though it sort of truncated our schedule more. Although, we can’t really complain, not many people are even awarded the Happy Isles start.
We took a break at Nevada Falls to cool off and eat lunch. Little Yosemite is about a mile past the falls so we weren’t in any rush. On the way there, we did have our first wildlife encounter. A rattlesnake on the side of the trail. I am not a fan of snakes by any means. They’re actually what I worry about most backpacking. We reached the Little Yosemite Valley backpacker’s camp, set up camp, then headed down to the river to lounge around some more. Much to my dismay, our second wildlife encounter ended up being a water snake floating by right as I was about to get in. This trip was off to a great start.
Enjoy all the Santa Cruz mountains have to offer in this ~30 mile thru-hike from Skyline Ridge to the Waddle Beach. Official trail starts at Saratoga Gap, however, overnight parking isn’t allowed there. If you aren’t lucky enough to have a drop-off, you can park at Castle Rock State Park and add on 3.5mi. Traditionally done in 3 days, we did it in 2 with a big 18.5mi first day from Castle Rock SP to Big Basin SP. A car shuttle of some sort is necessary for this hike. You are required to camp in designated campgrounds along the trail. Most campgrounds are closed during the winter and the agency will not issue permits until they open. The majority of the trail is shaded although temperatures can get warm during the summer months.
A big beef I have with the backpacking around the Bay Area is how convoluted the permitting process is. Top hits when googling “Skyline to sea” don’t actually send you to any agency where you can get permits. Navigating Redwood Hikes sends you to a backcountry trail camps site where you can actually start the process. Here is a summary step-by-step of how we got our permits for S2S (as of June 2018).
Plan out how many miles you want to do a day and what campsites that puts you near. Redwood Hikes does give a great overview of the trail, the different parks you hike through, and where the campgrounds are.
Check campsite availability to see if the dates you want are available. A “(0)” next to the campground means there are no sites available there. Limit is 6 people per site.
Wait until they email you back saying that you have been “approved”
If you have been approved, you now have until 5PM the next business day to call (831)338-8861 (during business hours) and submit payment. If you don’t do this in time, your request is cancelled, and you must start all over again.
After paying over the phone, they will email you your backpacking permit as well as 1 parking permit. If you are planning on parking a car at either end, you will need to pay for the second car upon arrival.
Thoughts
I have some pretty mixed feelings about this trail. Some parts were just a grind and a bore to get through while other parts were absolutely gorgeous and wonderful to be in. First and foremost, we mostly used this as a gear test/training hike for the JMT. We had a group of 4 and 2 cars, one for either end. The morning of we drove out to Waddell, dropped off one car and then continued on to Castle Rock. This whole process took 2 hours starting from Oakland. The Castle Rock parking lot is pretty heinous. It fills up ridiculously early due to the popular rock climbing there and they don’t reserve spots for overnight backpackers. We arrived at the lot around 9:30am and it was completely full so we had to wait and pray that someone who did an early hike would leave. God must have been looking in our direction because we only had to wait about 15 minutes. 10am isn’t that great a start when you have 18.5 miles to do.
I would say our day 1 was pretty bland. If you start from Castle Rock, you will meander along the Saratoga Gap trail until it meets up with the official Skyline-to-the-Sea trail. Castle Rock is unfortunately within very close proximity to an outdoor gun range. For the first 3-4 miles the ambiance consists of periodic gun fire. Once you have traveled out of hearing range of the gunfire, you get to travel directly next to highway 9 where you can enjoy the sounds of passing traffic. There were also a couple abandoned cars that looked like they careened off the highway. The dense foliage made them unsalvageable.
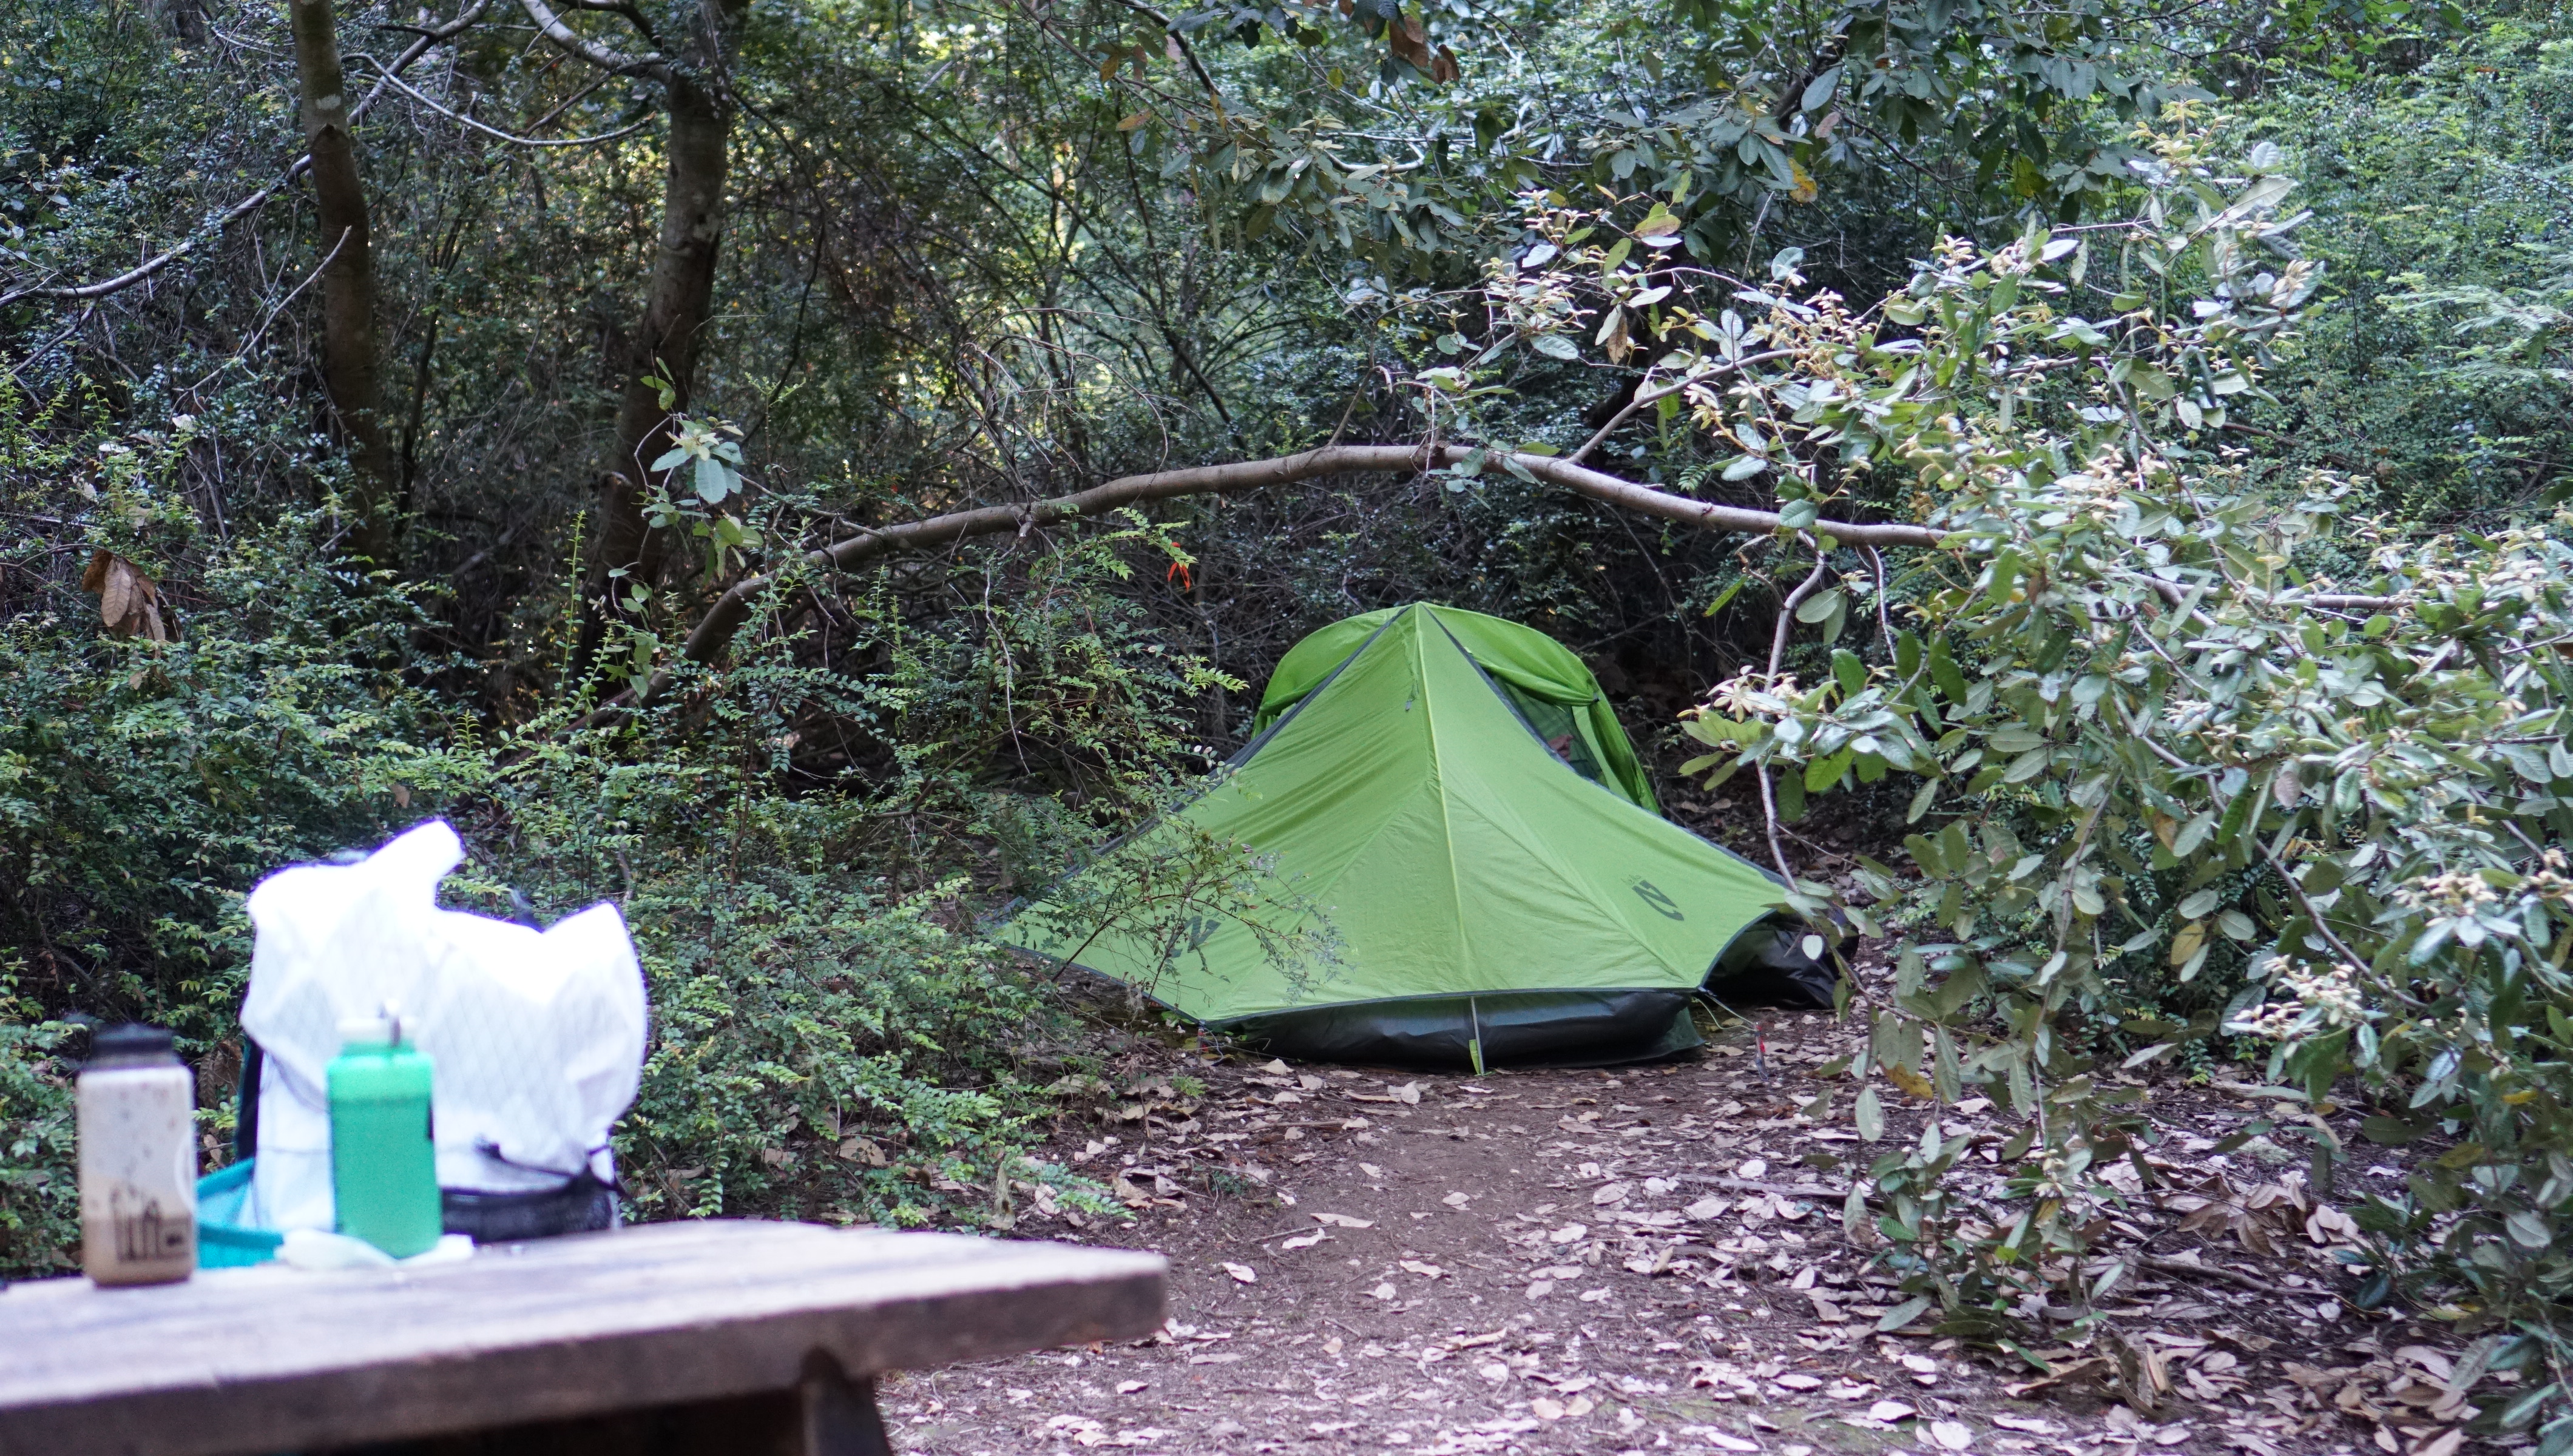
We stopped at the Waterman Gap Trail Camp for lunch and to refill our water. Its a bit depressing to stop for lunch at 9 miles and realize you’re only halfway done. The camp was very nice. We sat around an unoccupied campsite to eat. Soon after we were on our way again. The rest of the day passed by in a mosquito filled haze and we rolled into Big Basin well after dark and then finally to Jay Camp around 10PM. Jay Camp is a bit off the trail and involved wondering through the Big Basin parking lots for roughly a mile before finding the camp.
Jay Camp itself was also very nice. You aren’t assigned a site prior to getting there, you just find one that unoccupied. We managed to grab Site 1 which had two good spots for 2 person tents as well as a highly needed picnic table to sit around. Flush toilets, sinks, as well as showers area available next to the campground.
Day 2 arrived and we didn’t pack up as early as I had wanted to. The pros and cons of hiking in a group. This is the same group that we’ll be hiking the JMT with. Here’s hoping that we start earlier than 10 during that trip.
Hiking through Big Basin was significantly better than Castle Rock. The foliage is more forest than brush and its hard to beat hiking through redwoods. We had to take some detours due to trail closures which added on an extra mile. The trail follows a creek system all the way to the beach. Coincidentally, we once again ended up hiking the same day as an Ultramarathon. A couple miles in the runners caught up to where we were and we had to start paying attention and letting them pass.
All in all, it was an alright trip and I’m glad we did it. We had ulterior motives and were going for high distance days so it was hard to really enjoy (hence my lack of photos). Plus I’m still getting used to this camera ><
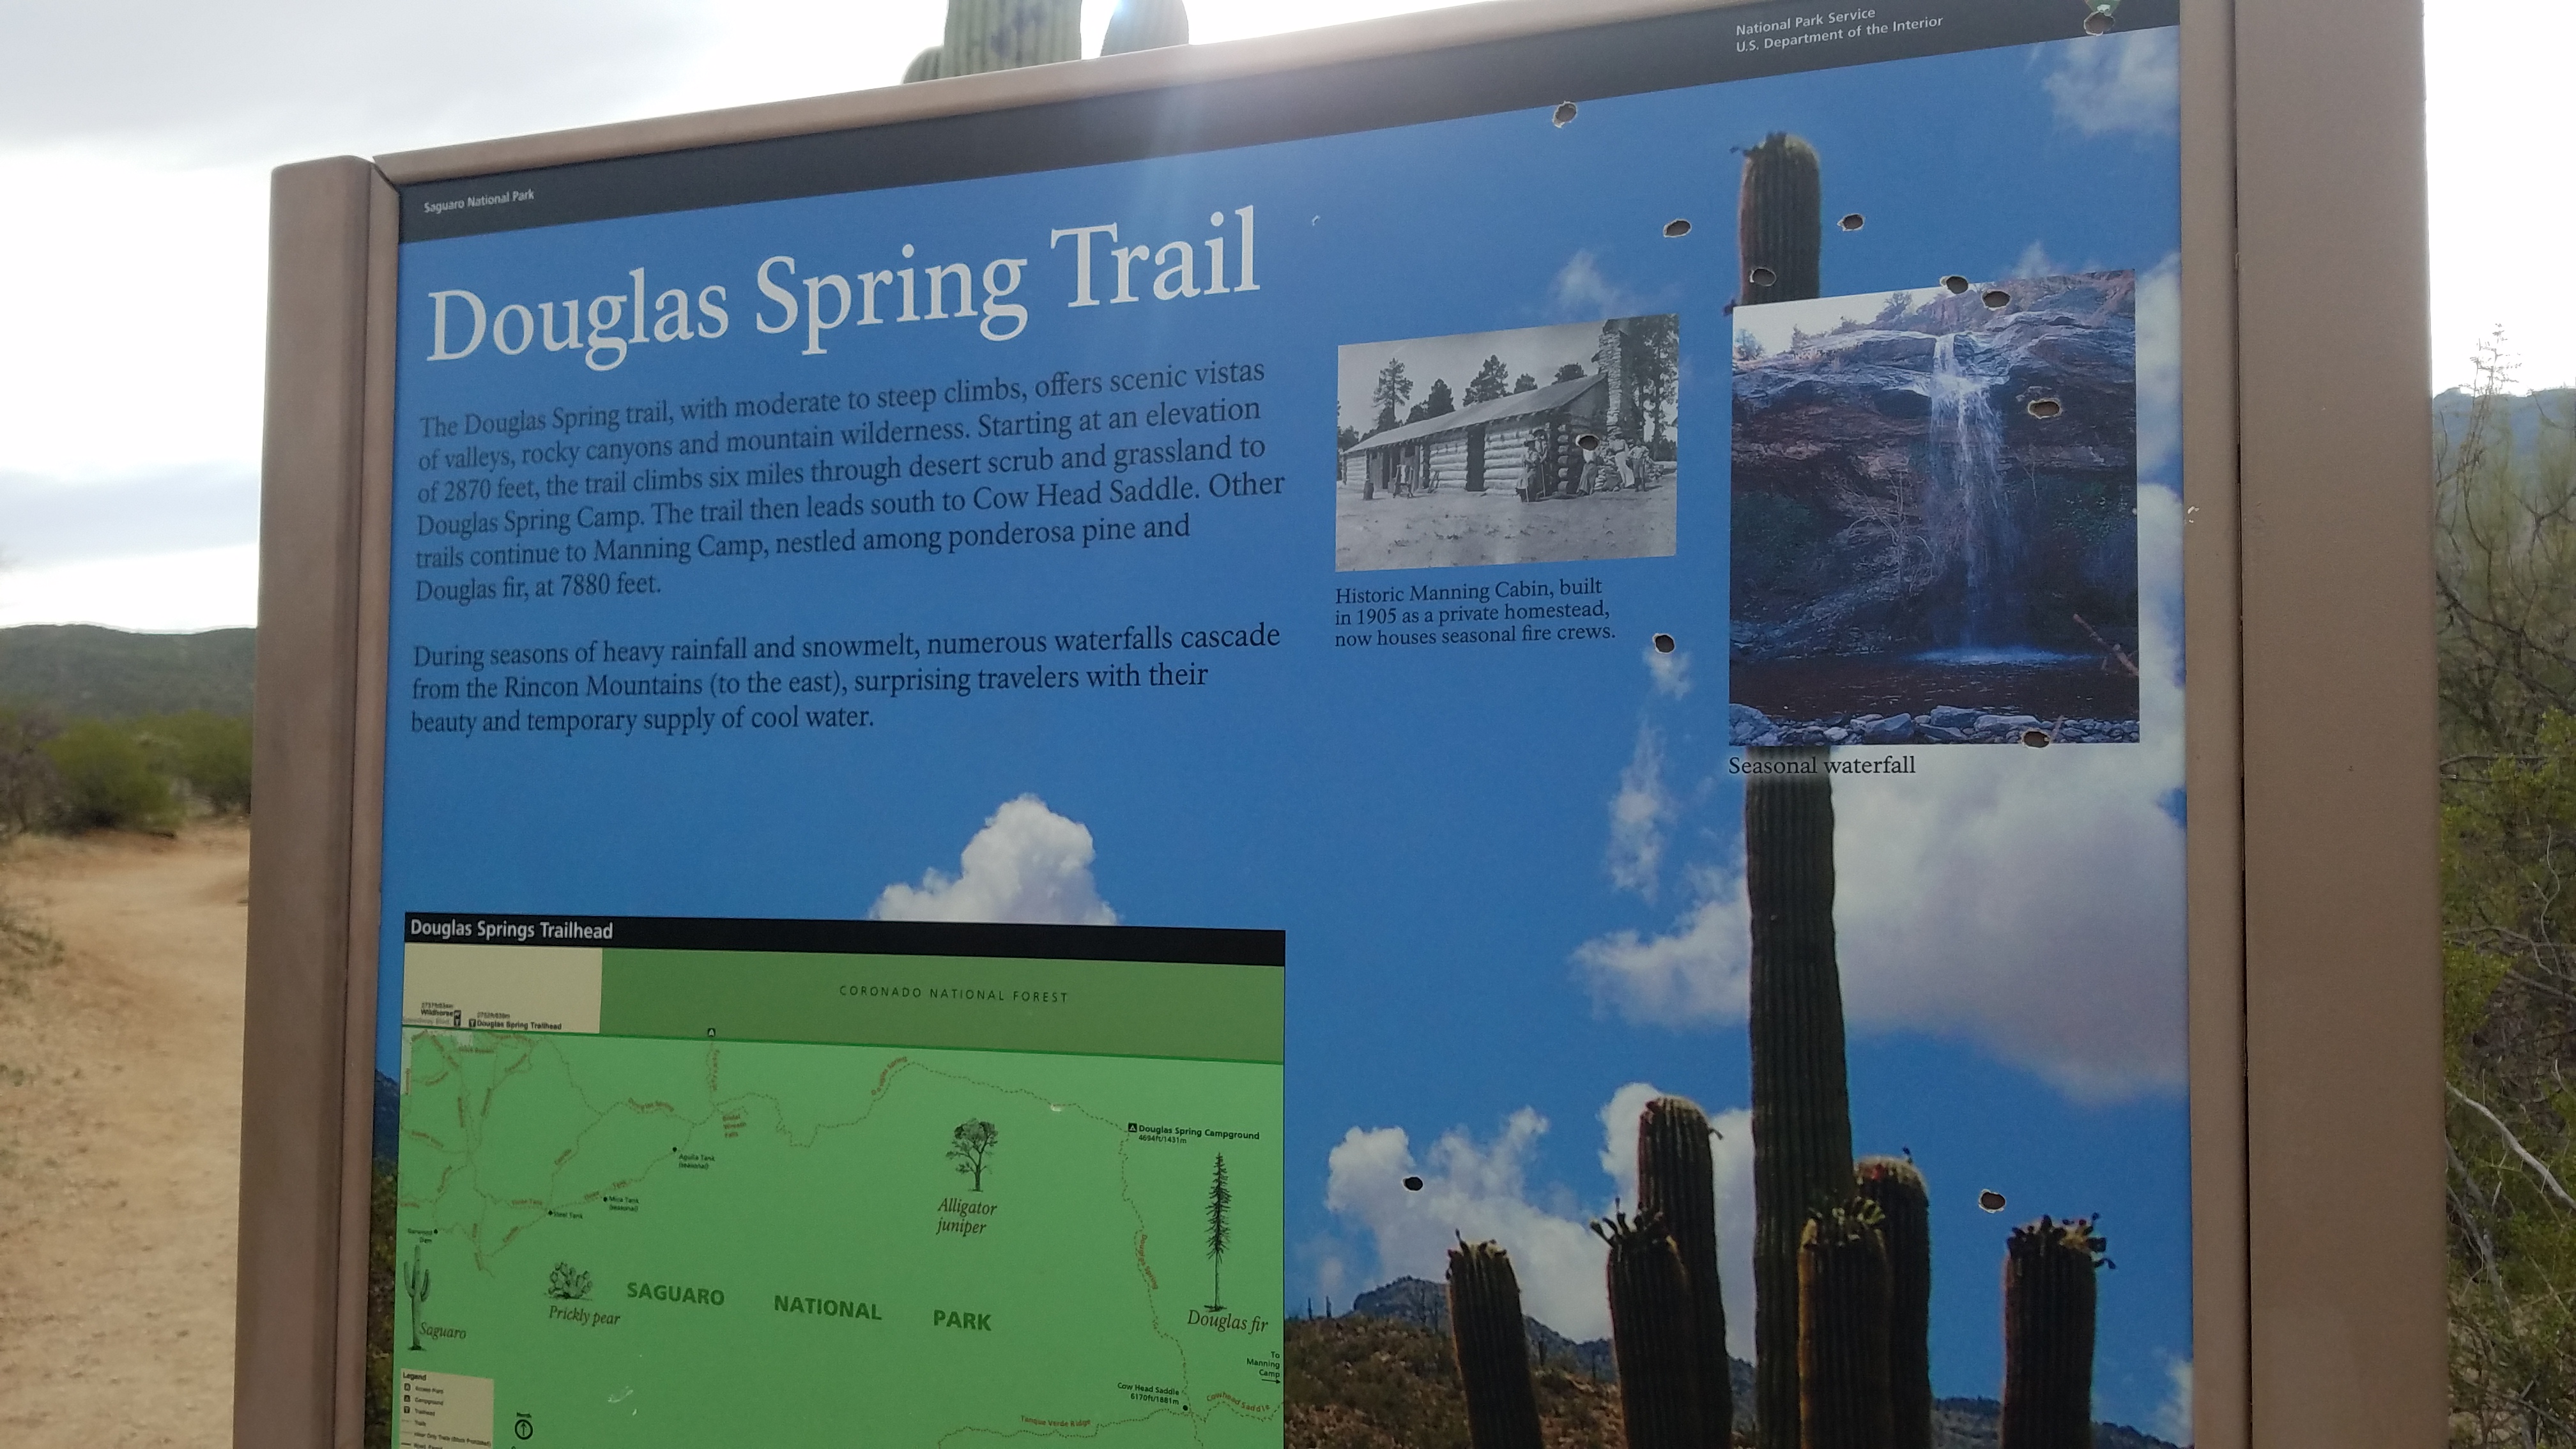
Hike through various ecosystems as you go from the desert floor to 8000ft up in this knee busting 28 mile backcountry loop through the eastern district of Saguaro National Park. Check with the park rangers before starting as water sources aren’t always running. The only all-year water source is at Manning Camp. Temperatures can be hot at lower elevations and cooler at the higher elevations. We started this hike from the Douglas Springs trailhead and ended at Tanque Verde Ridge trailhead. We arranged a drop-off and pick-up for this hike. Be cautious of the various snakes in the area as well as gila monsters, bears, Africanized killer bees, and mountain lions. Campgrounds have bear boxes so you don’t have to worry about bear cans or hanging.
In retrospect, I hadn’t thought this trip through very well. I had picked Saguaro national park as are next destination because we could also visit some family in Tucson. The idea of the alien looking landscape was all very appealing while planning the logistics. I queried people on /r/Tucson for recommended hikes in the park as well as read up on the respective Backpacker Magazine article. That is how I settled on a backcountry loop starting from Douglas Springs, staying over in Manning Camp and Grass Shack, and finishing on the highly touted Tanque Verde Ridge. (I might’ve made up the term backcountry loop. Is that a thing? I wasn’t sure what else described the kind of route we did). What I didn’t look at very closely was the amount of elevation gain and where the campgrounds were situated. We missed out on some pretty epic desert sunsets.
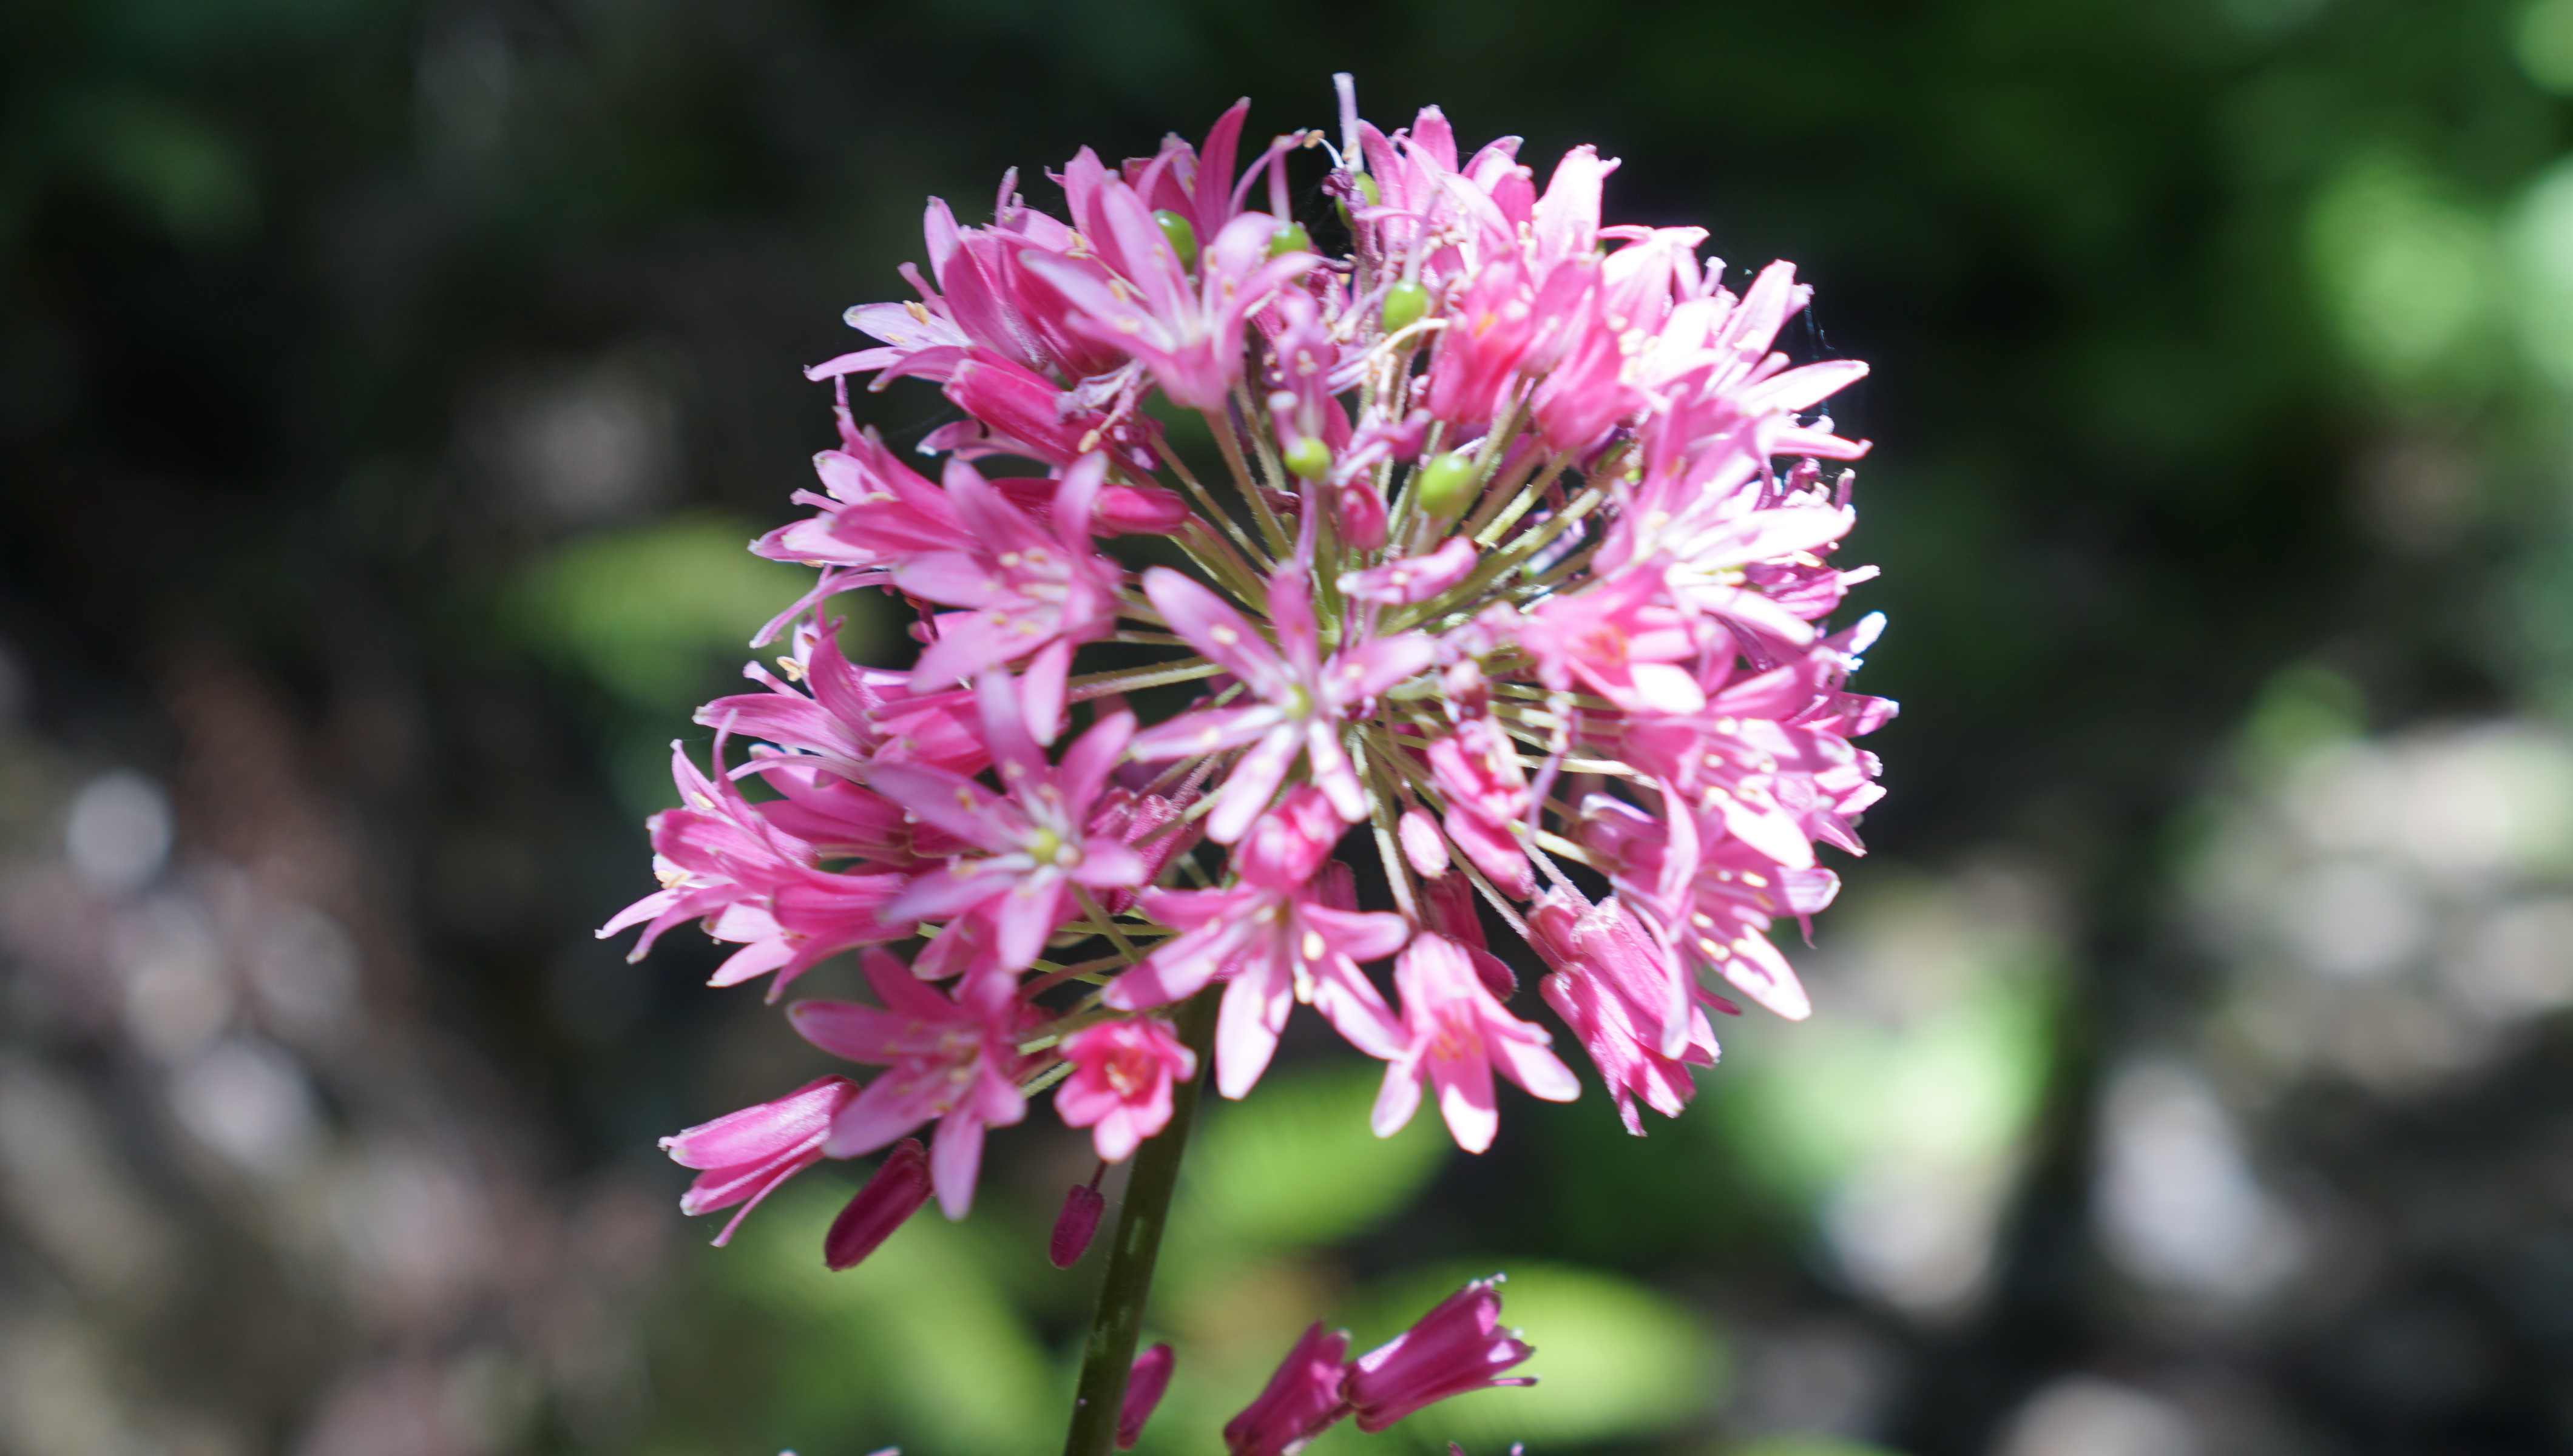
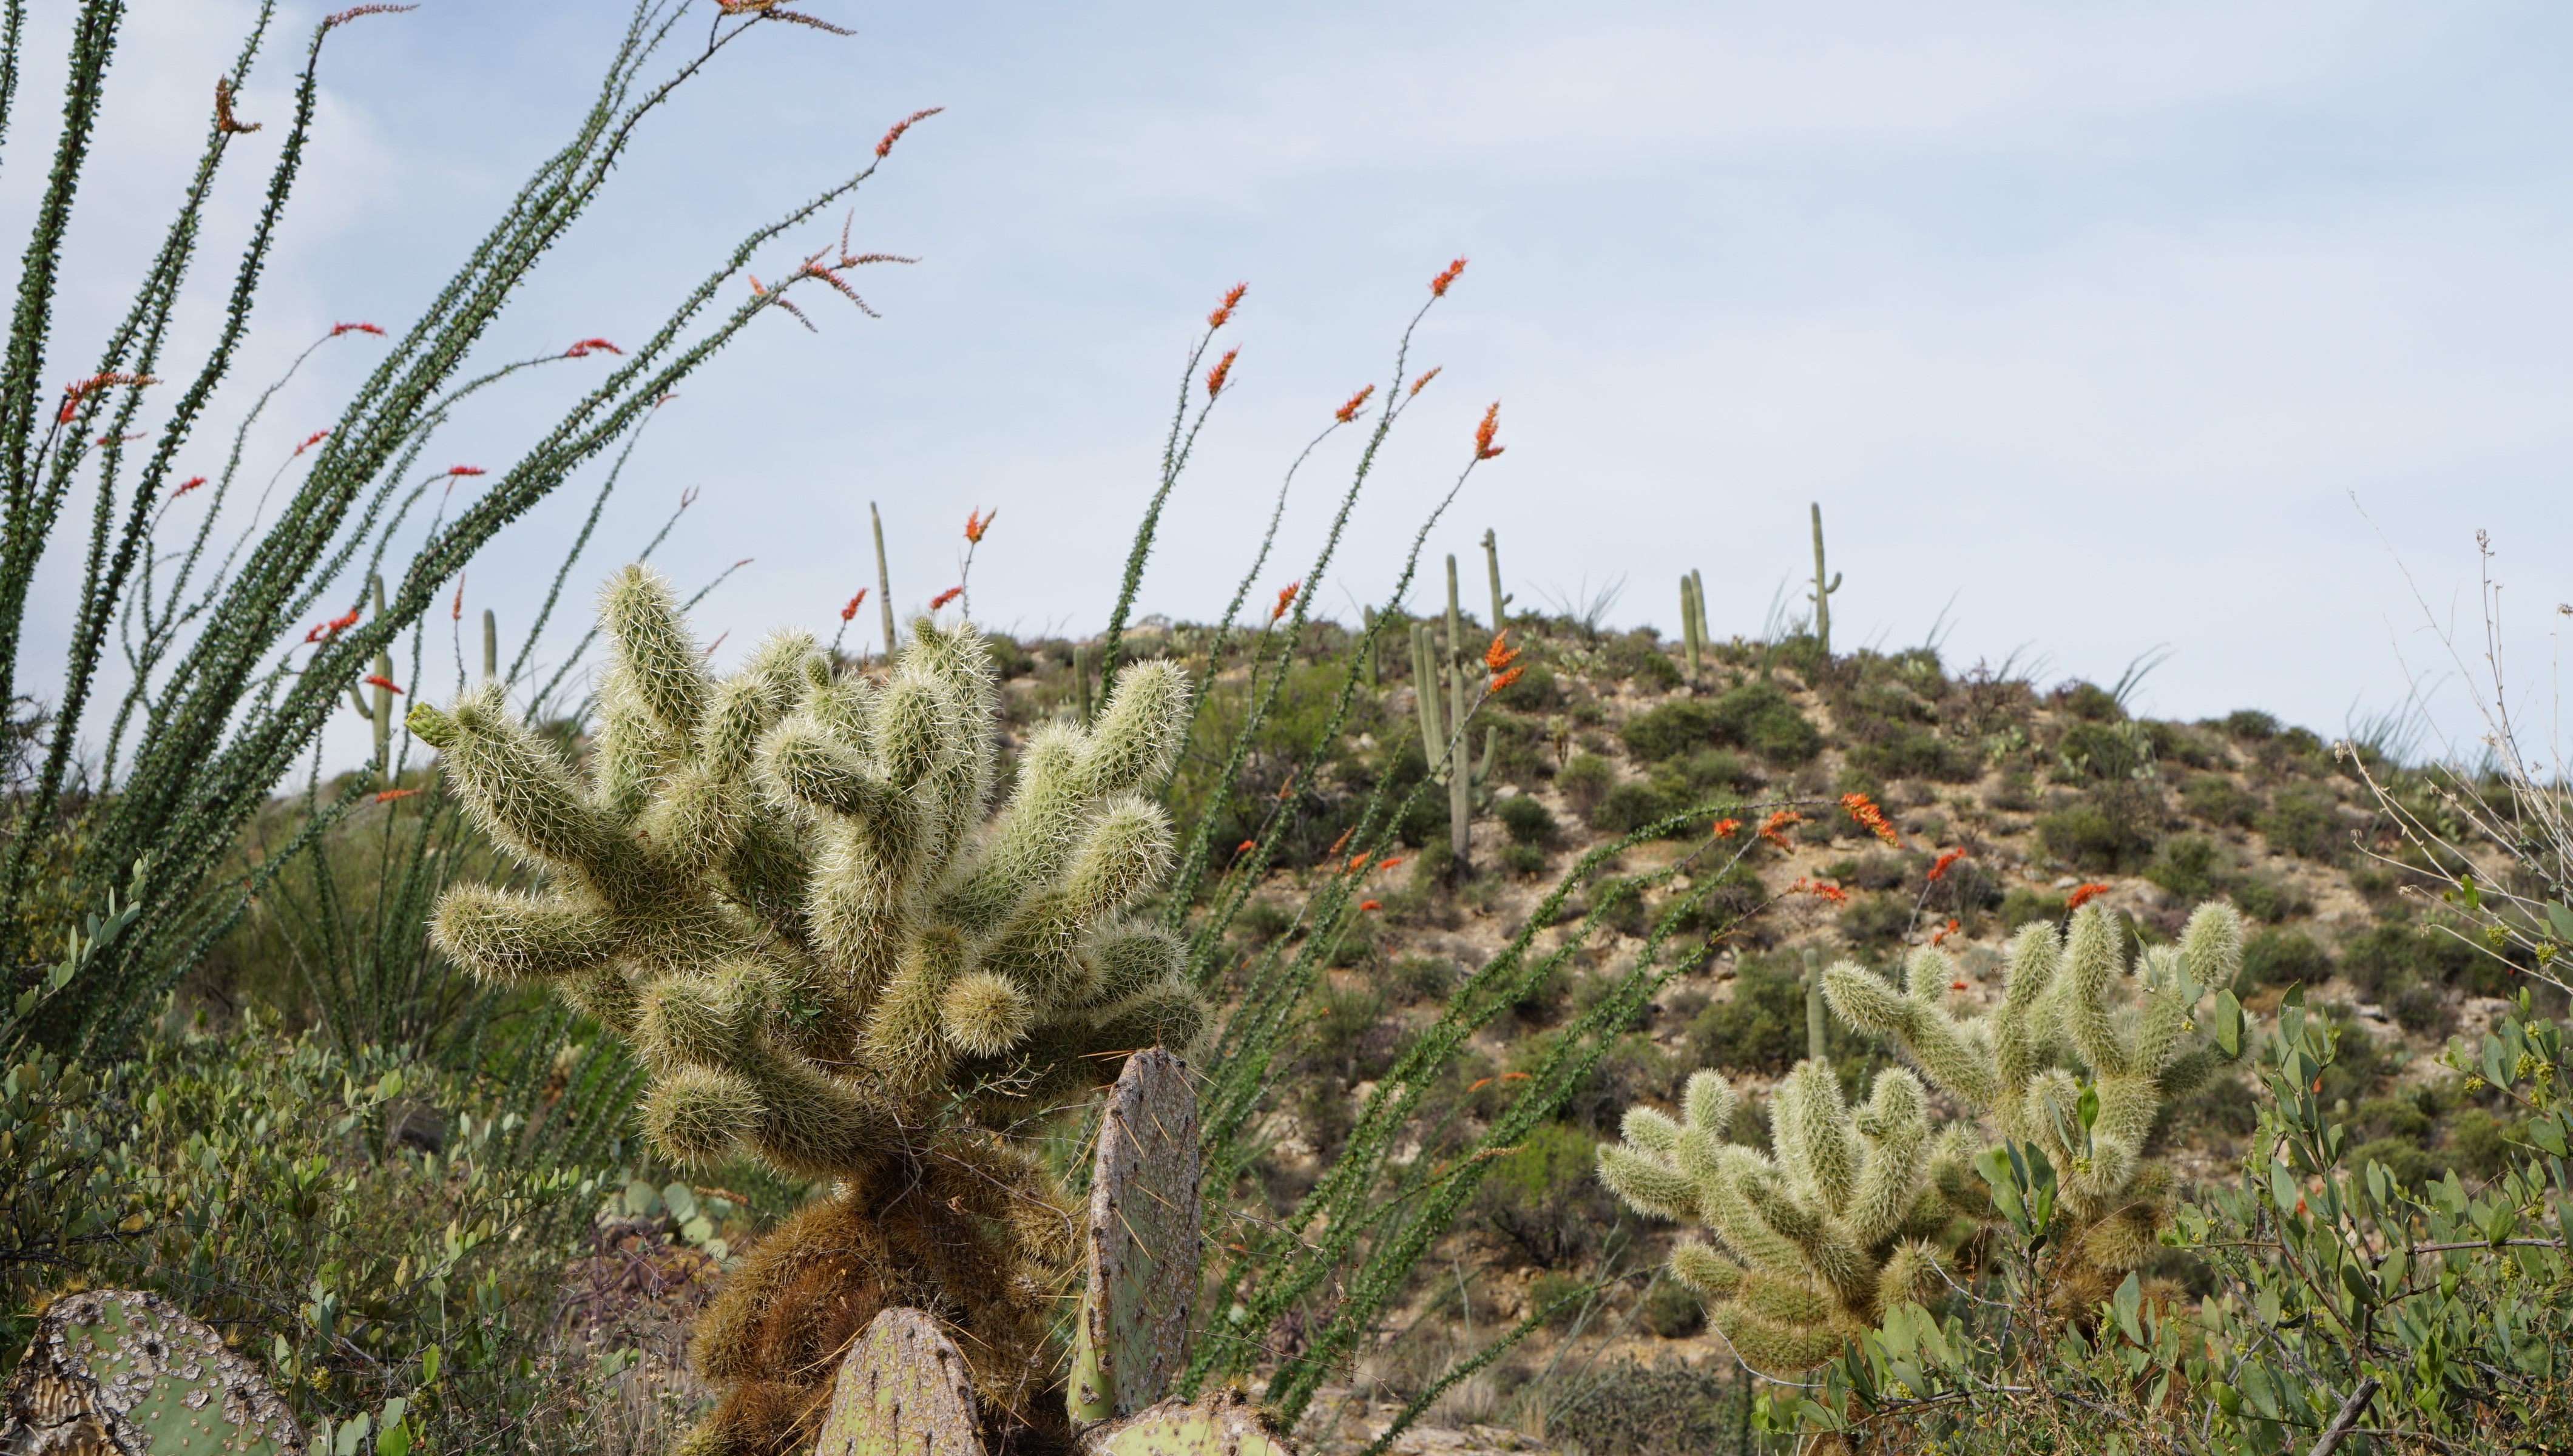
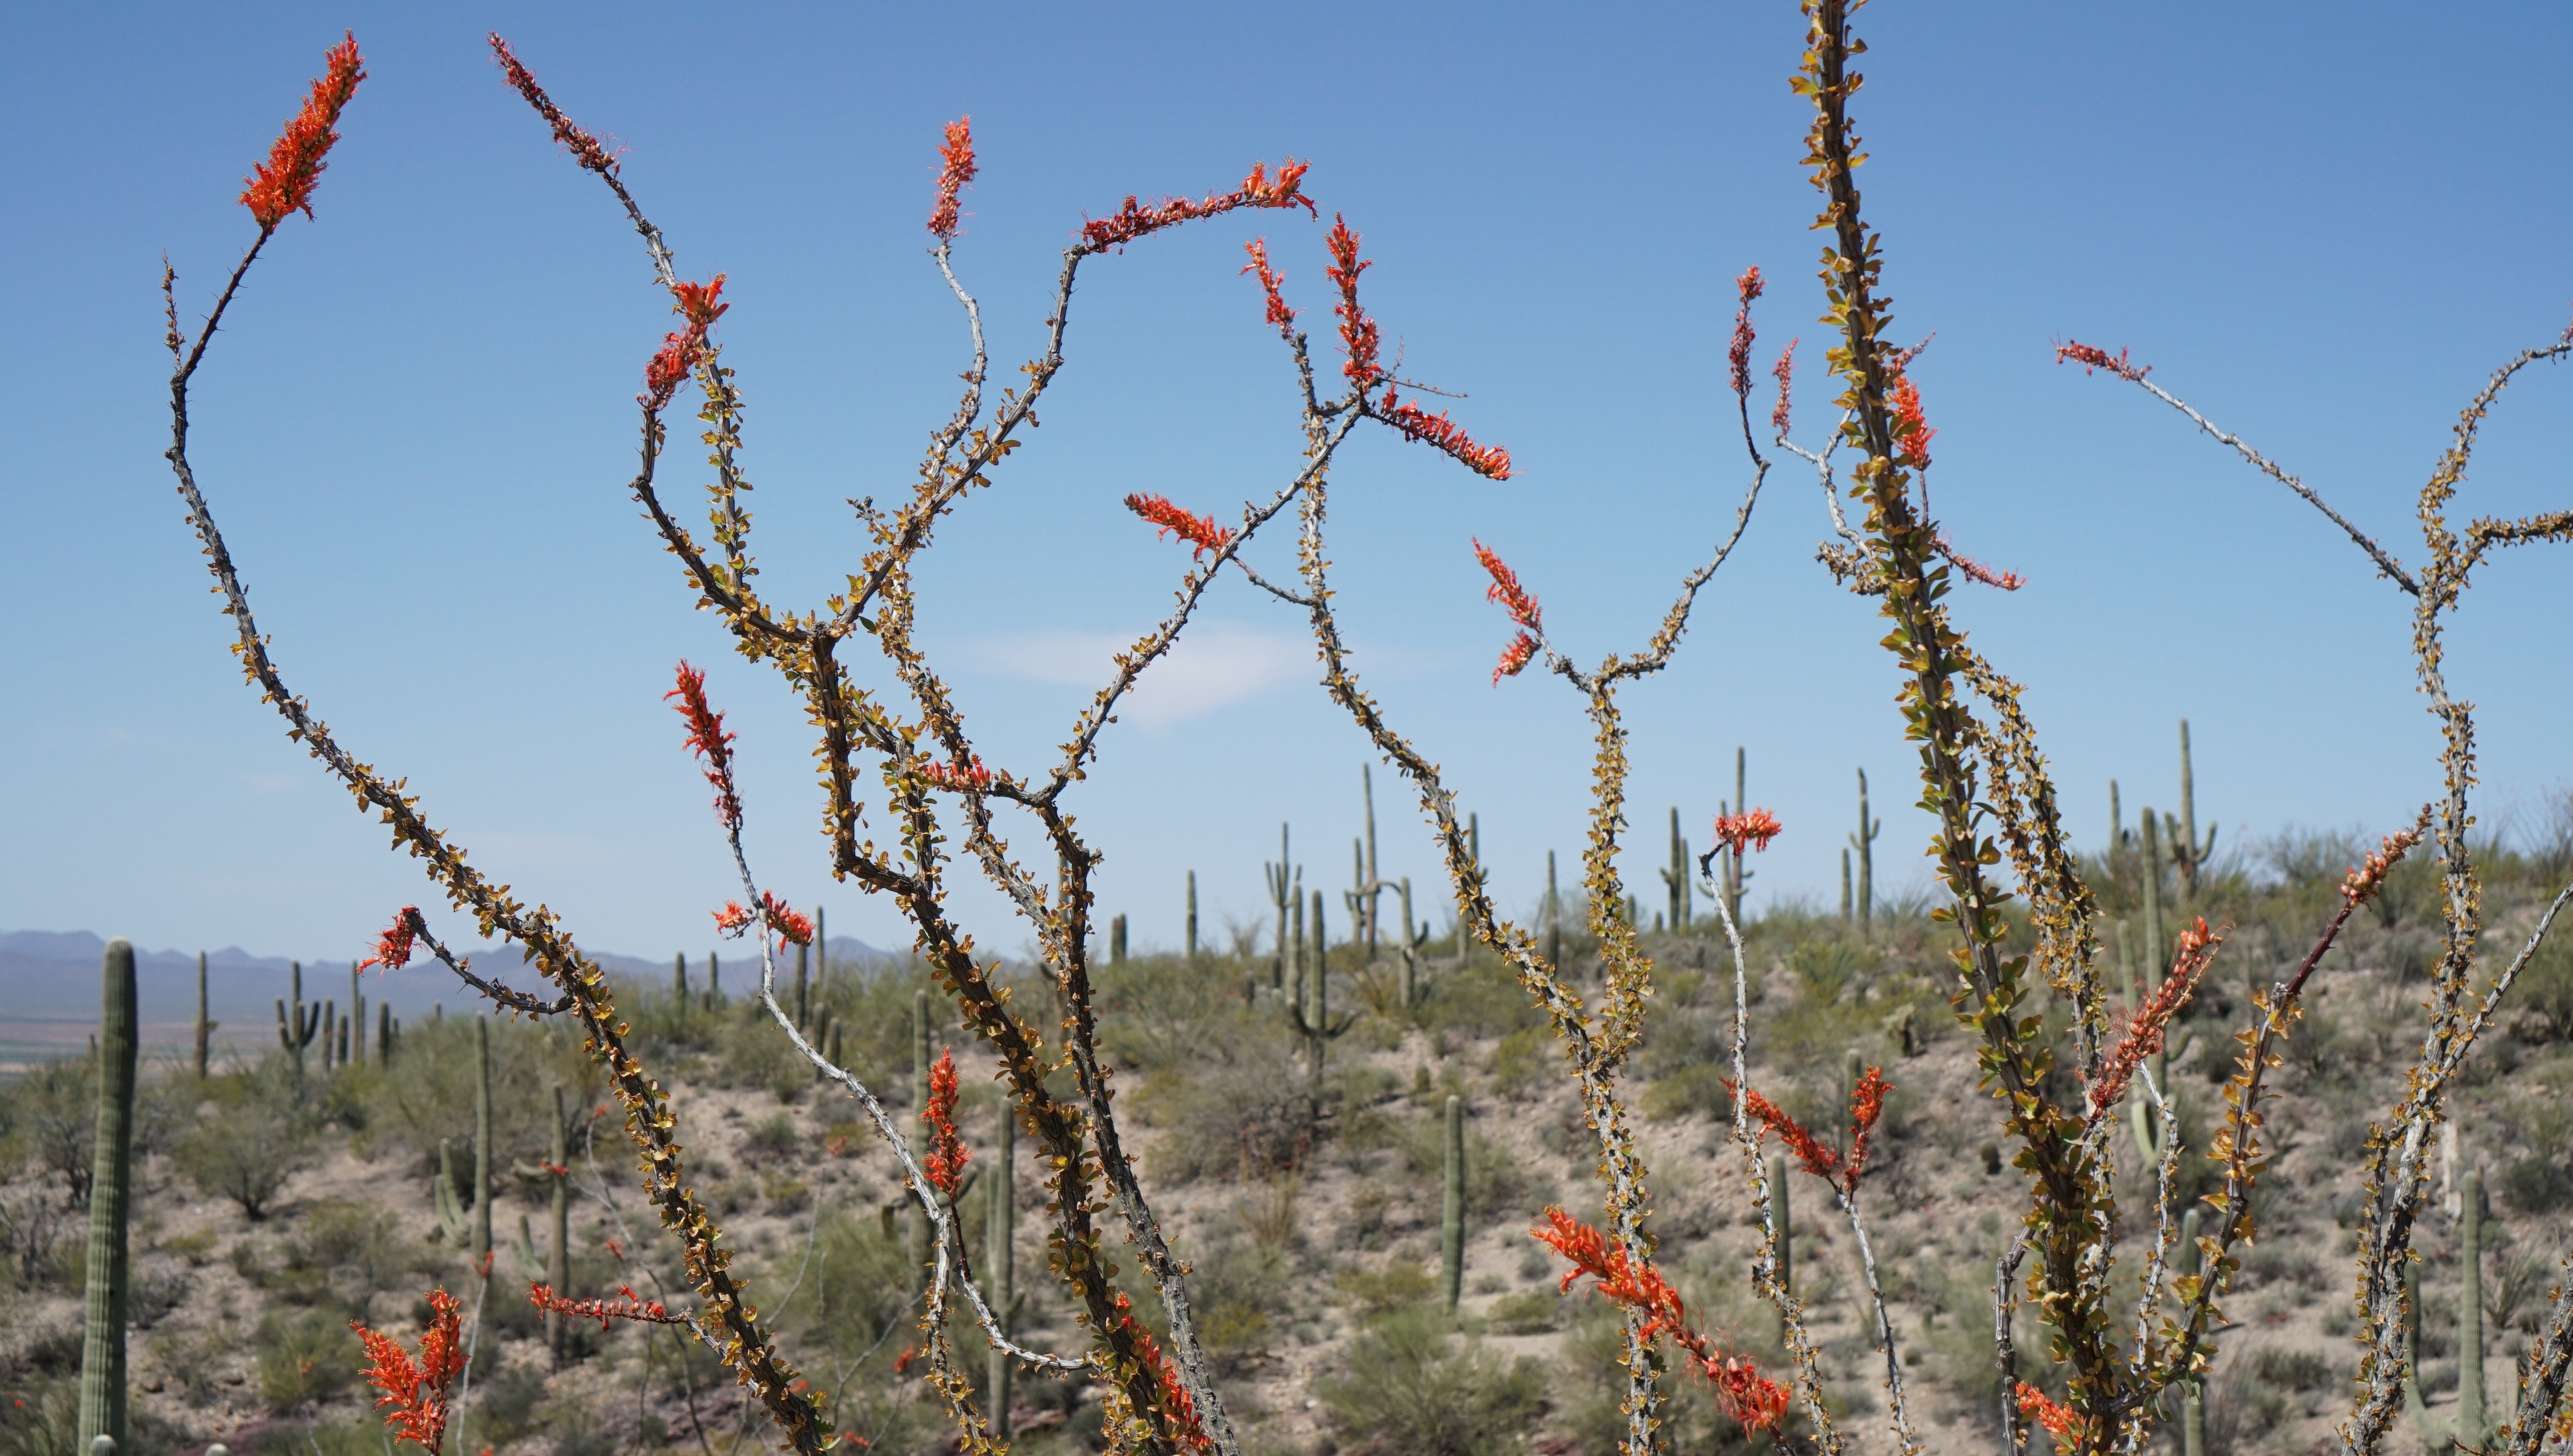
Day 1 of this hike started out reasonably alright. We started early to try and gain elevation before the afternoon heat. The first few miles rambles upwards through fields of saguaro, cholla, ocotillo and other desert flora. We had come at a good time as the ocotillo was in bloom as well as some other plants.
As we climbed higher, the saguaro began to thin out. Long dry grass replaced the various cacti. There were more trees here but it was hard to tell whether they were alive or not. I referred to this is the “grassy dead tree zone” for the remainder of the trip. I’ll be honest, it wasn’t quite as interesting as I had hoped. We left the cactus zone far too quickly and this new biome seemed to drag on forever.
The first major difference in desert hiking and hiking in the Sierra’s is the constant sun exposure. You don’t realize how draining that is until its 12:30 and you’re scrambling for the tiniest patch of shade behind a bush to eat lunch. We felt beat and we were only 6 miles in at Douglas Springs. The spring was pretty low and wasn’t flowing much so we opted not to refill any of our containers. We had packed enough water to last us the full day. After lunch we continued our drudge up the mountain. Grass fell way to an abundance of manzanita. Dead trees were replaced with live ones and the temperature evened out around 80 with a nice breeze. At least in this zone there was some shade from the heat. We topped out at Cow Head Saddle, an intersection point we would hike through on the third day. Yet more elevation gain awaited us as we turned toward the east and continued up the mountain. The ranger at the permit office told us it was 12 miles from Douglas Springs to Manning Camp. My GPS track begs to differ as we clocked in at 8pm and 13.5 miles. Day 1 was rough.
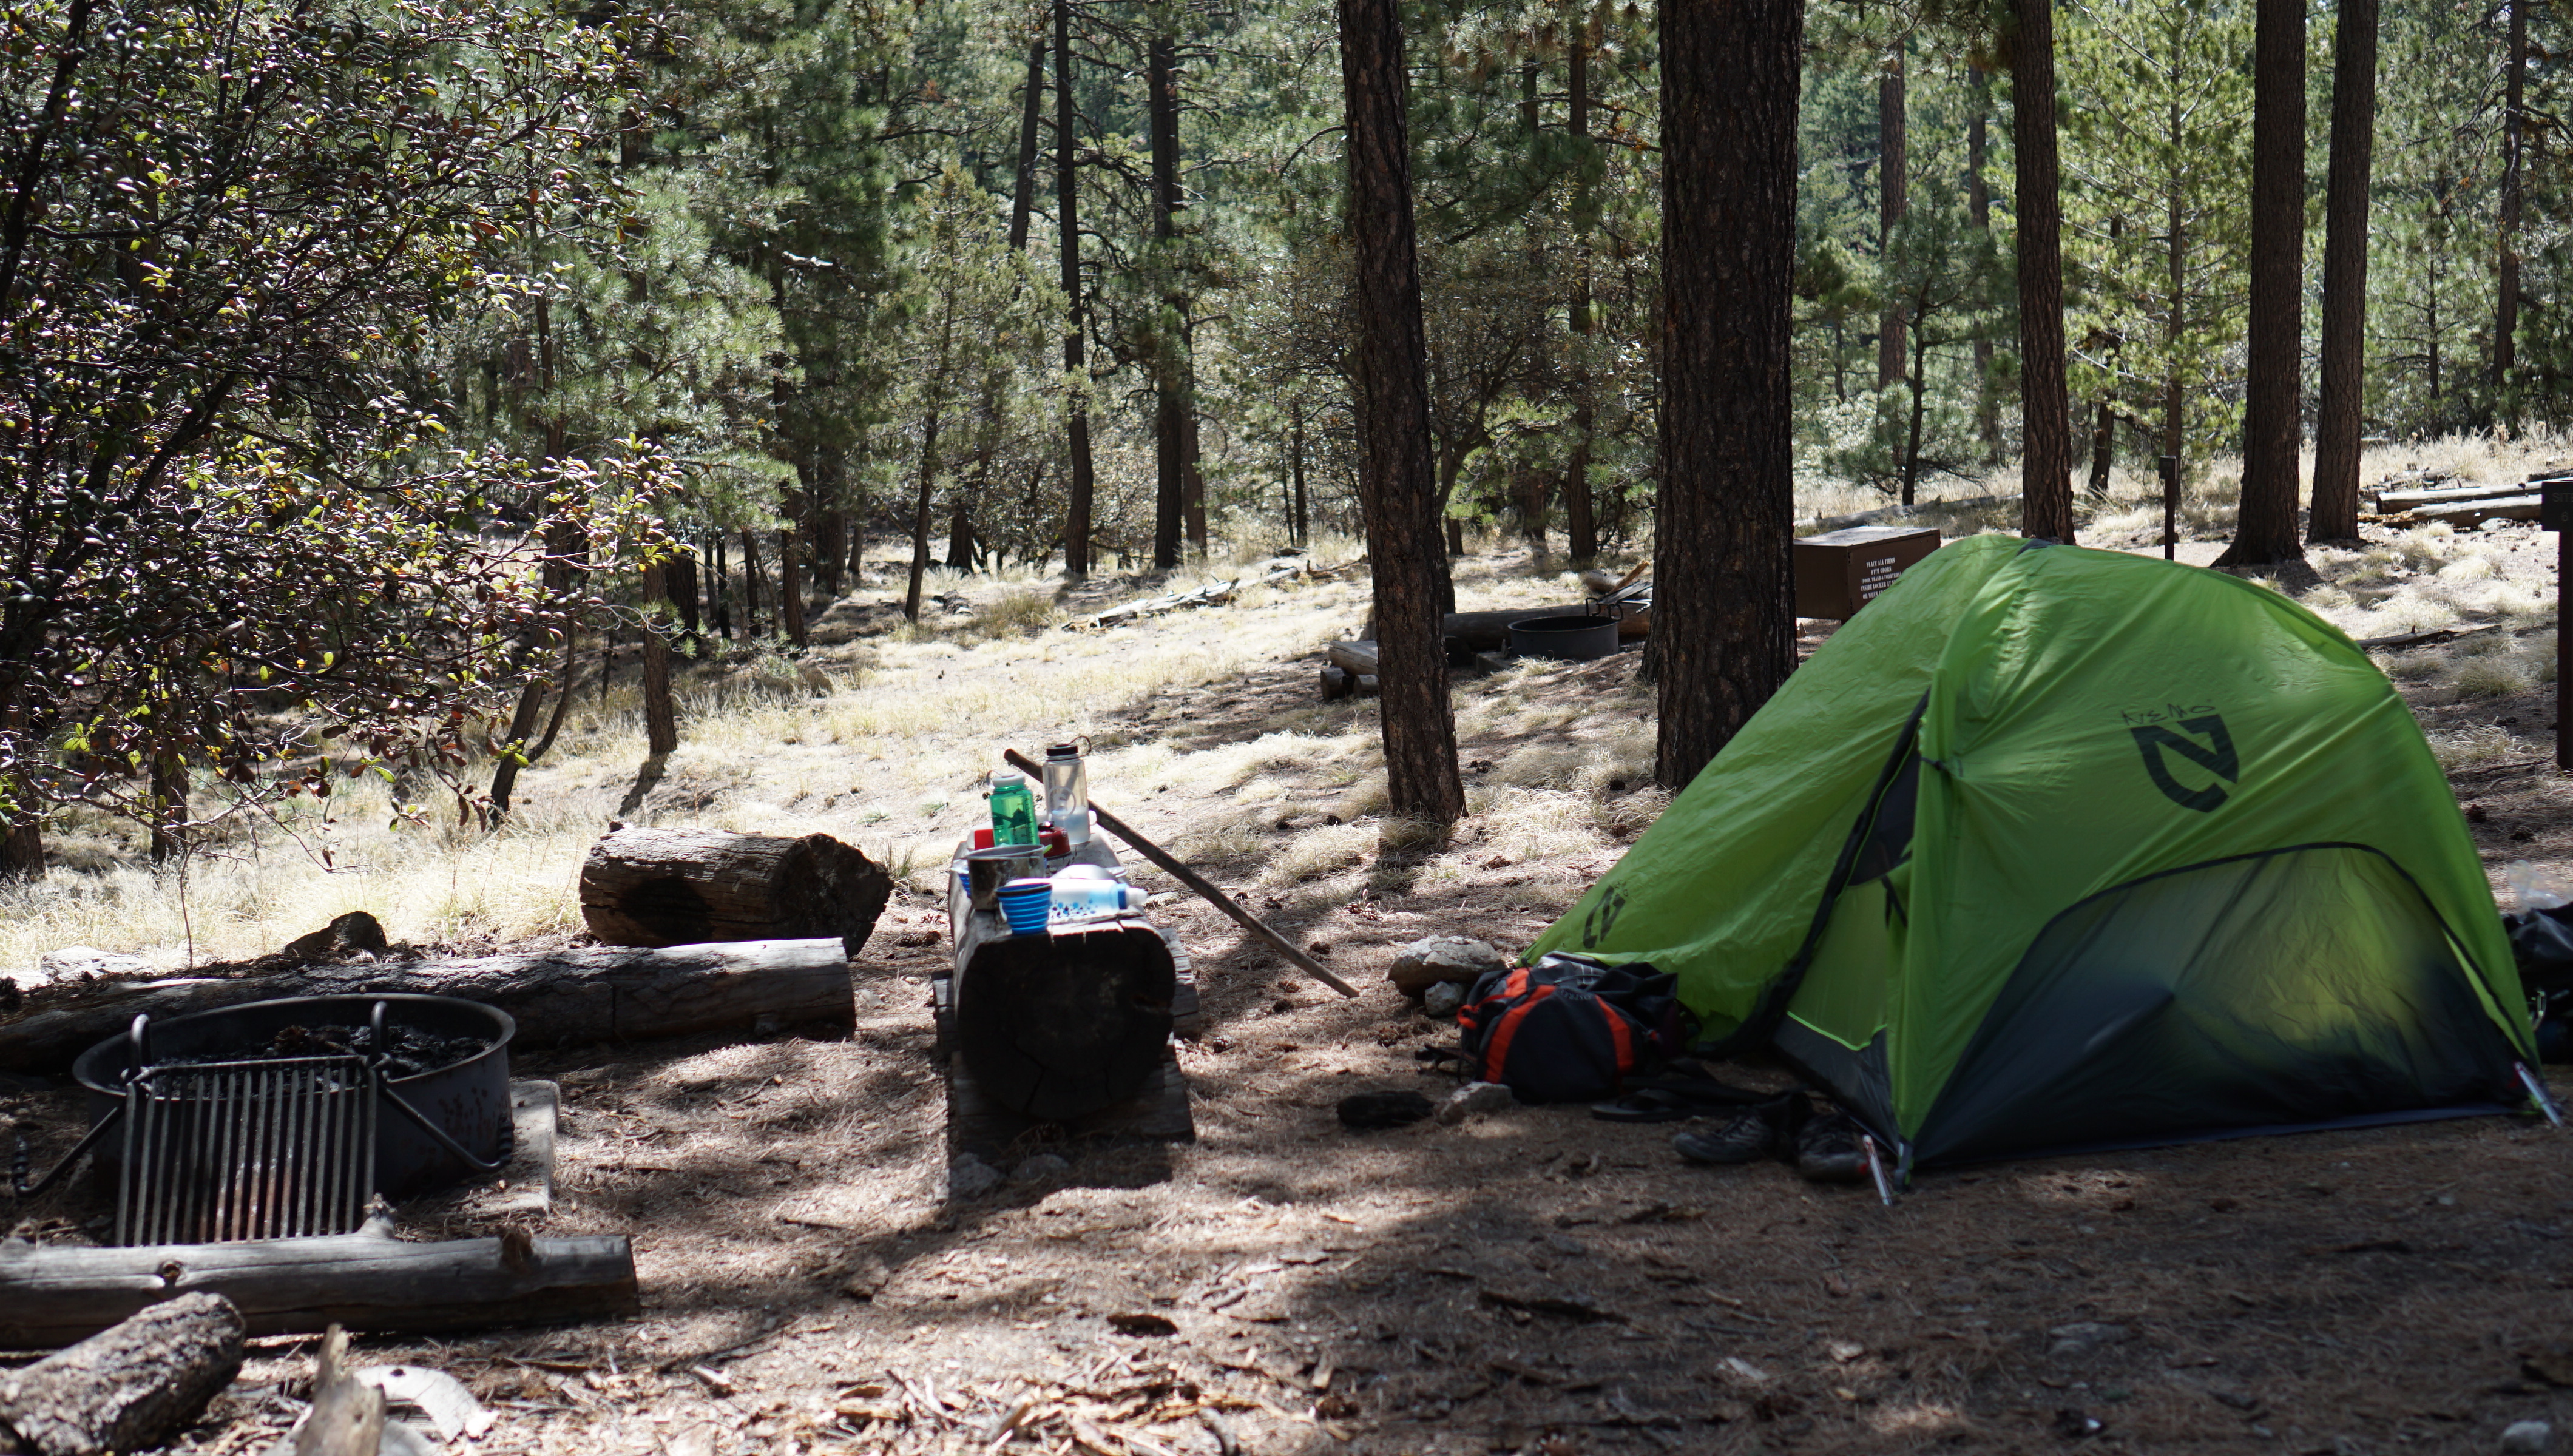
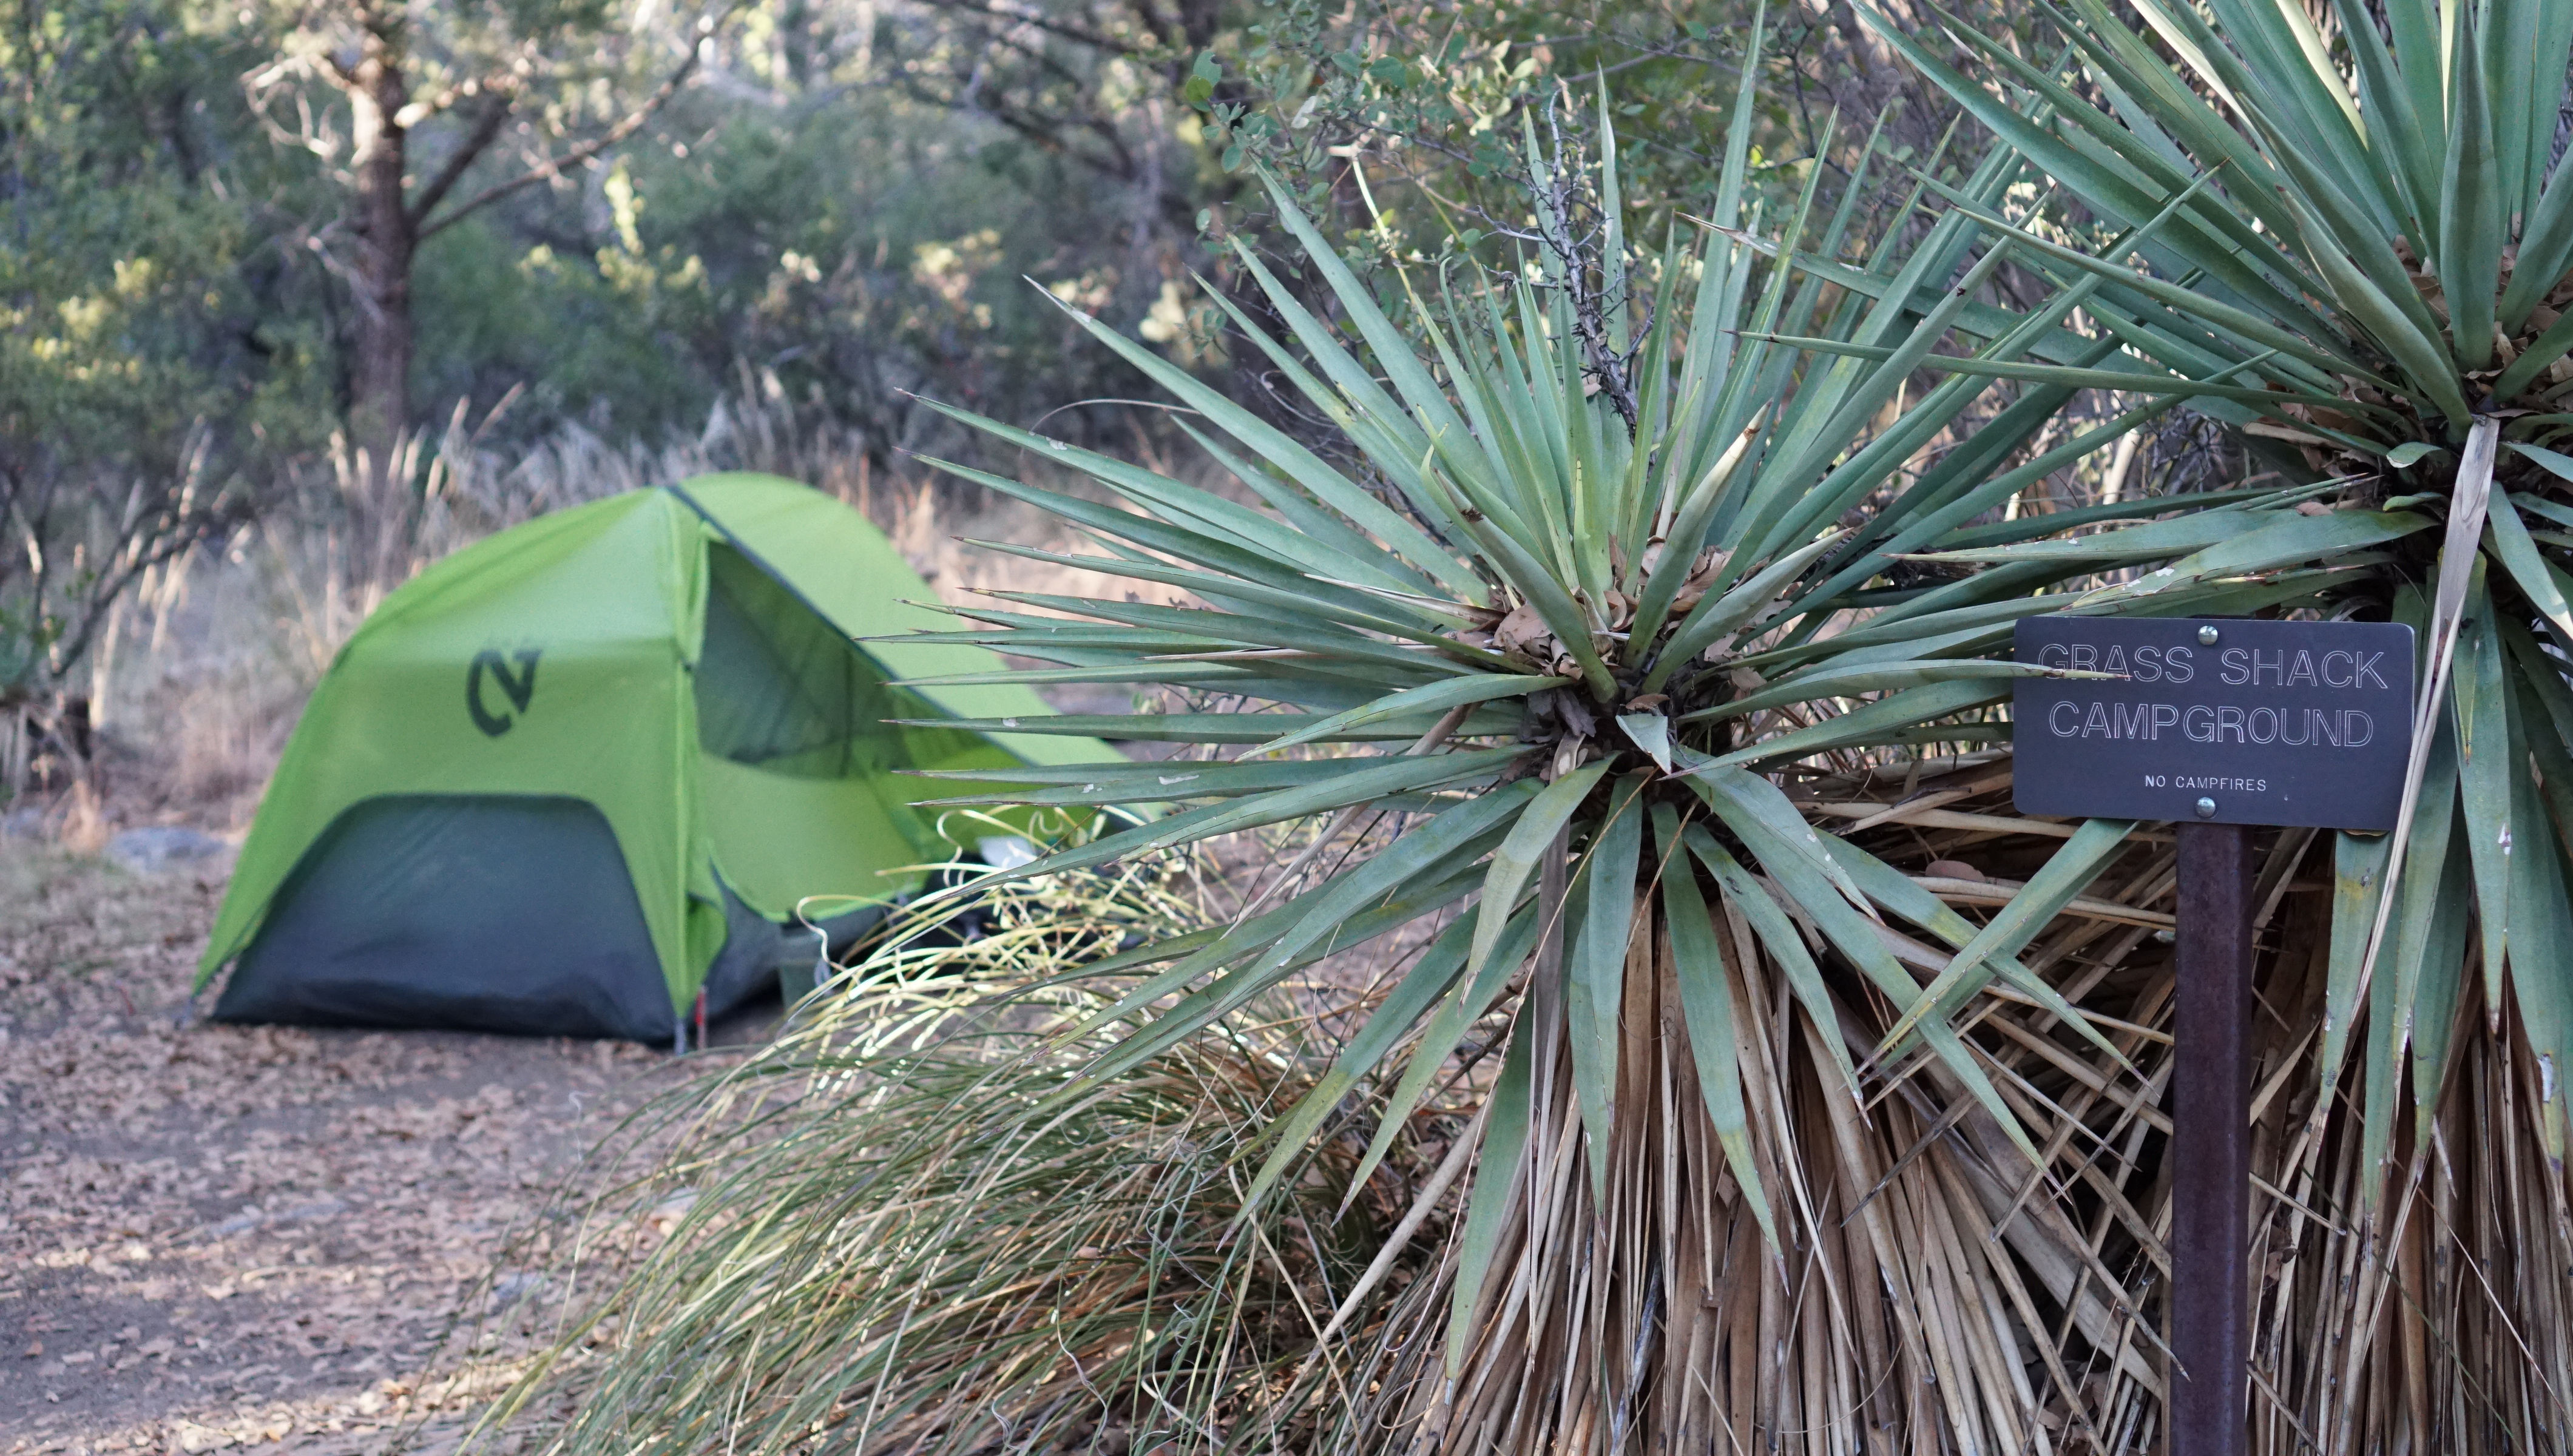
Day 2 was a planned short day. From Manning Camp to Grass Shack is a short 4.5 miles so we took our time making breakfast, refilling all our water and breaking camp. Manning Camp has established fire pits at each of the 6 campsites where you can burn any downed wood you find on the ground. This raised a few eyebrows when the ranger told us this but became obvious when we made it to 7000ft. The top of the mountain is a massive pine forest. You would never think you were even in Arizona anymore since it felt just like the Sierras. We made a fire to ward off the morning chill and enjoyed our coffee. Temperatures were around the mid 40’s during the night and warmed up to around mid 60s by the early afternoon. Manning Camp has a large natural spring next to it that flows throughout the year. We filled up every reservoir we had not knowing the quality of the spring at the subsequent camp.
We probably started hiking too late as we hit the trail at the hottest time of the day. Once again exposure was our enemy and made those 4.5 miles drag on forever, despite being mostly downhill. We rolled into Grass Shack camp around 3 and promptly set up camp just so we could relax and do nothing. Grass Shack is situated along a stream that was still trickling in early April. The goal for the rest of the day was just to relax and prepare ourselves for an early start and 13 miles the next day.
Day 3 started at 6:30am. We wanted to be well on our way along the ridge before noon. We were pretty efficient eating breakfast and breaking camp. We left not too long after some other backpackers who were doing the AZT. The initial leg of the day was about 1000ft back up to Cow Head Saddle and then onto the Tanque Verde Ridge trail.
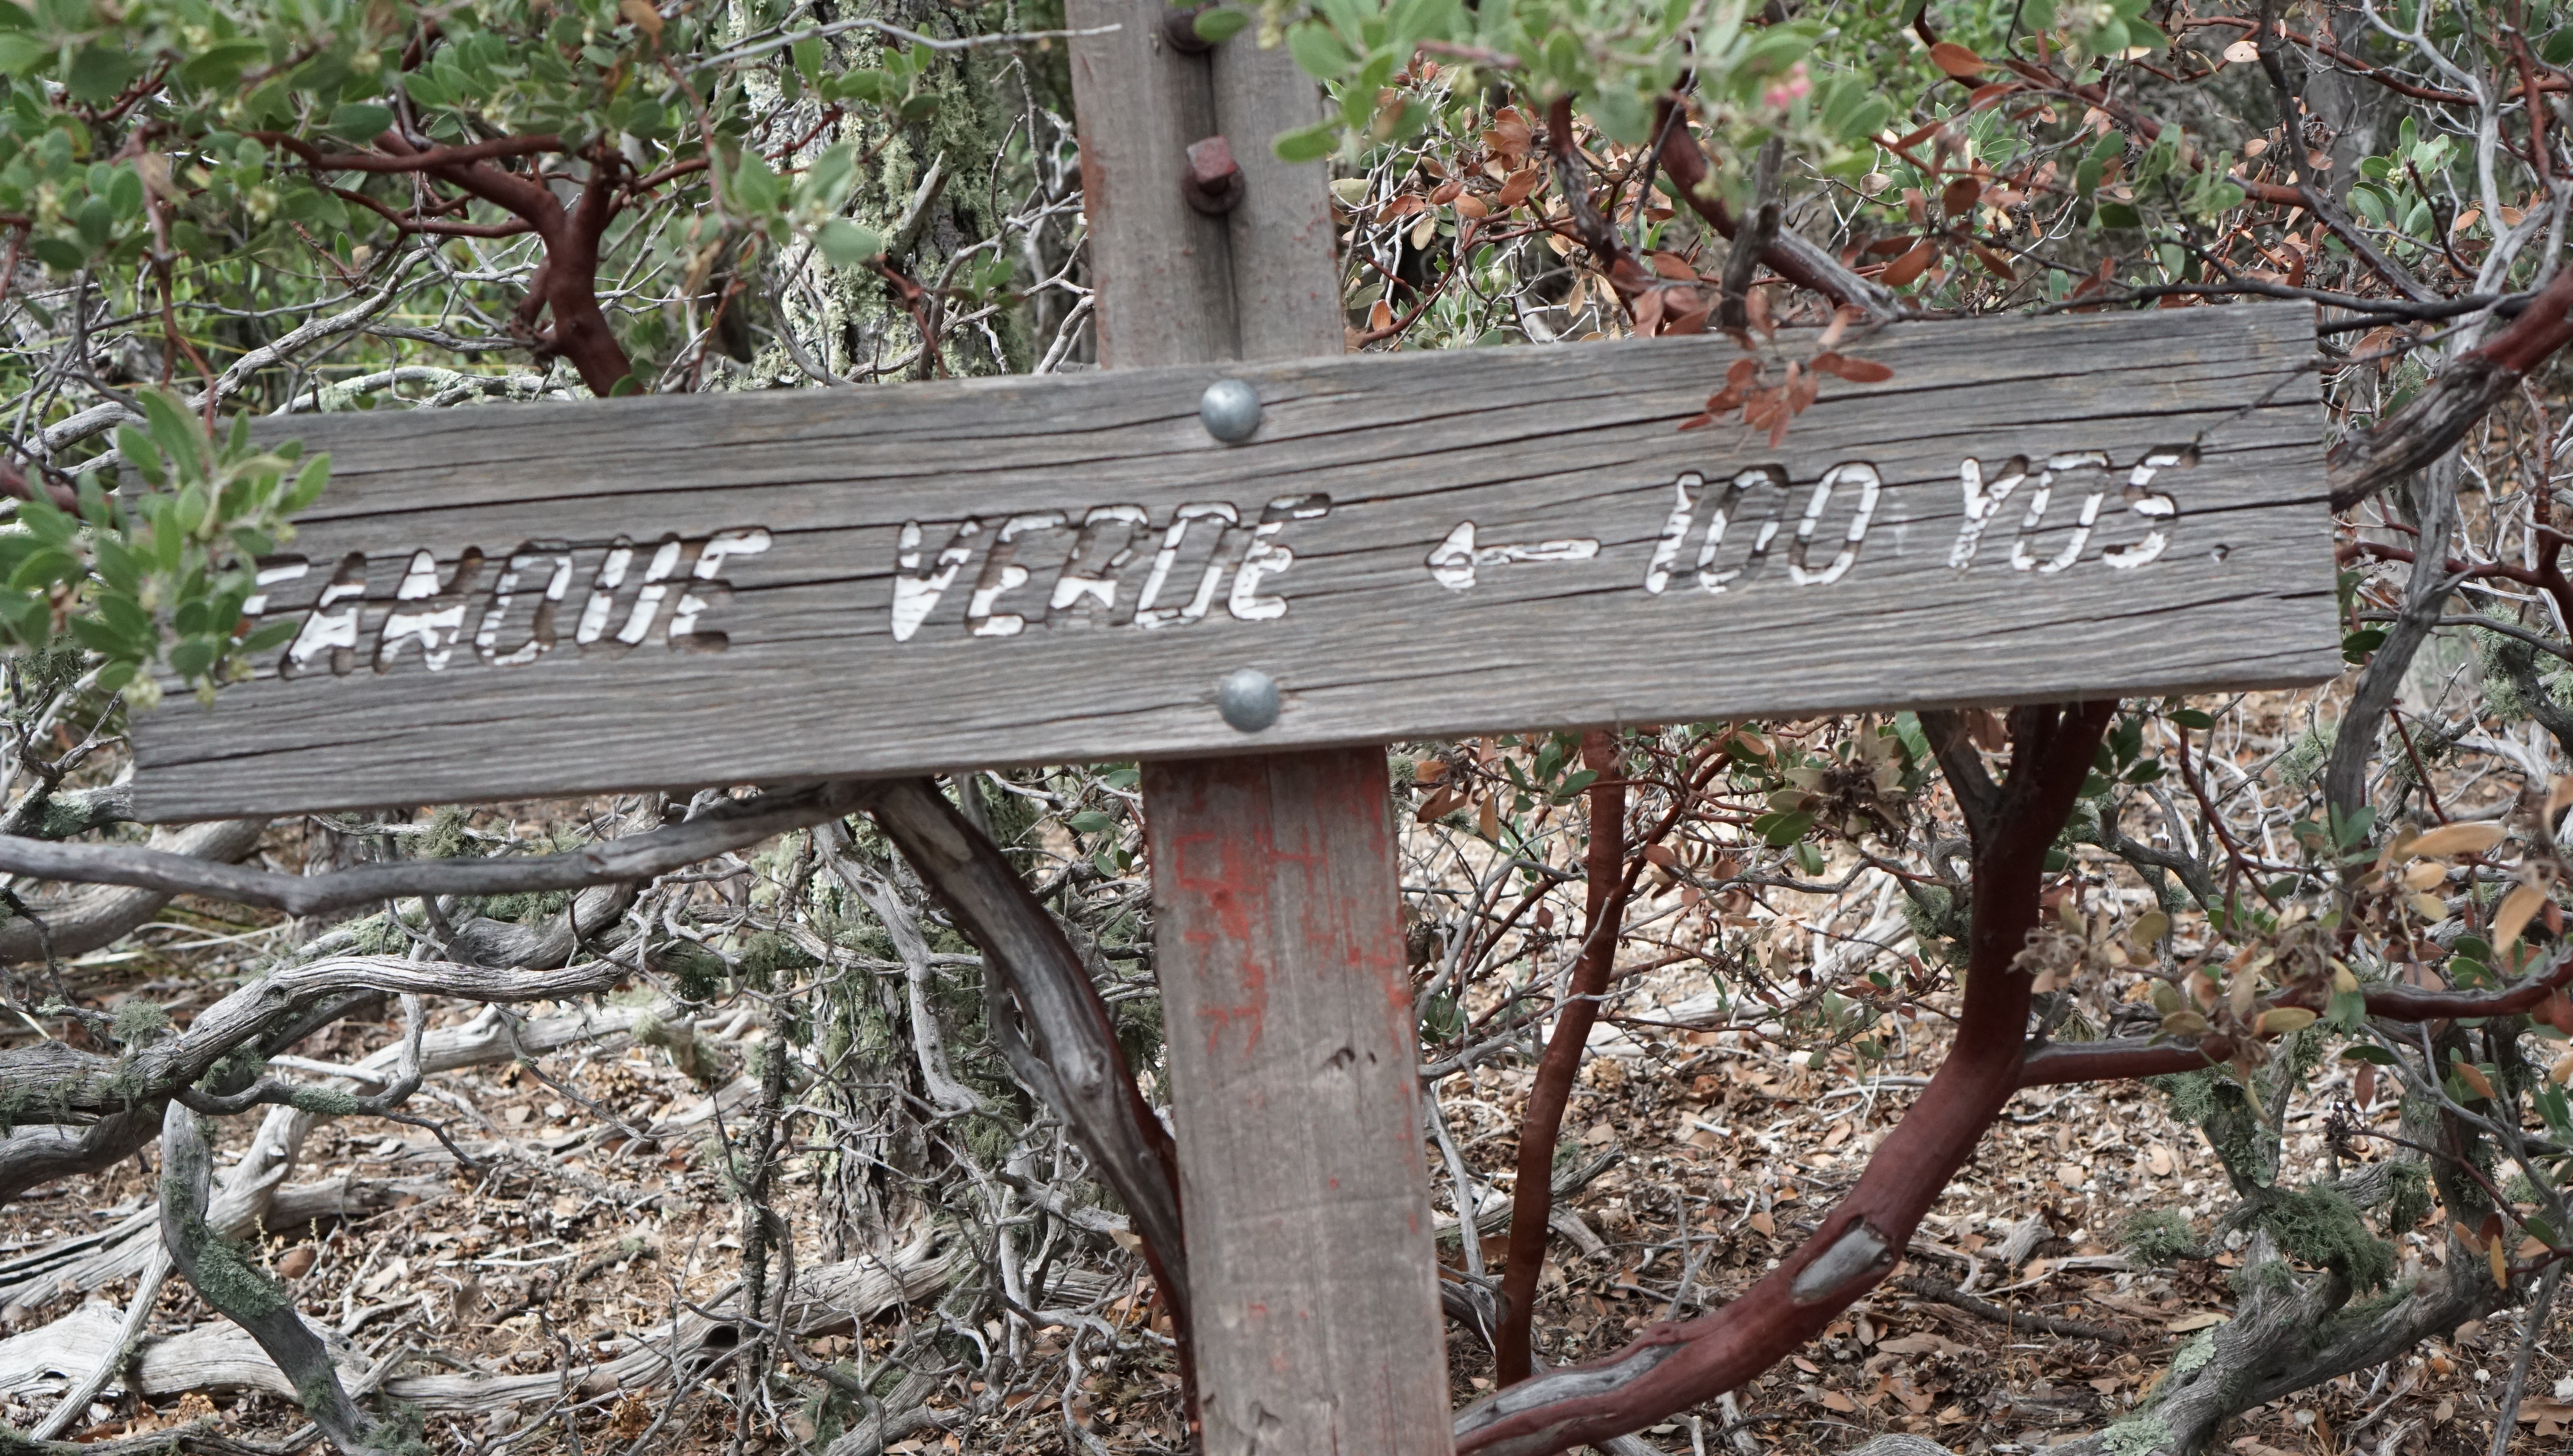
I’ve never backpacked on so much scree and fallen rock as this trail. Parts of it just seemed like you were hiking in a narrow wash. We followed the ridge and took the short side trip to top out on Tanque Verde Peak. The sign said a misleading 100 yards to the peak when in reality it was about 100 ft.
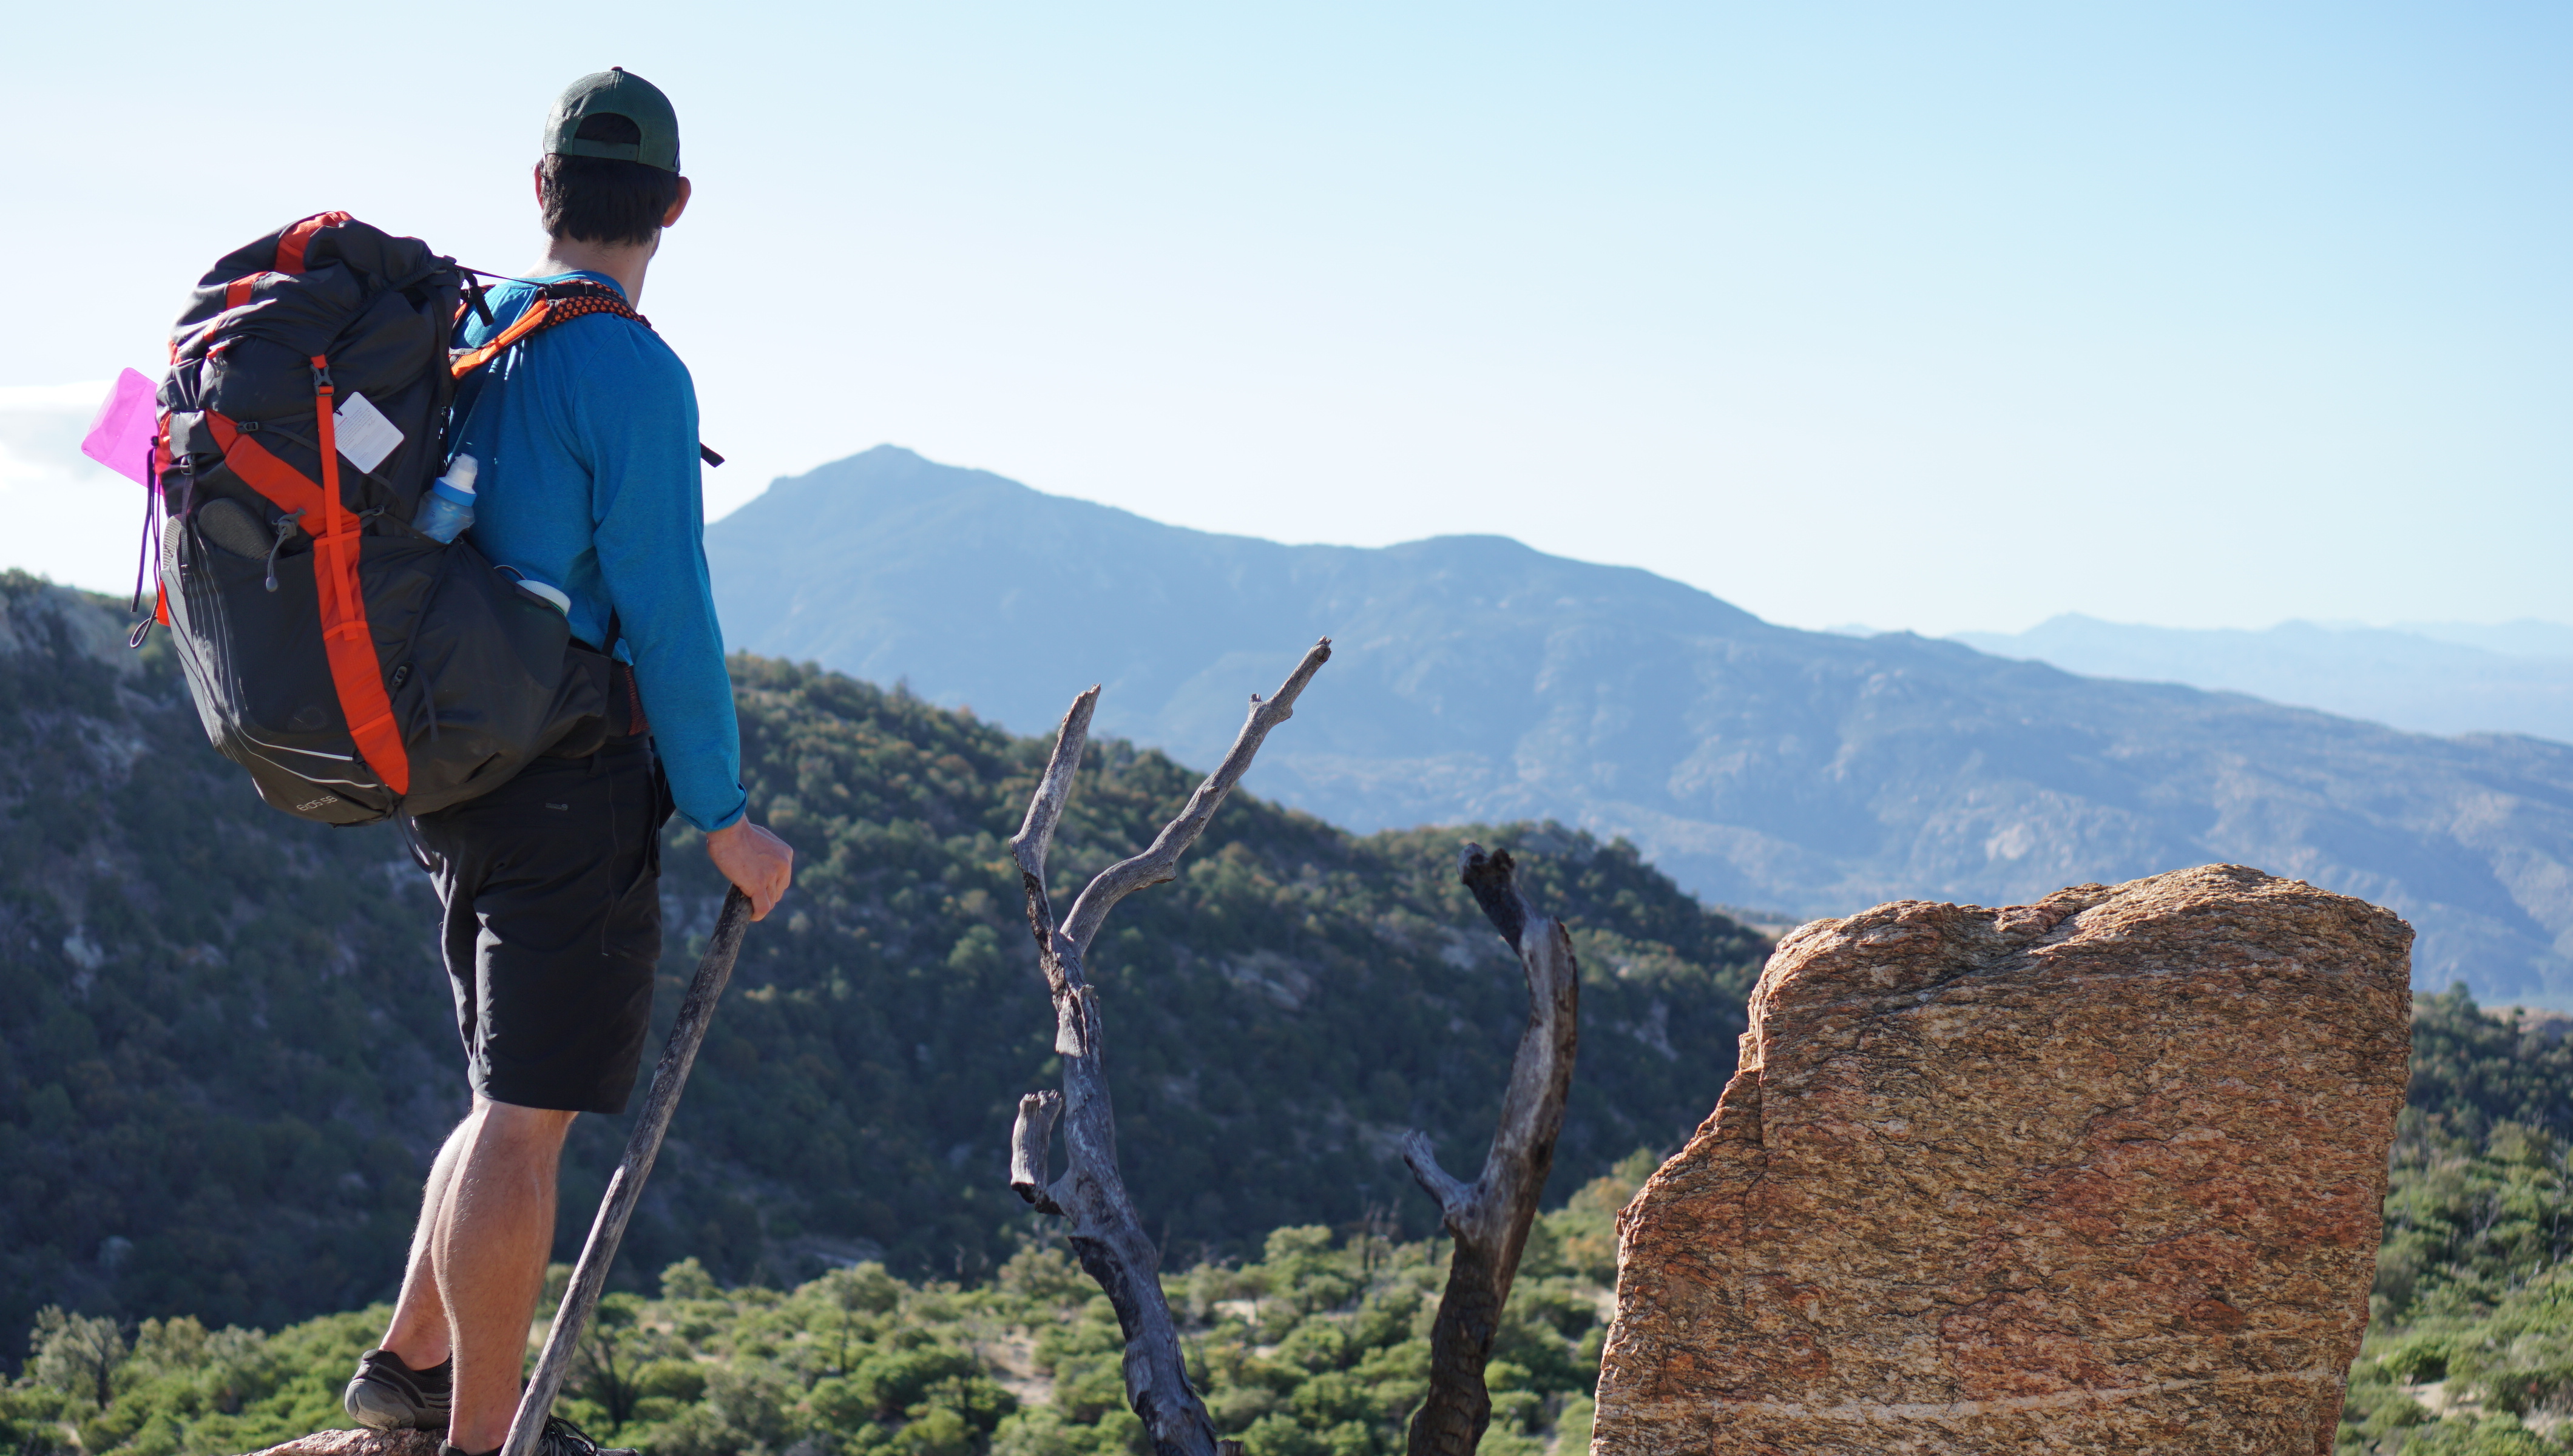
For the first time we were able to have views of the surrounding area. From the ridge-line we could see everywhere we hiked the first and second days as well as out to Tucson and the surrounding island peaks. Hill after hill we descended along the ridge. Through the manzanita zone, way too long through the grass and dead tree zone, and finally back into the saguaro zone. A hot wind picked up in the afternoon as we did the final stint down Tanque Verde Ridge, dodging every sharp and prickly thing along the trail.
In summary, I’m happy to have gone and had the experience backpacking in a different type of terrain and ecosystem. It makes hiking in the Sierra’s seem like a shade and water-filled dream.


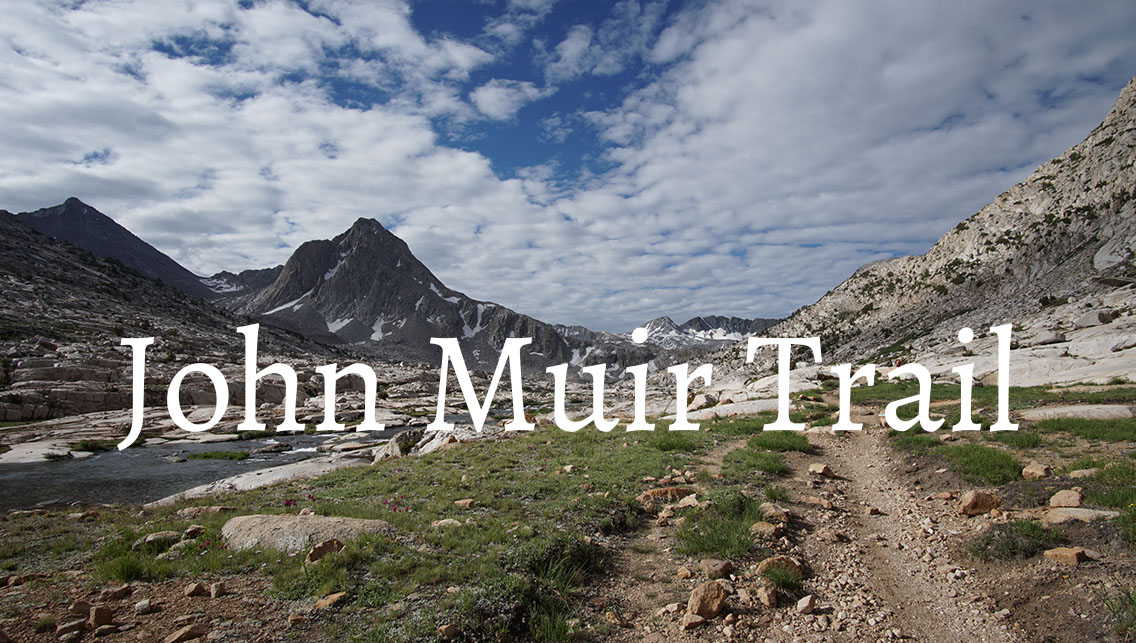


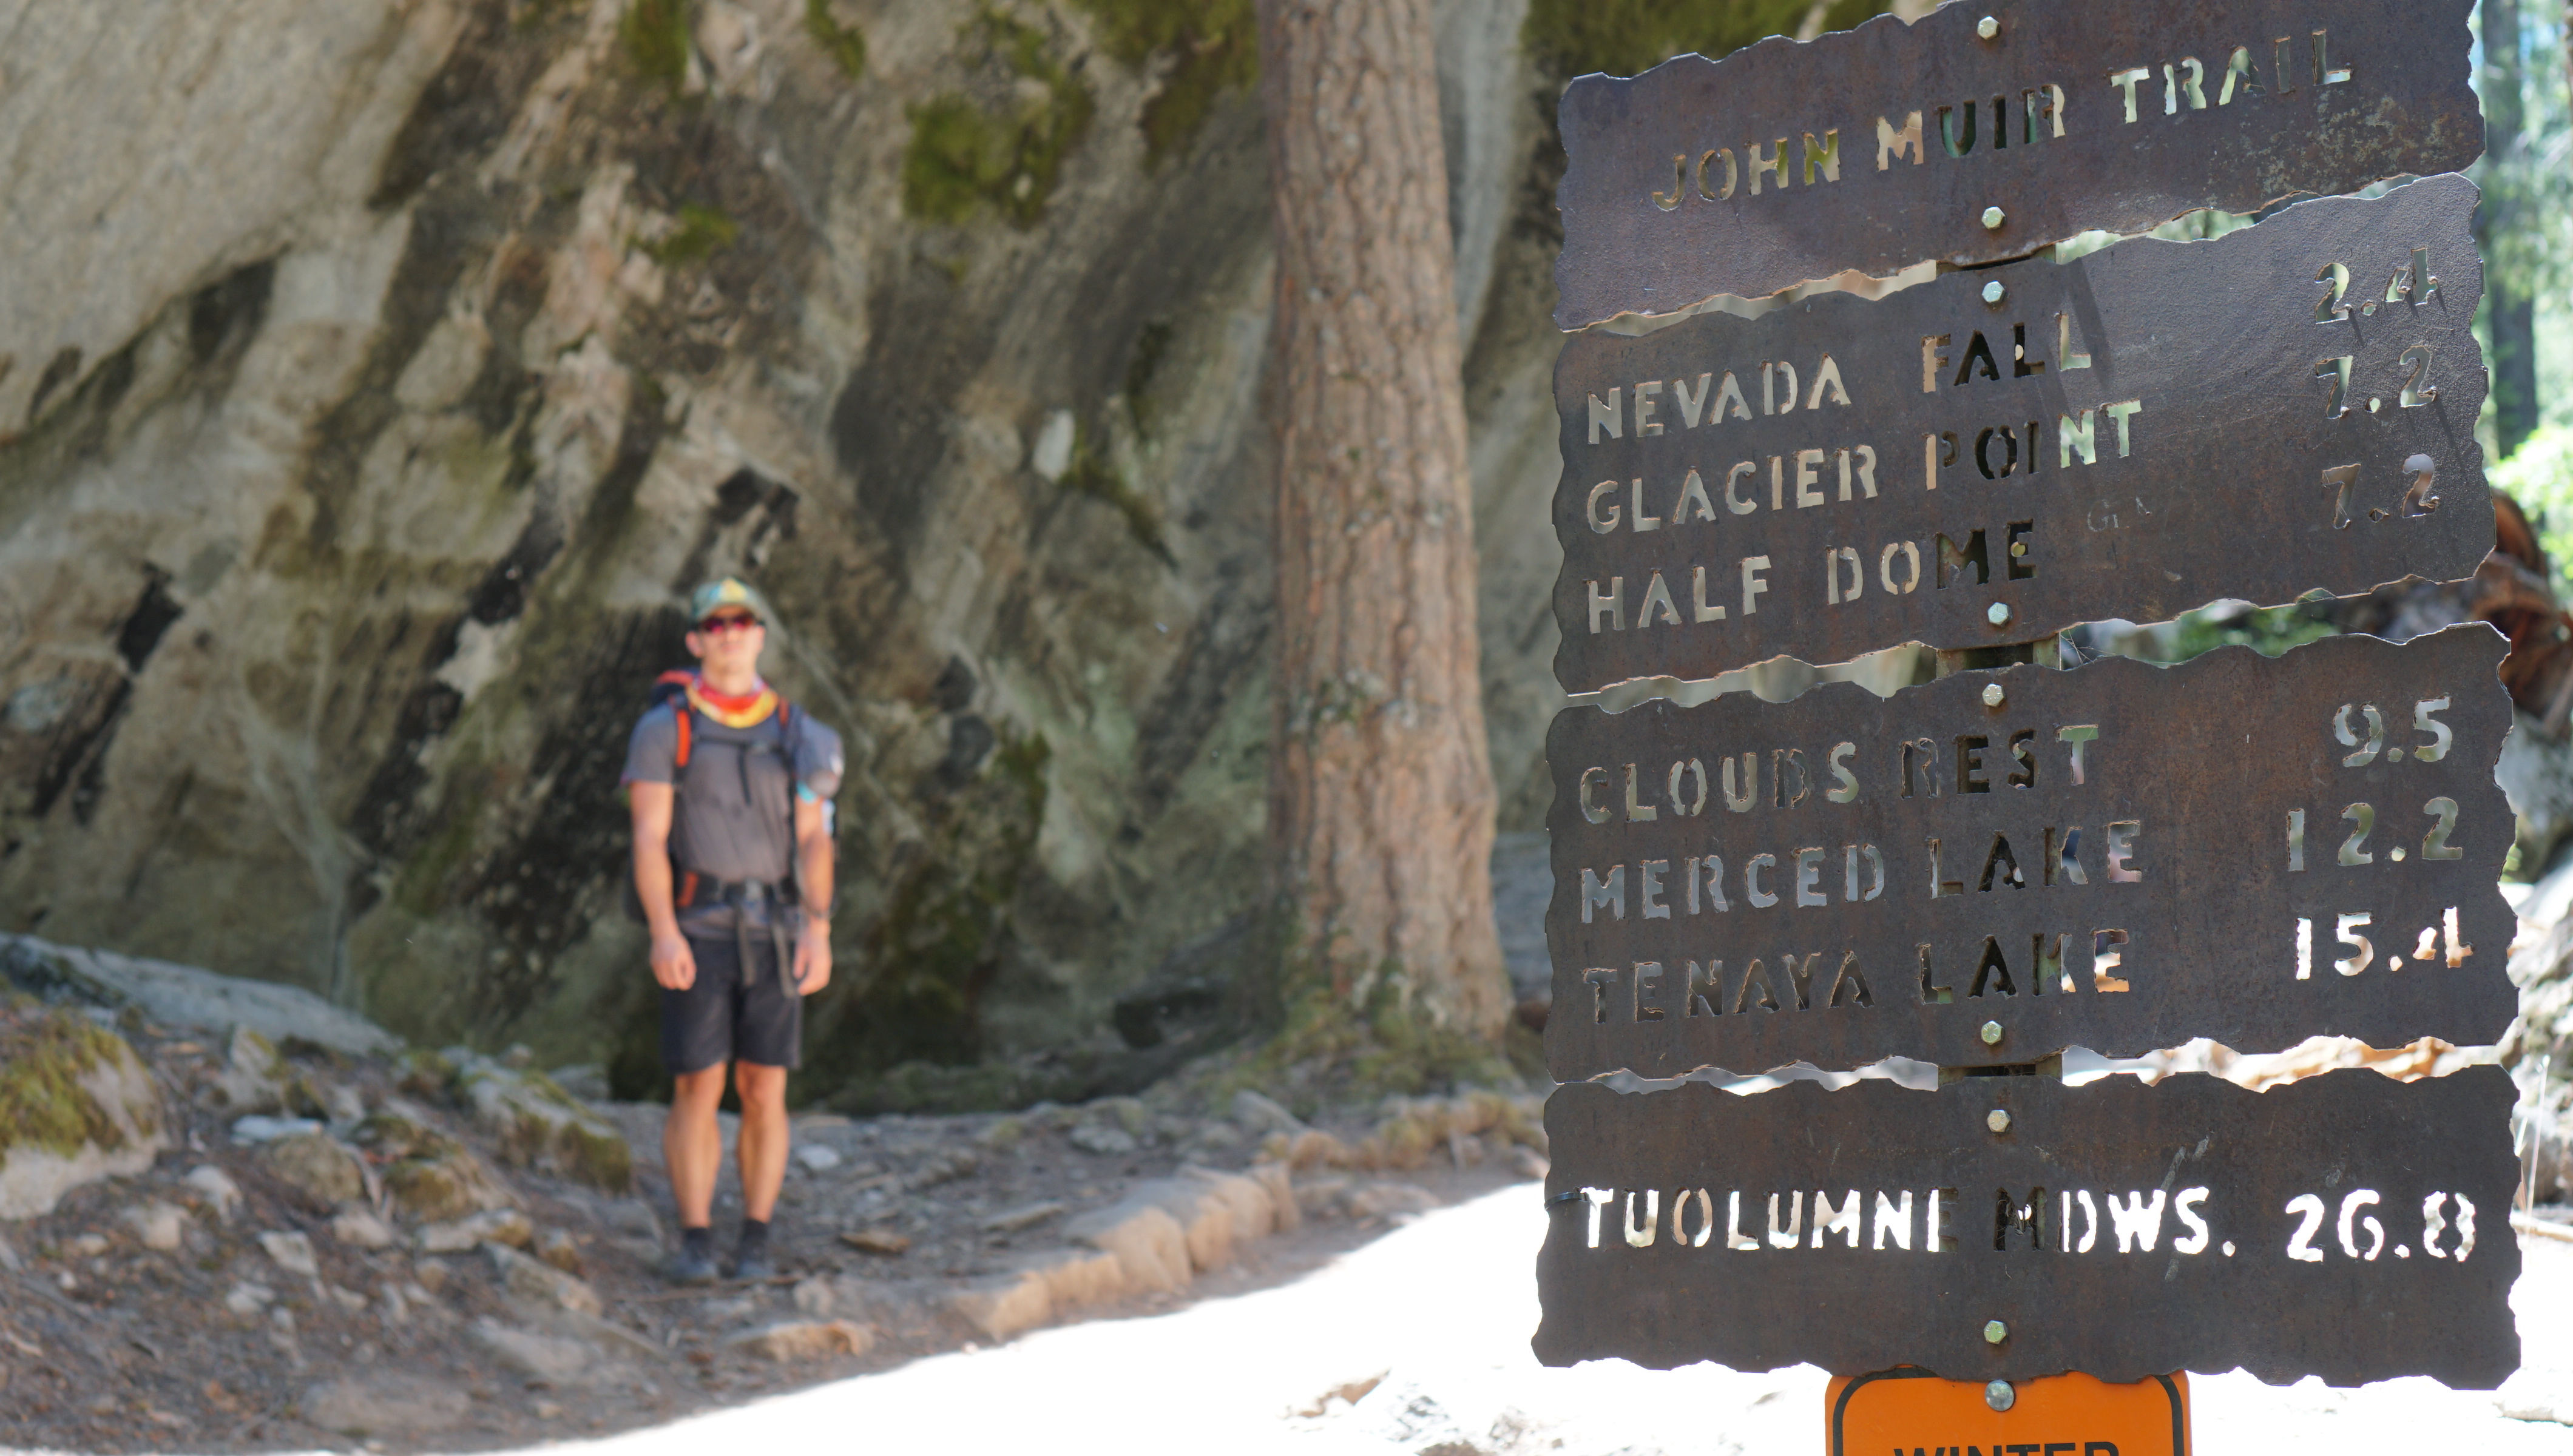 it has a decent amount of elevation gain within a short distance. We bobbed and weaved past the day hikers just so we didn’t have to do the steep portions at a slow pace. Just over the bridge at the bottom of Vernal is the fork to the Mist Trail on the left and the John Muir Trail on the right with the first trail sign for the JMT.

 wanted to. The pros and cons of hiking in a group. This is the same group that we’ll be hiking the JMT with. Here’s hoping that we start earlier than 10 during that trip.